
This chapter describes the Channel Settings and how to enable a Channel for Recording, once it has been configured.
What is a Channel?
A Channel is a virtual representation of an NDI® Source within the network. Depending on the number of inputs, you can configure one or multiple Channels.
Enable a Channel for Recording
After configuring a Channel, you have to enable it by clicking on the checkbox next to the Channel name. The Channel can now be used by the Just In Mac Lite NDI 2026 application. When quitting and relaunching Just In Mac Lite NDI 2026, previously activated Channels will still be active, so there is no need to open the Configuration panel and activate the Channels again.If you plan to run your Channels in “Auto” mode (with automatic signal format detection) you can select “Auto” from the Video Mode dropdown menu. This enables the automatic signal format detection and the Channel will automatically sense and recognize a proper broadcast signal and change the video mode accordingly.
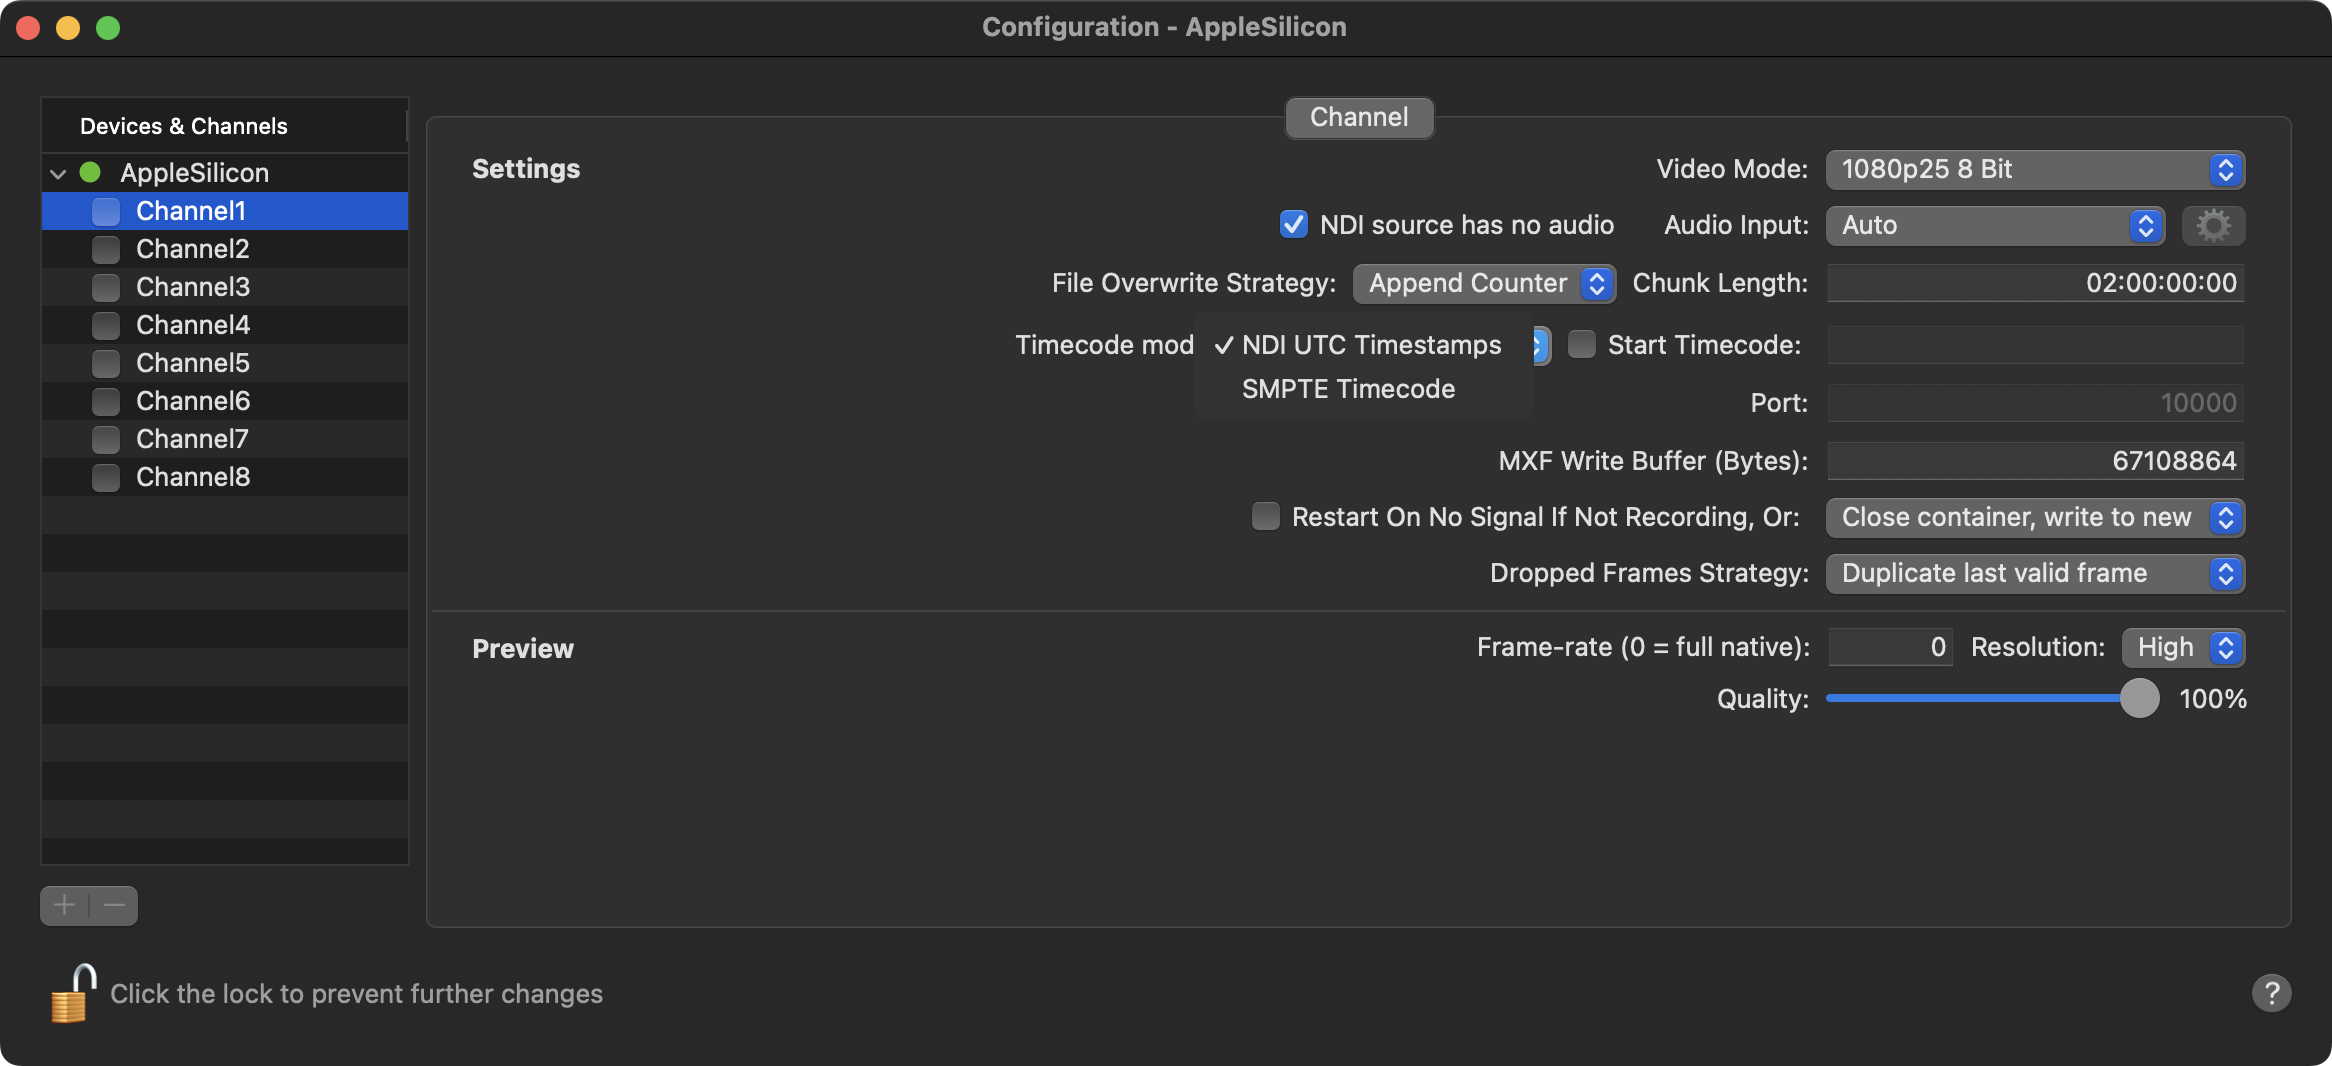
To change the Settings of a Channel, you will have to uncheck the corresponding checkbox first. Please note that the Channel will then go offline and will not be reachable by the Just In Mac Lite NDI 2026 application. Additionally, you cannot disable a Channel, if this Channel is currently in recording mode.
Once a Channel is enabled, it will be available in the “Connections” tab within the Inspector.
Change a Channel Name
The name of a Channel can only be changed when the Channel is disabled. First, make sure that the Channel is not enabled, and then click on the Channel Name (next to the Channel checkbox), adjust the name, and press the “Enter” key to confirm.
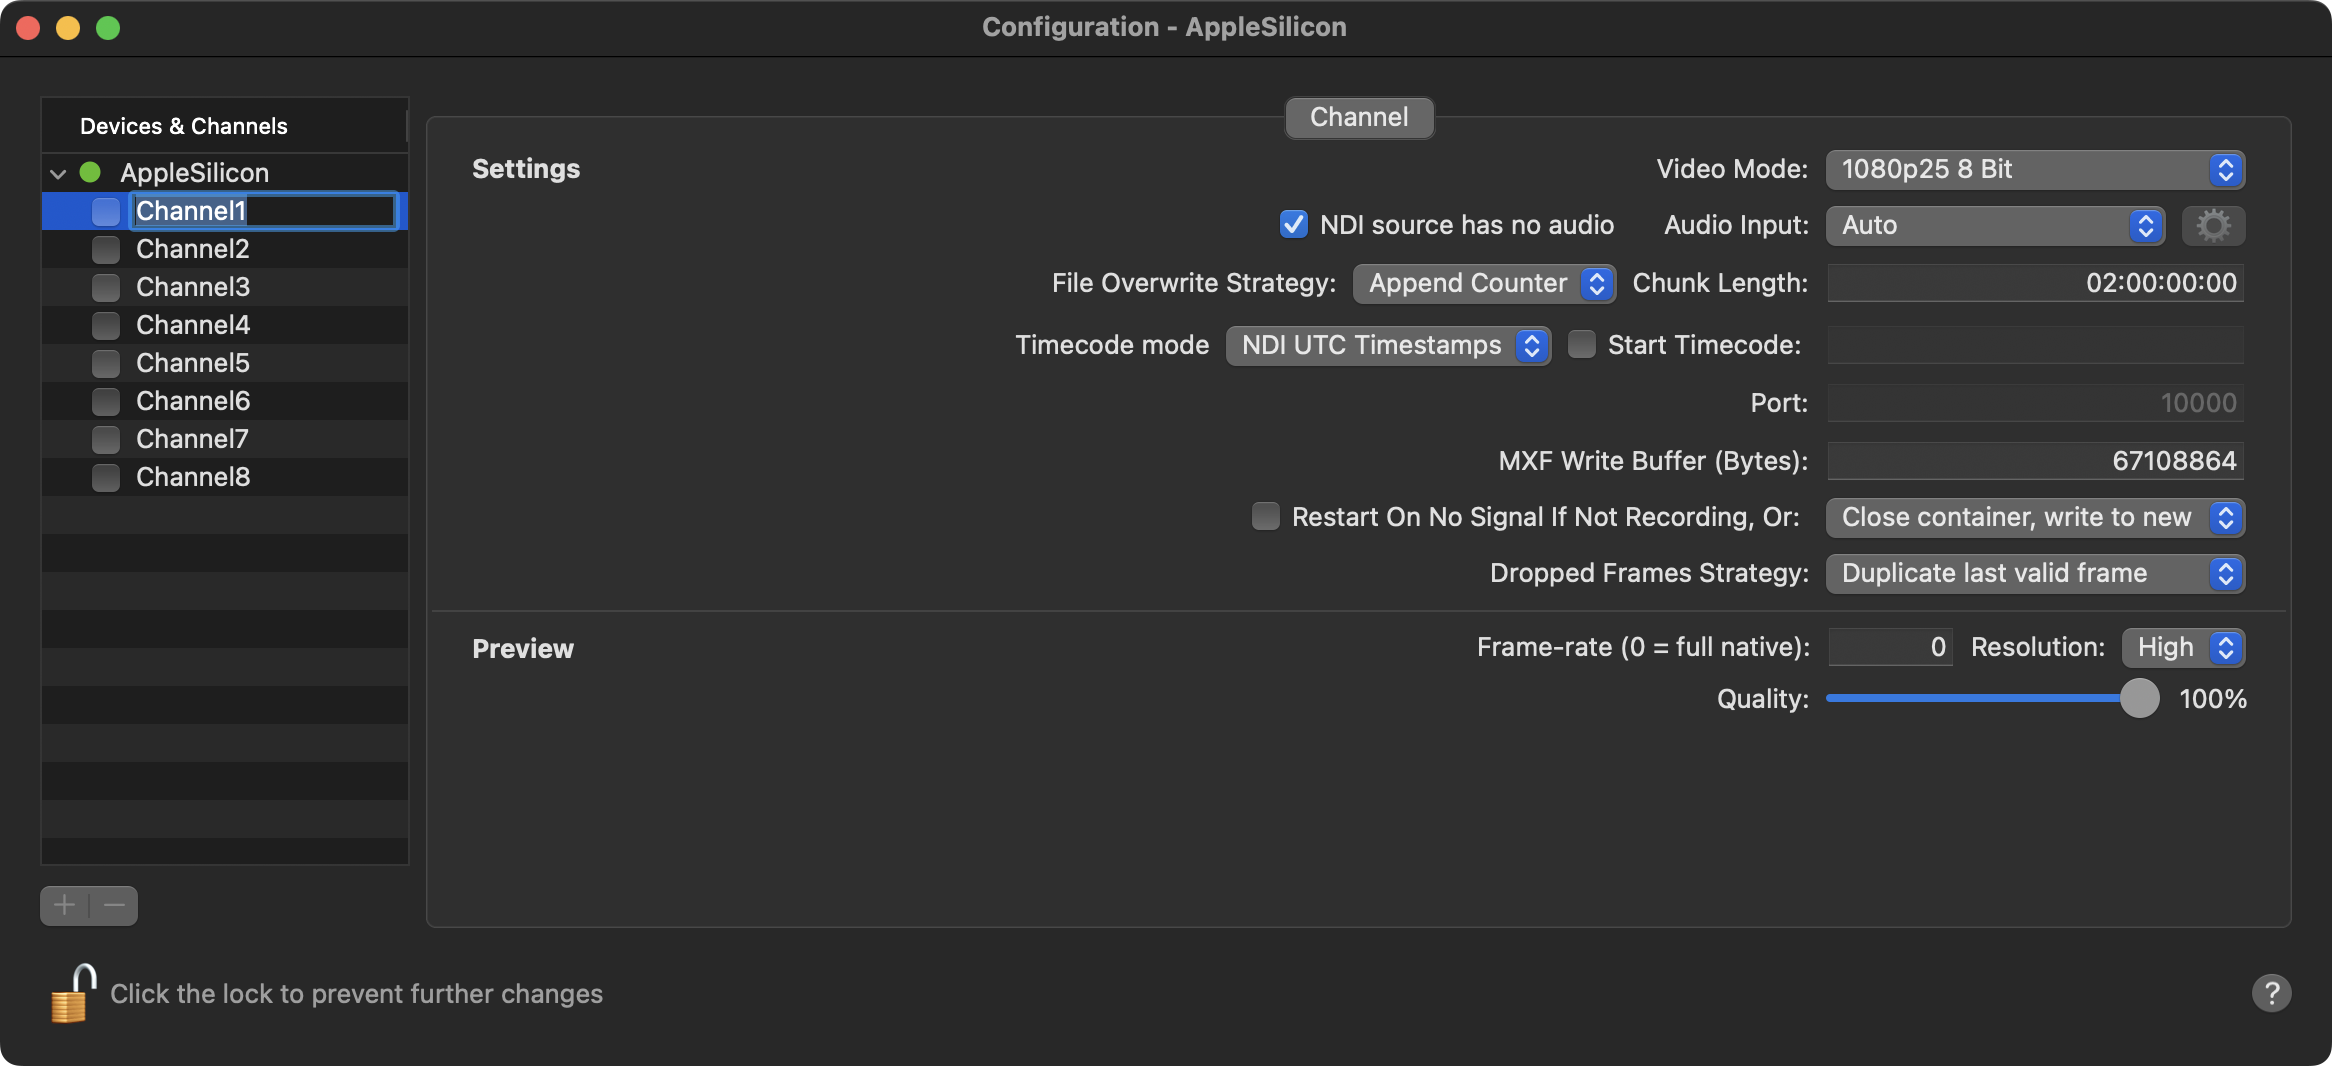
Channel Settings
The NDI® source can be selected within the Channel Inspector. Please note that the Just In Mac Lite NDI application requires access to the NDI Network.
Also, please be aware that the NDI Test Pattern application from the free NDI Tools is not supported as a source.
Video Mode: Select the Video mode and ensure that it matches the NDI® Source. If it does not match, a warning will be shown (“No Signal” or “Wrong Signal”). If you plan to run your Channels in “Auto” mode (with automatic signal format detection) you can select “Auto” from the Video Mode dropdown menu. This enables the automatic signal format detection and the Channel will automatically sense and recognize a proper NDI source and change the video mode accordingly.
NDI source has no audio: This setting disables the audio reception delay within the NDI pipeline. The pipeline's default behavior includes a delay to accommodate expected audio. In scenarios where audio input is not present, enabling this option optimizes performance by removing the unnecessary delay.
File Overwrite Strategy:
Append Counter (Default): When using this option, the Just In Mac Lite NDI application will add “_2” to the actual file name to avoid overwriting an already existing file.
Replace: By choosing this option, the Just In Mac Lite NDI application will overwrite a file with the same name at the target location.
Chunk Length: Defines the maximum length of the recorded Video. The maximum Chunk Length is 12 hours, the default option is “2” hours.
If the Recording does not reach the entered Chunk Length, the recorded clips will be automatically truncated to the expected recorded length.
Recording exceeds the entered Chunk Length: A new Recording (generating a new clip) will automatically be started.
Timecode Mode: NDI channels now have an additional “Timecode mode” setting with the options “NDI UTC Timestamps” and “SMPTE Timecode”. The former expects frames with standard NDI UTC timestamps, as provided by the majority of NDI devices. The latter expects SMPTE timecode encoded as 100ths of a nanosecond. This may be useful with some devices, such as the AJA Bridge that takes embedded SDI SMPTE timecode and converts it for use with NDI. When “SMPTE Timecode” is selected for the channel, “SDI Embedded” is additionally available as a timecode source, allowing you to see the embedded timecode sent with the stream.
Start Timecode: Enabling this option overrides the local time or incoming timecode and makes every new clip start with the defined timecode value.
MXF Write Buffer (Bytes in binary): This setting can be used to tune MXF writing for specific storage requirements, but should only be changed with care as it may lead to unexpected results including write errors. Recommended value: “Block size of storage”.
Restart On No Signal if Not Recording: If this option is enabled, the Channel will automatically restart after a signal loss (only in Idle Mode). Available options are:
Close container, write to new: Recording to the current file will be stopped and as soon as there is a valid signal again the recording will start into a new file.
Close container and stop: Recording will be stopped when the Channel detects a signal loss.
Dropped Frames Strategy:
Duplicate last valid frame: In case of a dropped frame, the channel adds a duplicate of the last valid frame available.
Add black frame: This option adds black frames for every occurring dropped frame.
Preview
You can manually override the resolution, frame rate, and quality of the Video Previews within Just Mac lite NDI 2026. This may be helpful to increase performance when displaying many Channels in Just In Mac Lite NDI 2026. Please refer to the Channel Preview Options below for more information.
Resolution: Two resolution options are available:
High: 640×360px
Low: 480×270px
Frame rate: The preview frame rate can be changed between “0” (=native frame rate) and “30” (if the channel frame rate is higher than “30”, then the preview will be limited to 30fps).
Quality: The “Preview Quality” setting can be changed between “10%” and “100%”.