
Just Live Lite User Interface Overview
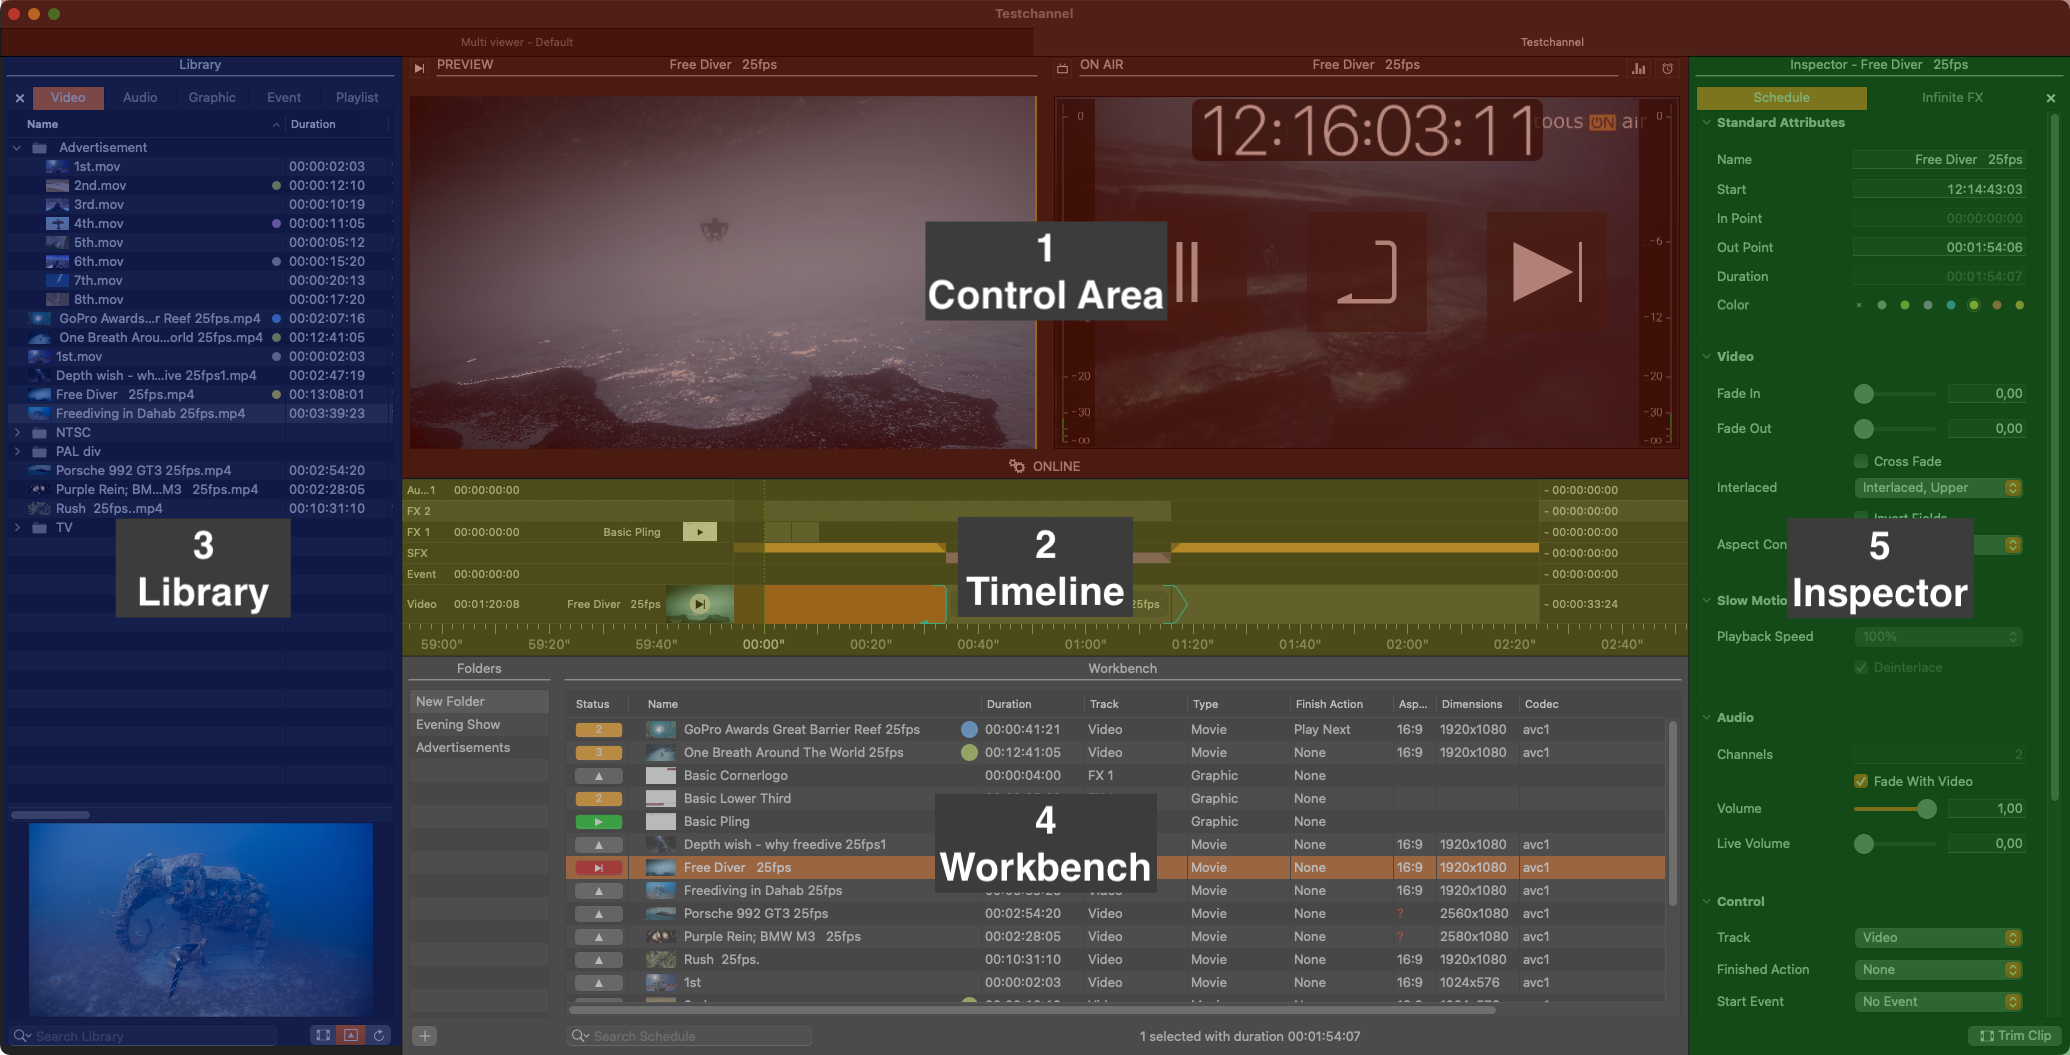
Control Area:
Preview View (left): Preview the selected Video, Audio or (optional) GFX element.
On Air View (right): Shows the current On Air output.
Status of the built-in playout engine (below): Shows the status of the built-in playout engine (ONLINE).
Timeline: Shows all Videos, audio files and (optional) Graphic elements which are loaded or already playing out (including the element names, the elapsed/remaining time info, and the Layers' Play buttons). The visibility of the final output is defined from top to bottom.
Library: Divided into four tabs, the Library shows Videos, Audio, Graphic elements and saved Playlists. Related metadata will also be shown (if available). There's also a search field and a preview at the bottom.
Workbench: This is the place where all the media is collected for the final playout. Folders can help you to organize and manage complex shows.
Inspector: You can modify attributes of one or multiple selected elements. The multiple selection of several items of the same kind is supported. In addition, you can instantly change the Channel settings without restarting of the Just Live Lite application.
The proxy Preview in the On Air window shows a compressed image with a reduced frame rate. In addition, the Preview can stop for a moment if the communication is interrupted, even when the real output is fine. This means that the Preview is not meant to replace a broadcast monitor for the final check of the live playout.
Just Live Lite Settings
The actual setup and configuration of the Settings is done by your system administrator.
To open the “Settings”, go to the menu “Just Live Lite → Settings”.
General
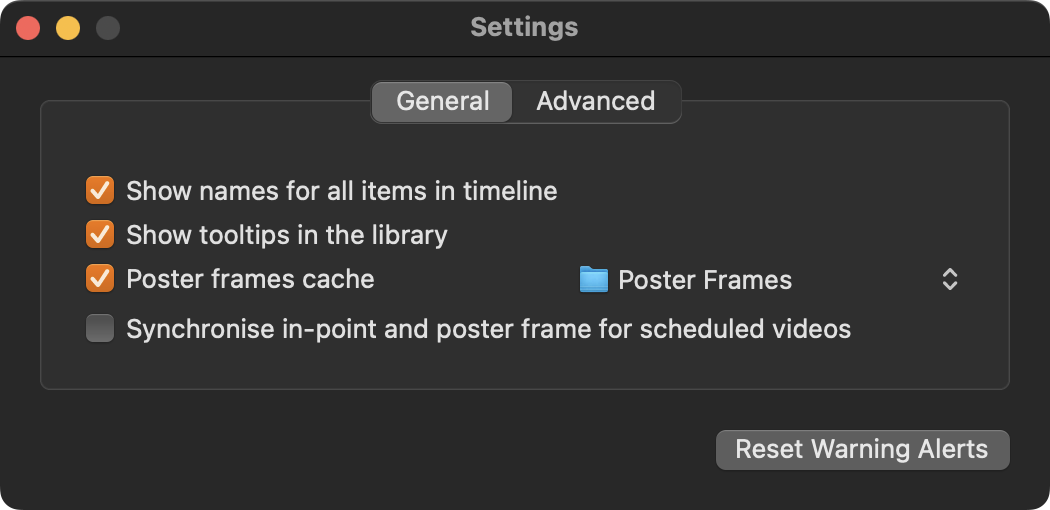
Show names for all items in the Timeline: Activating this option will show the names of all items in the Timeline as an overlay. If this option is deactivated, you can still move the mouse pointer above an item in the Timeline to see its name.
Show tooltips in the Library: Deactivate this option to disable tooltips in the Library while moving the mouse pointer over entries. This option is enabled by default.
Poster Frames Cache: This defines the folder where poster frames will be saved. By default, the poster frames are saved in the folder “Poster Frames” inside the “Documents” folder of the current User. This option is enabled by default. Disable it to suppress the creation of new poster frames in the Workbench of the Just Live Lite application.
Synchronise in-point and poster frame for scheduled Video clips: Activate this option to take over the newly set in point as the poster frame for the selected Video clip.
Advanced
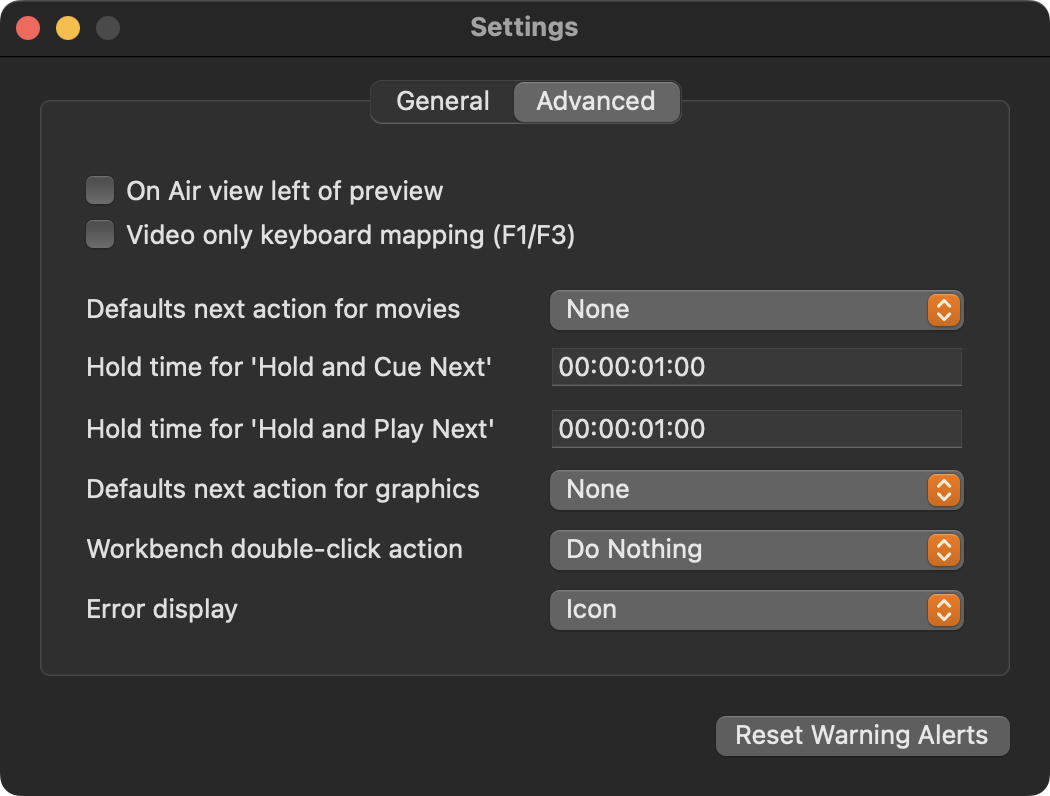
On Air view left of preview: When enabled, the On Air View is located to the left of the Preview.
Video only keyboard mapping (F1/F3): Activate this checkbox to change the way the “F1/F3” keys are working. By default, “F1 starts/stops” the playout of the first Layer, “F2 starts/stops” the playout of the second Layer, and so on. With this checkbox activated, “F1 starts” the playout of the first Layer and “F3 stops” the playout. Pressing the “F1” key while an item is playing has no function in this case.
Defaults next action for movies: This option allows you to predefine the default end action for every Video that is dropped into the Workbench. This preset can be overruled later for each Video element using the Inspector.
Hold time for “Hold and Cue Next”: This setting allows you to define how long the last frame of a Video will be “held” before the next clip will be cued.
Hold time for “Hold and Play Next”: This setting allows you to define how long the last frame of a Video will be “held” before the next clip will be played.
Defaults next action for graphics: This option allows you to predefine the default end action for Graphic elements that are dropped into the Workbench. This preset can be overruled later for each Graphic element using the Inspector.
Workbench double-click action: This defines the action which is executed when double-clicking an item in the Workbench.
Error Display: This option allows you to choose whether error messages are displayed as small icons or as overlays within the On Air Window of the user interface.
Reset all dialog warnings: Pressing the “Reset Warning Alerts” button enables dialog warnings again.