
Important: Before you Install
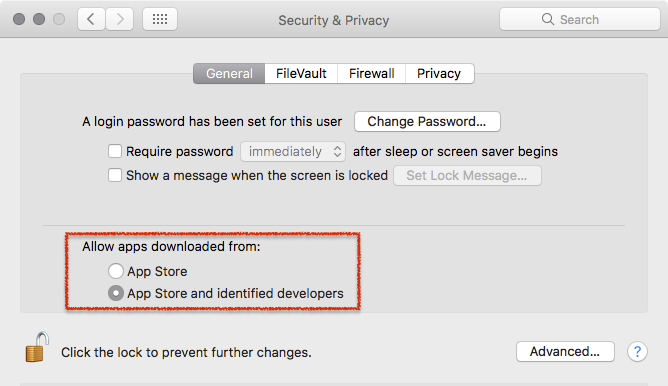
Just In comes as a disk image (DMG). To open the disk image the Security settings of the system must be changed.
- Open the System Preferences.
- Go to Security & Privacy.
- Click on the General tab.

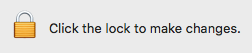
- Unlock the Preference Pane.
- Change the setting to Allow apps downloaded from App Store and identified developers.
- You can now head to the point Download & Installation below.
Further reading (external link): → macOS Sierra: Open an app from an unidentified developer
1. Video Device Driver Installation
- Skip this step if you have no Video device.
- AJA version 14.3 and higher is currently not compatible with our Playout Engine and therefore we recommend to use AJA Driver version 14.2.1 until this issue is solved.
- BMD version 10.12 and higher is currently not compatible with our Playout Engine and therefore we recommend to use BMD Desktop Video driver version 10.11.4 until this issue is solved.
2. Prepare your System
- Download Just Live from our Online Helpdesk (free account required).
- Open the download and run the TOA System Checker.
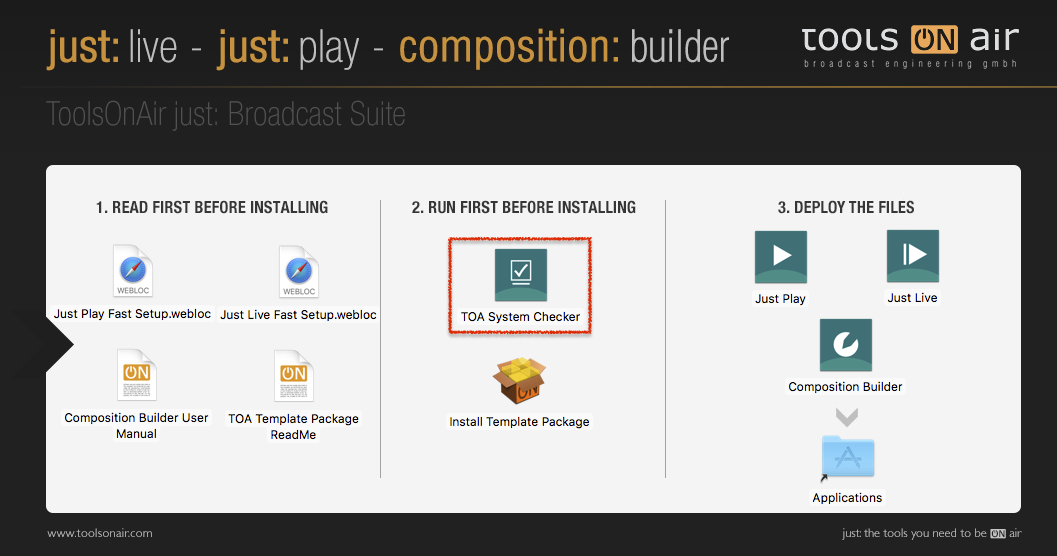
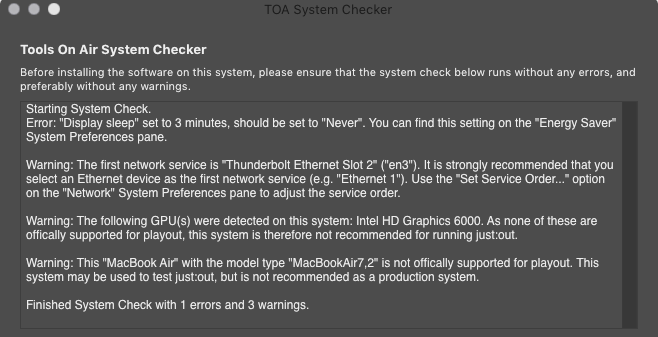
- Follow the displayed instructions in the TOA System Checker and solve all errors and warnings.
- Turn off any screen saver which might be activated in the Desktop & Screen Saver System Preferences pane.
- If you are upgrading from an older version of Just Live, you might want to make sure that you have a valid v2.5 activation code for this machine before installing the new version.
3. Installation
- To install a full copy of Just Live onto your machine (with all required files), drag and drop the Just Live folder from the disk image onto the Applications folder.
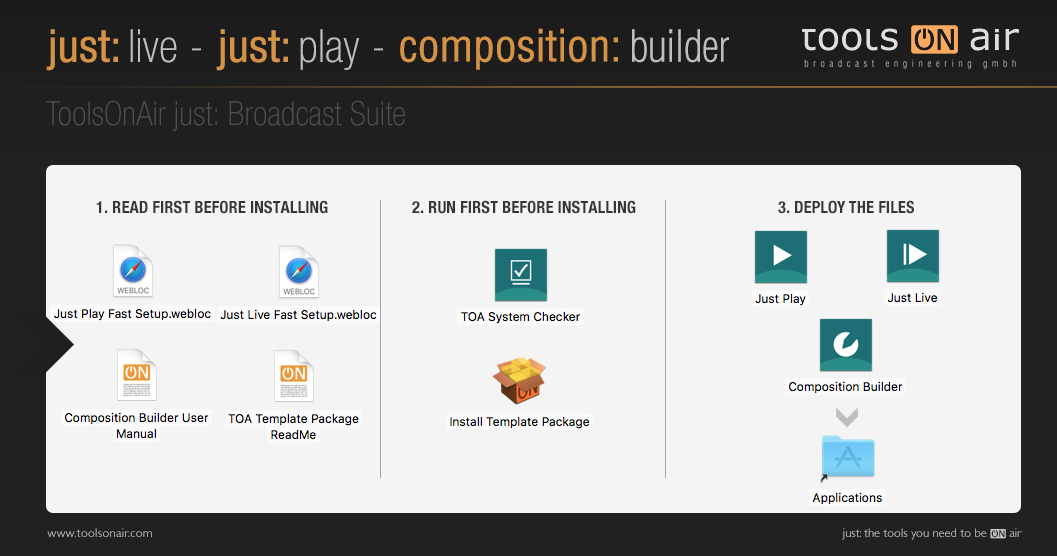
- After copying, eject the disk image.
- Navigate to the Just Live folder inside of your Applications folder.
- Add the applications Just Out, Just Connect and Just Live to your Dock.
4. Configuration
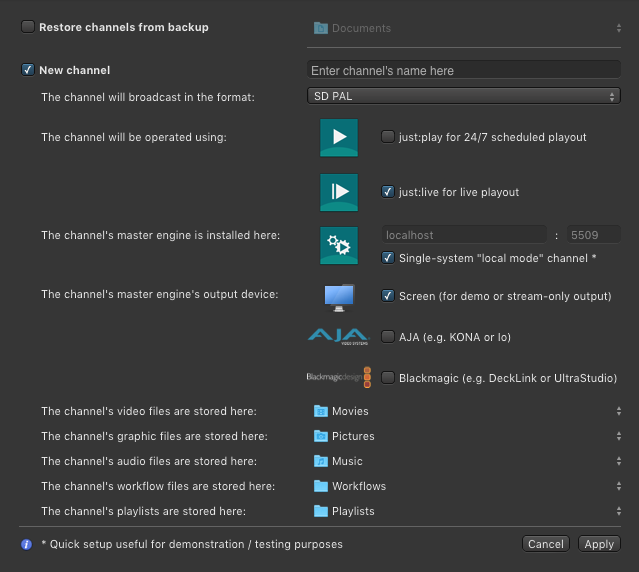
- Start the Just Connect application. It will automatically display the Setup Wizard.
- Make sure the option New Channel is selected and enter the name of your Channel into the Channel's name field.
- Select the Format you would like to use for broadcast.
- Activate the option Just Live for live Playout.
- Make sure that the checkbox Single-system "local mode" Channel is activated.
- If there is a dedicated Video device, select AJA or Blackmagic, otherwise keep the Screen option selected.
- Change the Repository Folders if desired. The default Repositories are:
Video files:
/Users/yourUserName/Videos- Graphic files:
/Users/yourUserName/Pictures - Audio files:
/Users/yourUserName/Music - Workflow files:
/Users/yourUserName/Documents/Workflows - Playlist files:
/Users/yourUserName/Documents/Playlists
5. Start the Playout System
Click the Apply button to apply the settings and options chosen in the Wizard. This will automatically start the following applications:
- just:out: this is the Playout Engine which does the final output and therefore should never be quitted.
- just:connect: this is the software which receives and sends information from and to the Just Live user interfaces which are connected to the Channel. just:connect is also responsible for intercommunication between interface(s) and just:out Playout Engine(s).
- Just Live: this is the graphical user interface which allows you to prepare live rundowns which will then be played out manually using the same user interface.
When quitting the Playout components you must start just:out, just:connect and Just Live individually. just:out and Just Live will not be started automatically!
6. Verify if your Channel is working properly
It can take a couple of seconds before the Channel is running.
- In just:connect: the Status column in the Channel list is displaying a green light next to the running master time.
- In Just Live: the Status reads "ONLINE" and the Buffer is higher than 50%. If the status reads "OFFLINE" or the Buffer is lower than 50%, delete the Channel in just:connect and go back to point four.


7. Read the User Manual
You can find the → Just Live User Manual in the Help menu of Just Live.
ToolsOnAir Online Helpdesk
If there are questions which aren't answered in the User Manual, please visit the → ToolsOnAir Helpdesk.