
Important: Before you Install
Just In comes as a disk image (DMG). To open the disk image the Security settings of the system must be changed.
- Open the System Preferences.
- Go to Security & Privacy.
- Click on the General tab.

- Unlock the Preference Pane.

- Change the setting to Allow apps downloaded from App Store and identified developers.
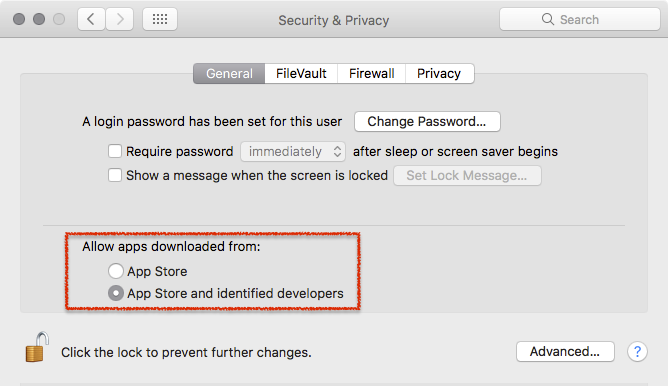
- You can now head to the point Download & Installation below.
Further reading (external link): → macOS Sierra: Open an app from an unidentified developer
1. Download & Installation
- → Download Just In from our Online Helpdesk (free account required).
- Extract the downloaded ZIP archive.
- If this dialog appears refer to the very top of this Getting Started.
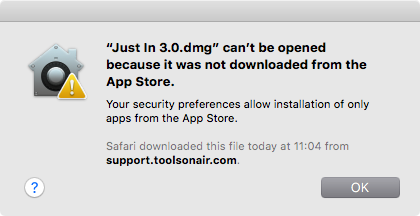
- The Just In disk image will show up.
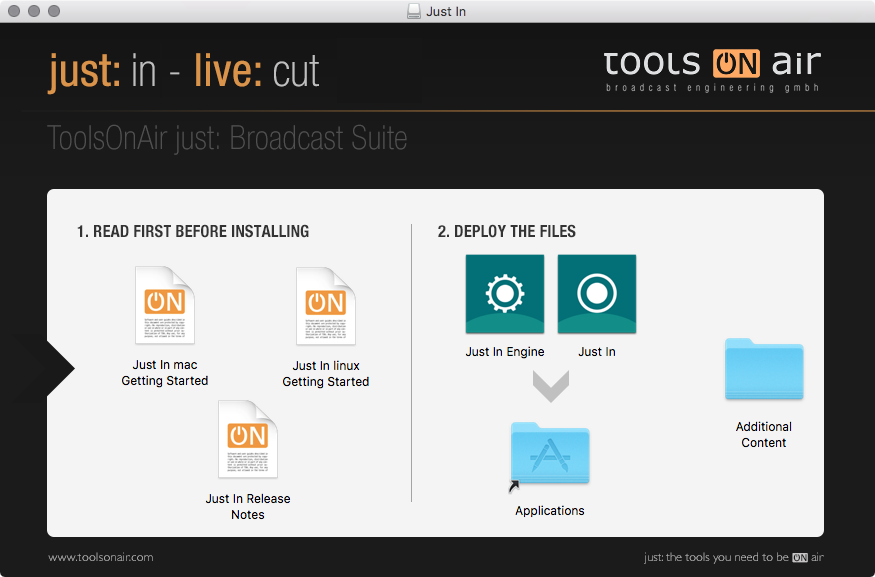
Copy Just In to the Applications folder.
Do not copy Just In Engine, as this is the Mac version of the Engine, which is not required when using the Just In Linux Engine.
- If desired, add the Just In Application to your Dock.
2. Start the Just In User Interface
- Go to the Applications folder and open the Just In Application.
- The Just In main window appears.
3. Configure a Just In Linux Engine
- Go to the menu Just In → Manage Just In Linux Channels (shortcut: command + option + comma).
The Just In Configuration window appears and the Channel Wizard shows up.
If the Channel Wizard should not show up, please contact us.
- Enter the Channel Name (1), select the Input (2) and the SDI Format (3). Configure the remaining settings accordingly to your needs. When you are done press the Configure button in the lower right to continue.
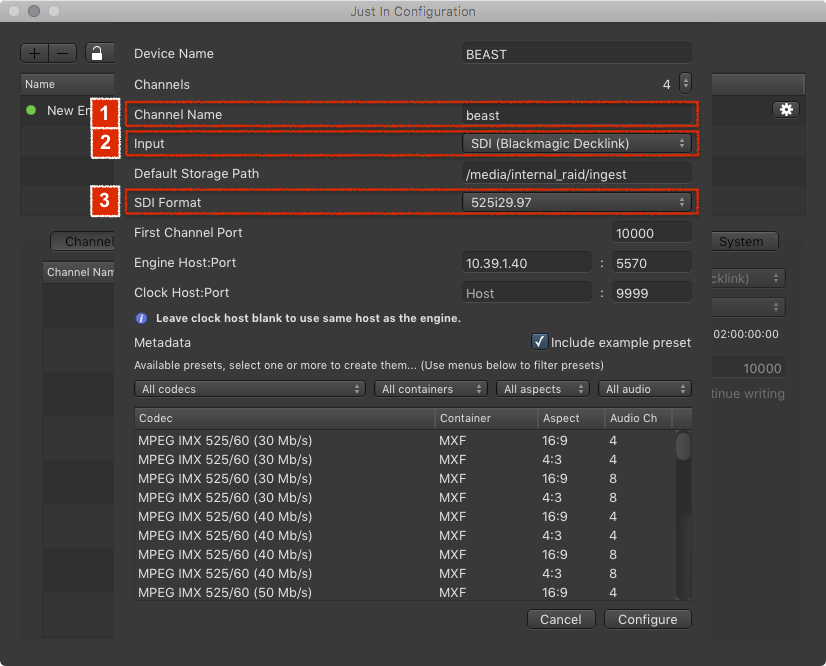
- The Engine has been added to the Engine List.

- Close the Just In Linux Engine configuration window.
5. Connect to a Just In Linux Engine
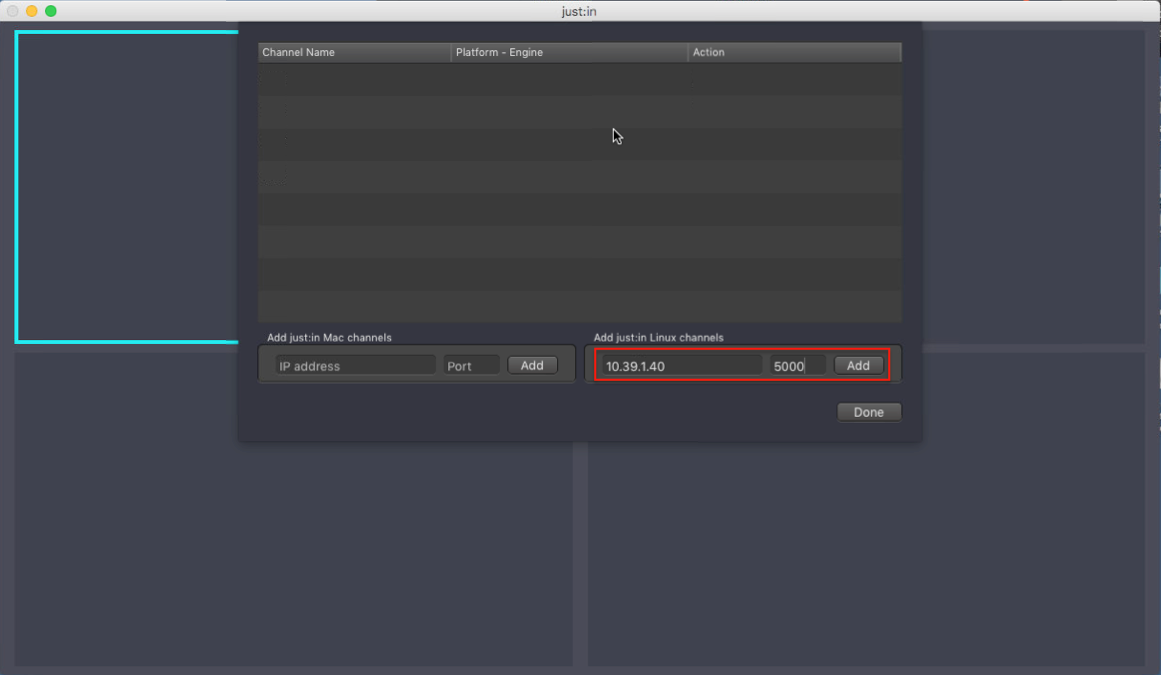
- Click the icon in the center of the main window to show the Connections Window which allows you to connect to a Channel.

- Enter the IP-Address and the Port of a Linux Channel and press the Add button. Repeat this for every Channel you would like to connect to from this user interface.
- Press the Connect button to connect to the Channel.

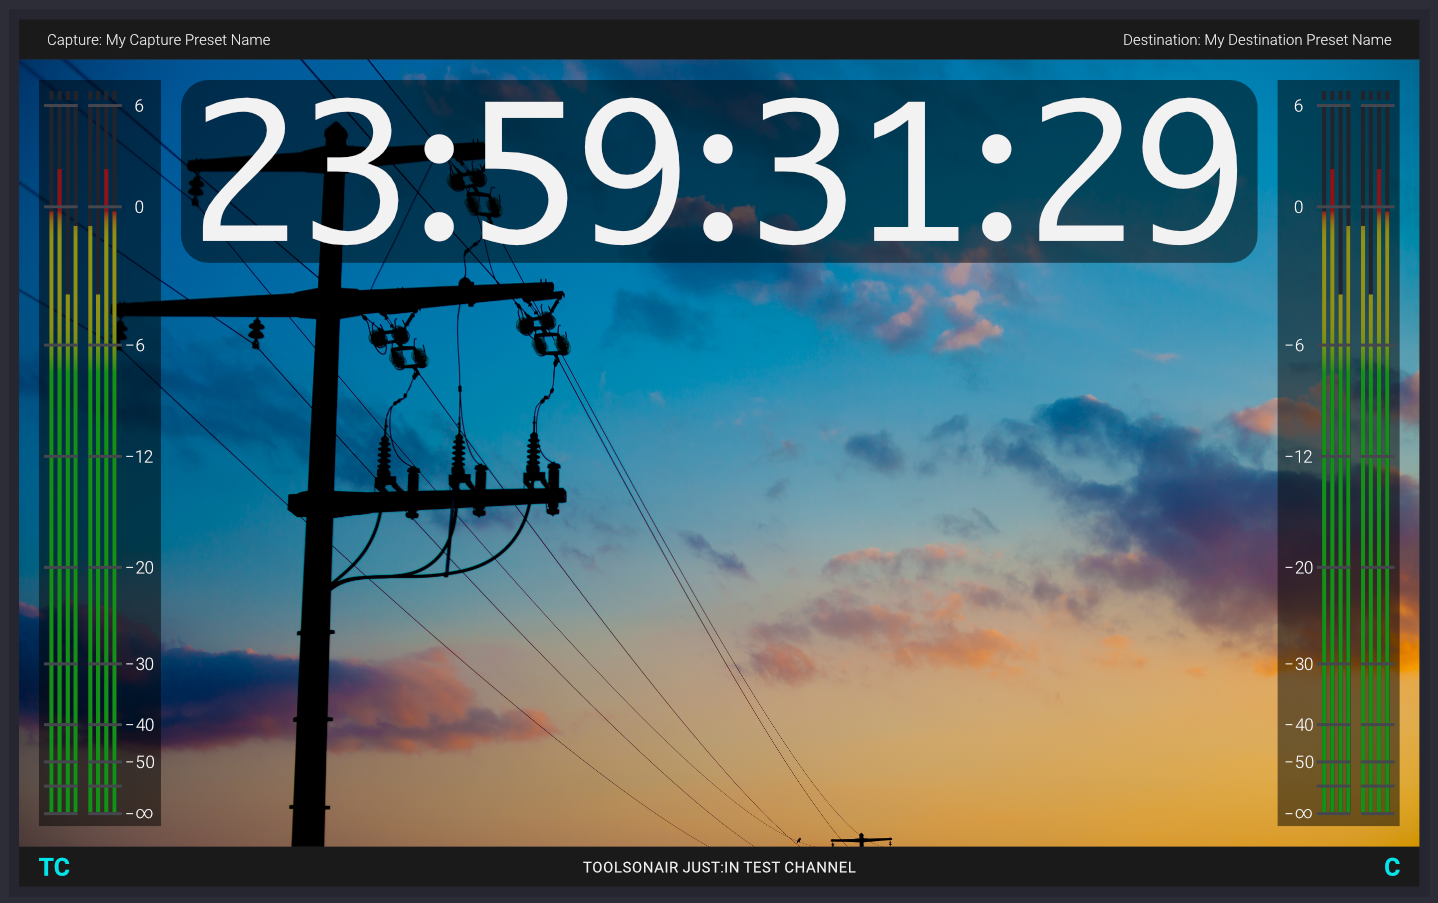
- Upon successful connection Just In displays the Channel Preview.
- The Getting Started ends here. For further information please refer to the Just In v3.0 Administrator Manual and the Just In v3.0 User Manual.
Starting a Recording
Before starting any Recordings you need to add at least one Capture and one Destination Preset. Refer to the Just In v3.0 Administrator Manual for further information.