
Table of Contents
Bandwidth Limitation
RAID controllers and SAS drives have a maximum speed, so it can help to limit data throughput to clients. Just Store’s Bandwidth Limitation feature allows you to manage this for each workstation or a complete subnet.
While Performance Profiles (Just Store v4.0) handle the overall priority of I/O operations, bandwidth limitation does only affect the maximum available bandwidth for each workstation or subnet.
Bandwidth Limitation Example: Connection over Switch/Router
For further reference on connection types please read the article Network Topologies (Just Store v4.0).
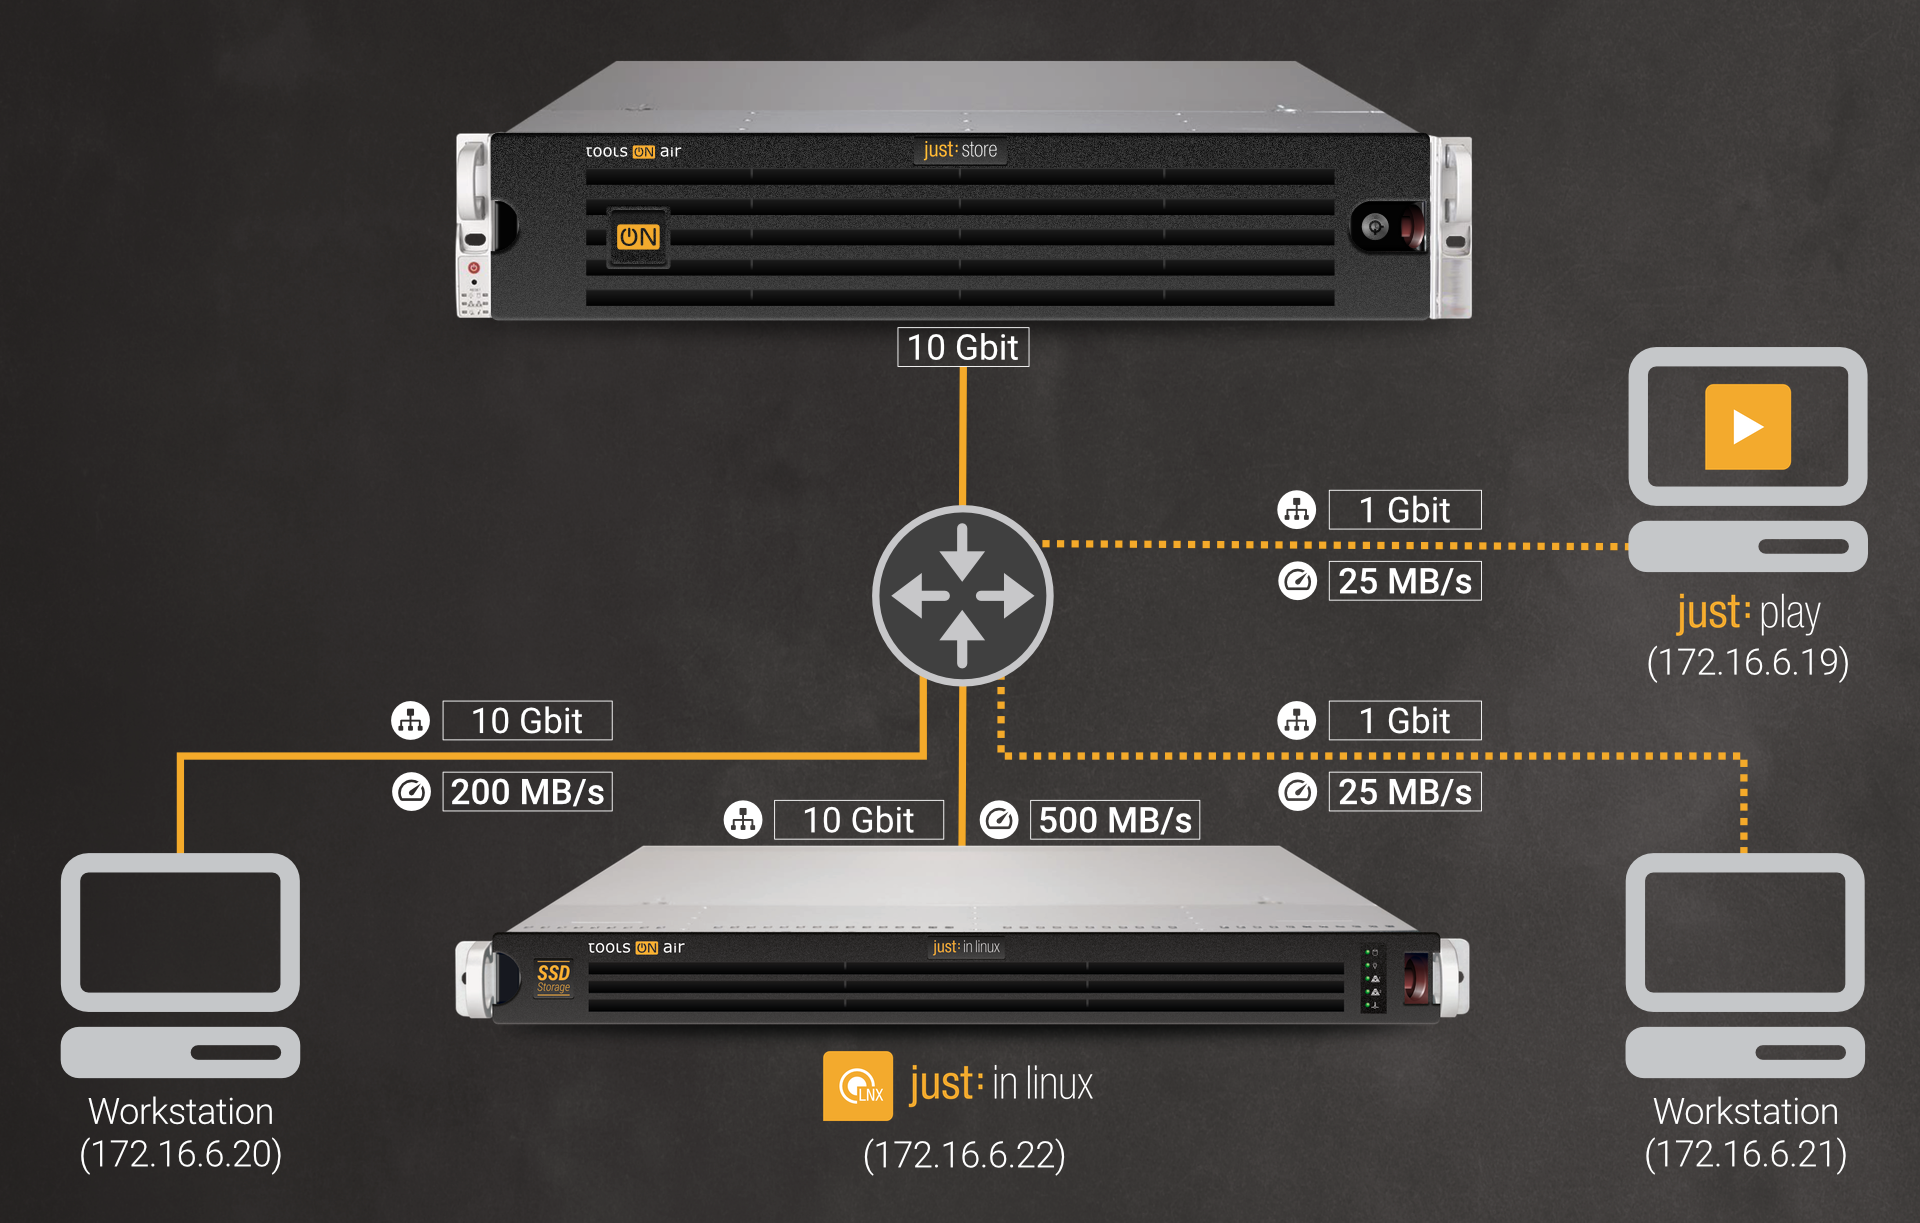
In this example all clients are connected through a 10 Gbit-capable switch which is connected via a 10 Gbit connection to Just Store. There is a total bandwidth of 10 Gbit, which has to be shared by the clients. You can set bandwidth limitation rules optimised for your scenario.
This illustration shows an exemplary bandwidth limitation scenario.
Bandwidth Limitation Example: Direct Connection
For further reference on connection types please read the article Network Topologies (Just Store v4.0).
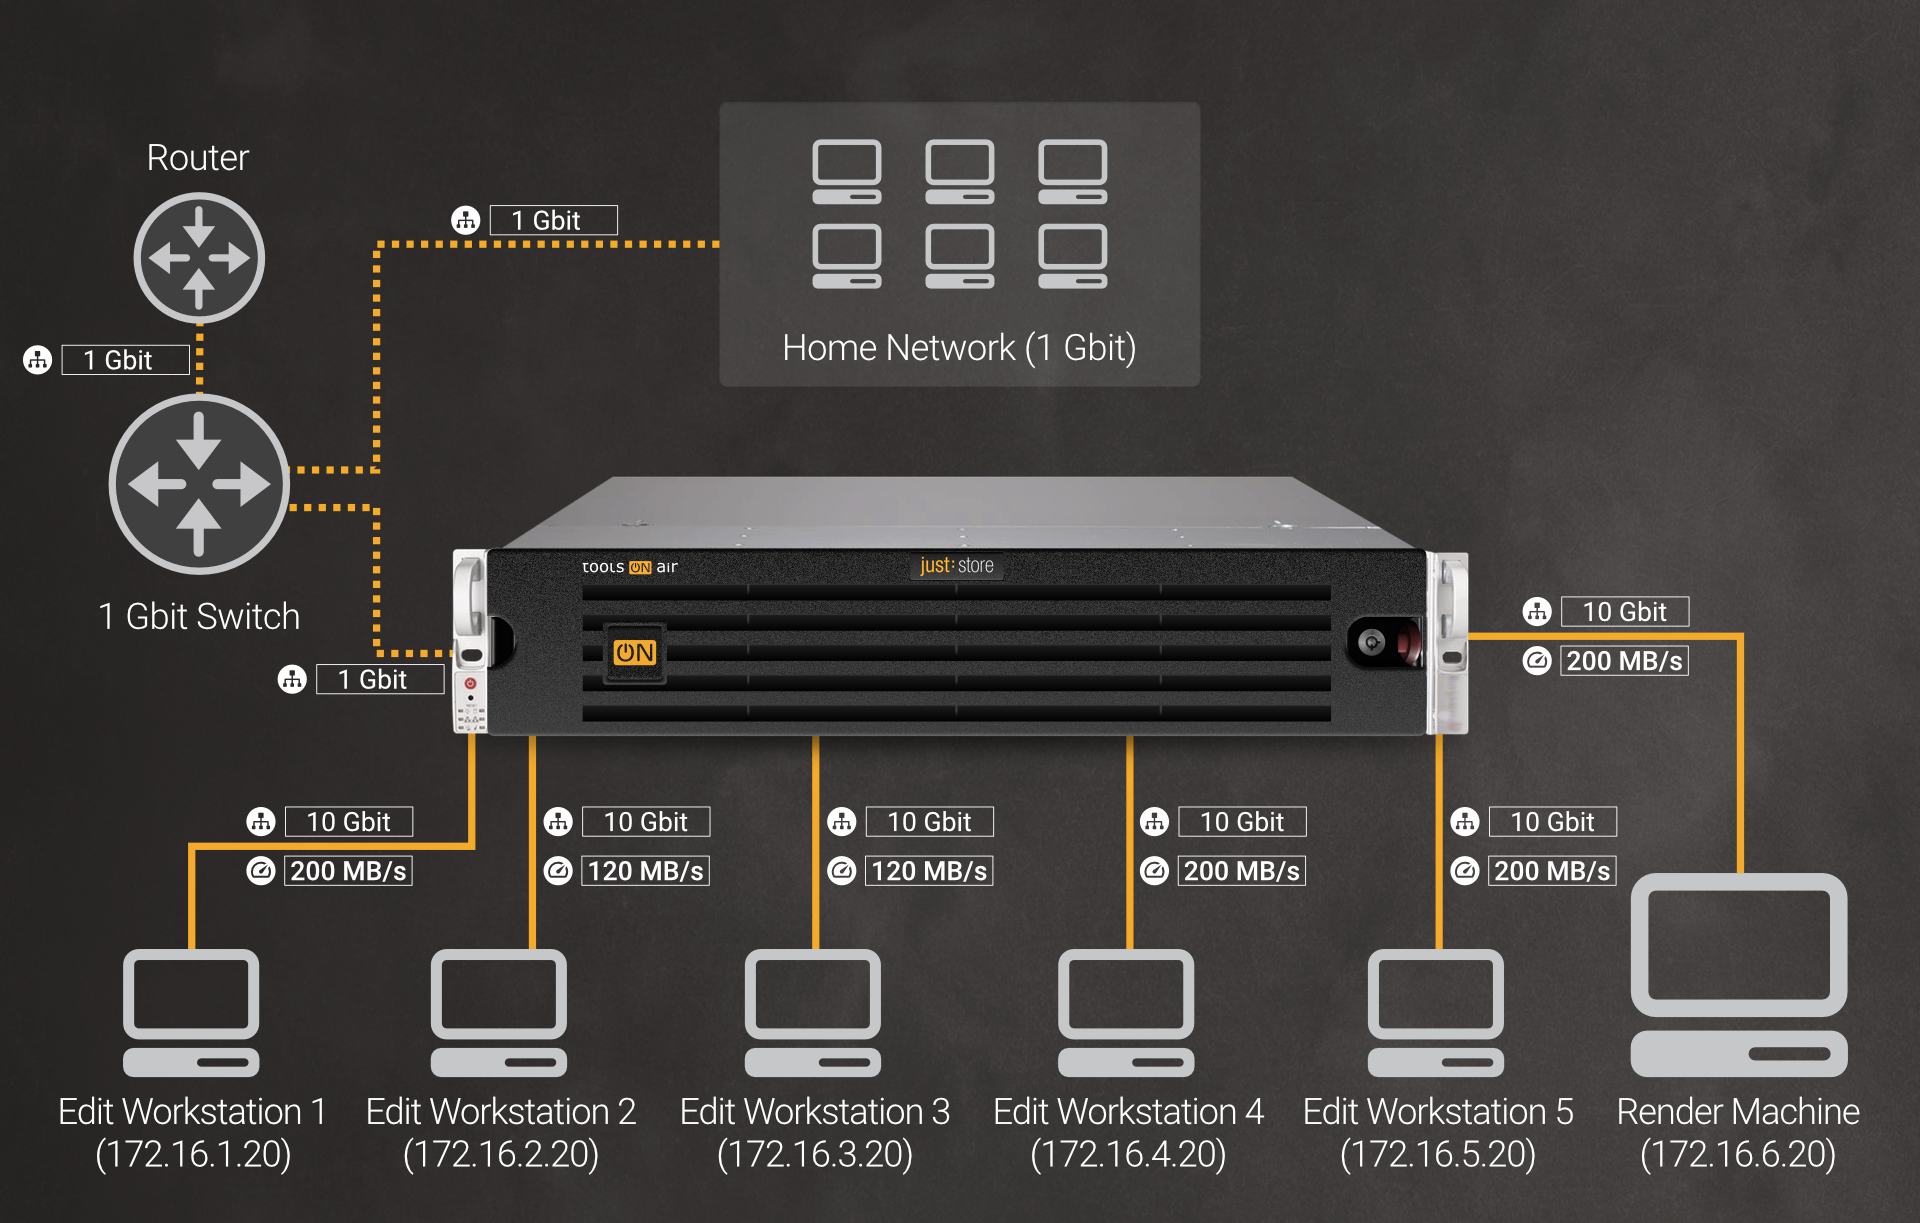
In this example we have multiple directly connected NLE workstations (like AVID Media Composer, Adobe Premiere Pro, Final Cut Pro or DaVinci Resolve Studio). Each of them is connected to Just Store via a 10 Gbit connection.
As not every workstation needs to take advantage of a 10 Gbit connection, we can set bandwidth limitations accordingly, as shown in the example scenario below.
Accessing the Bandwidth Limitation
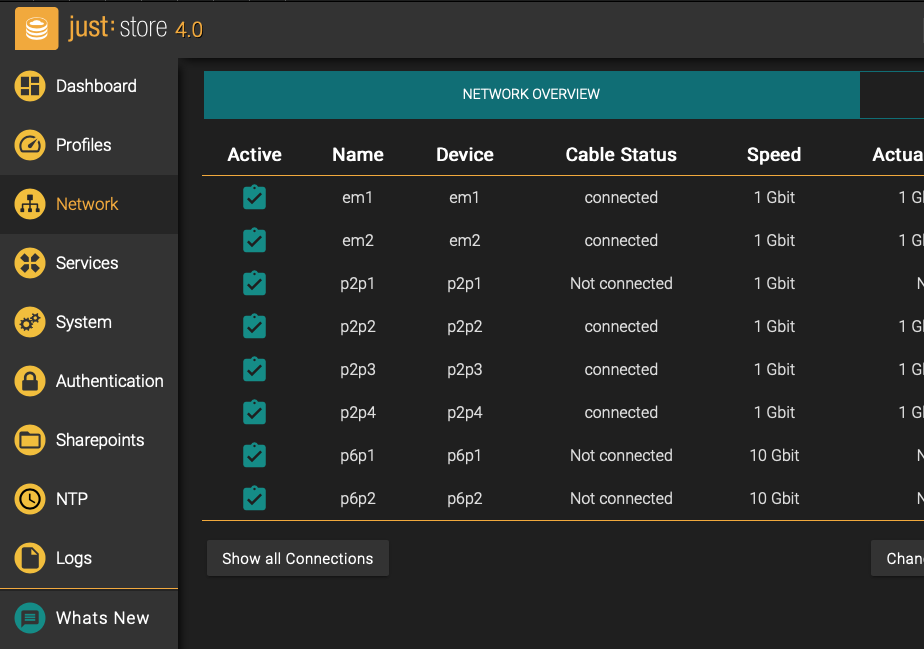
Click on Network in the sidebar.
Click on the Bandwidth Limitation tab at the top.
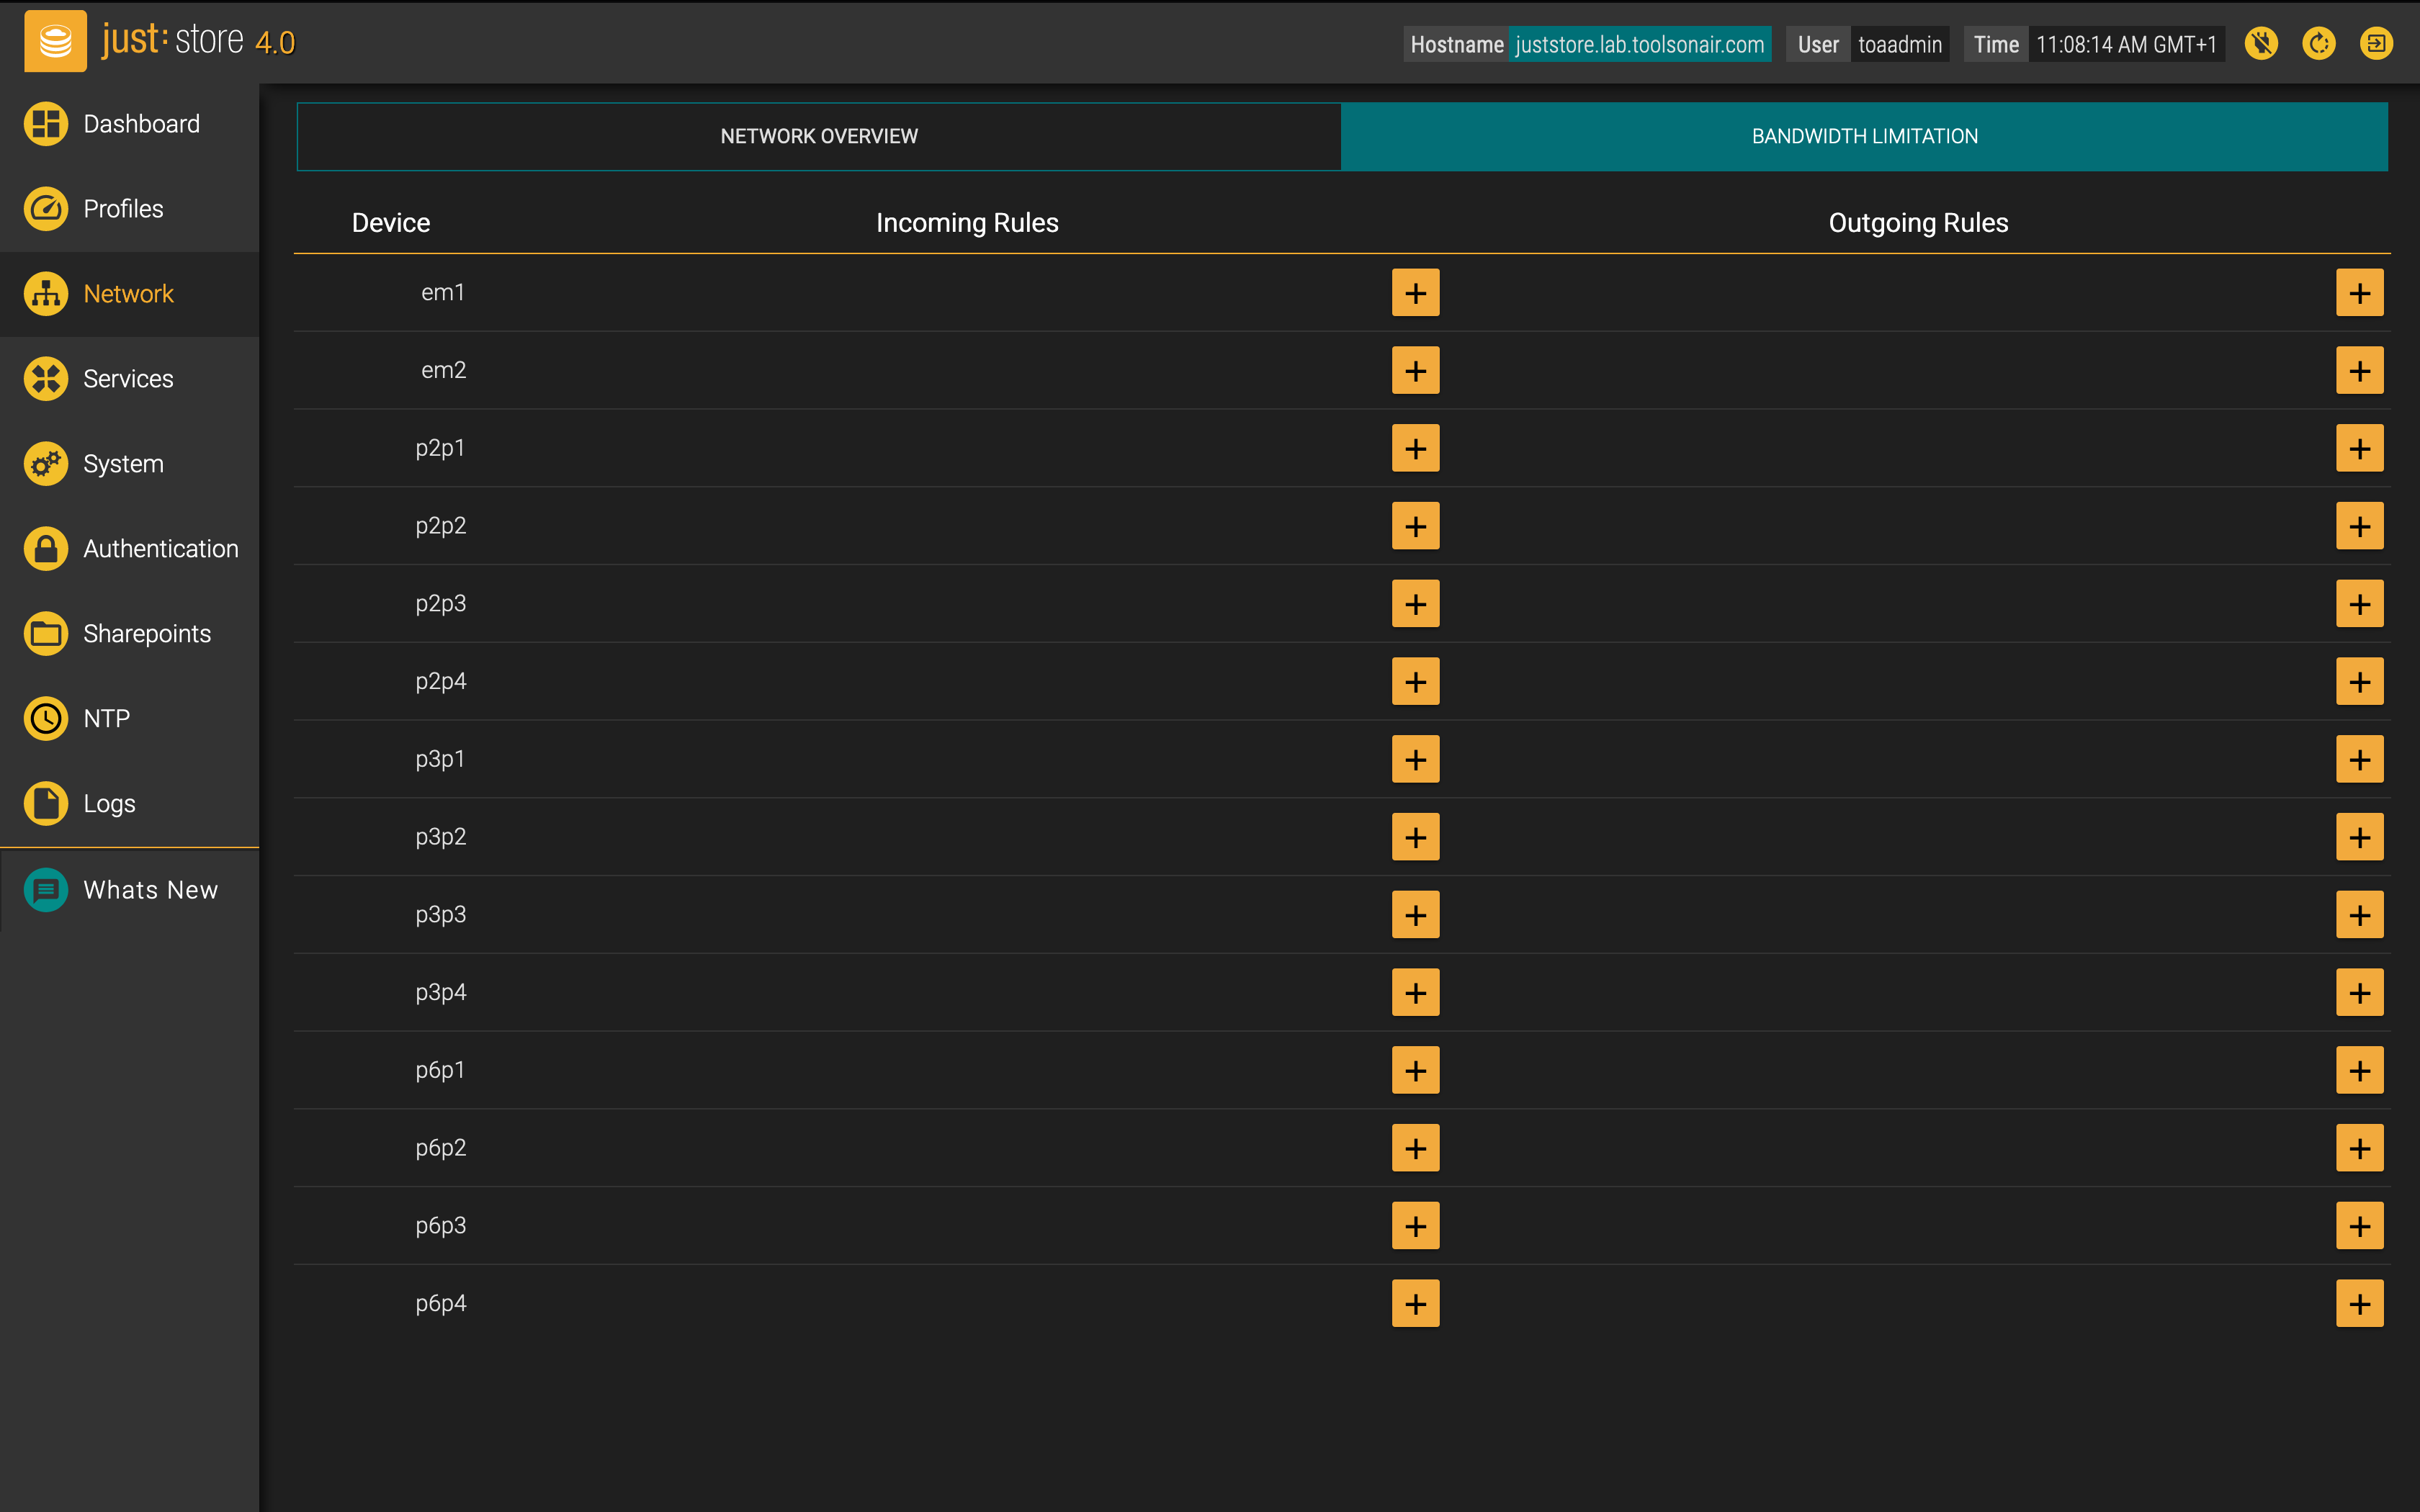
Device: shows the device for the limitation rule.
Incoming/Outgoing Rules: displays the destination and rate of the limitation rule.
Adding a Limitation Rule
In the Incoming Rules column, press the plus button on the device you want to add a limitation to.
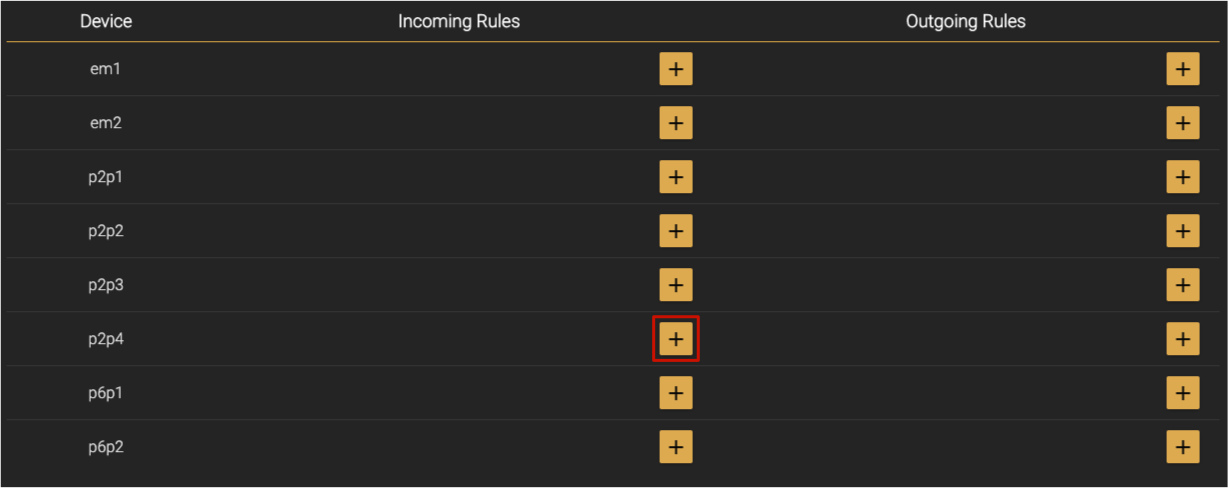
Choose whether this is an incoming, outgoing or both-directions rule. The Bandwidth Limitation Rule Options are explained below.
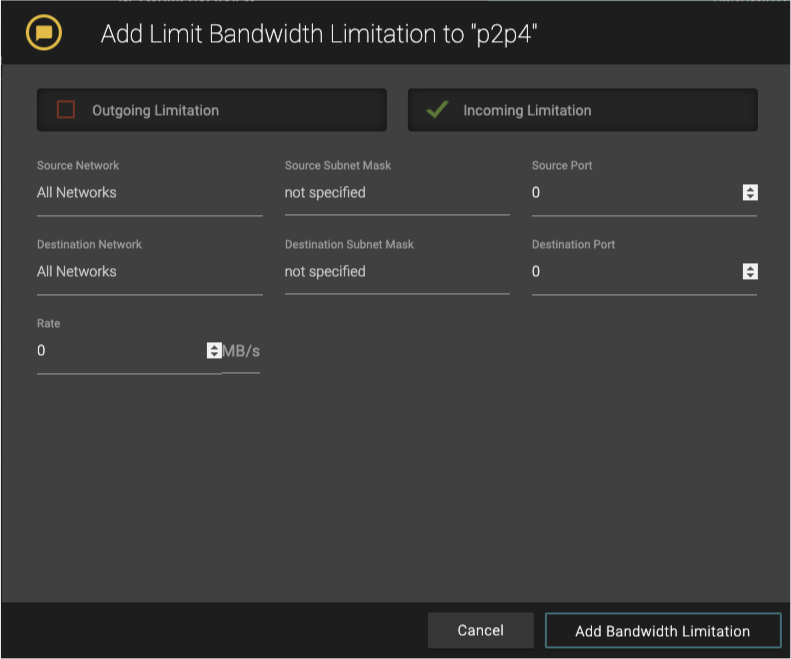
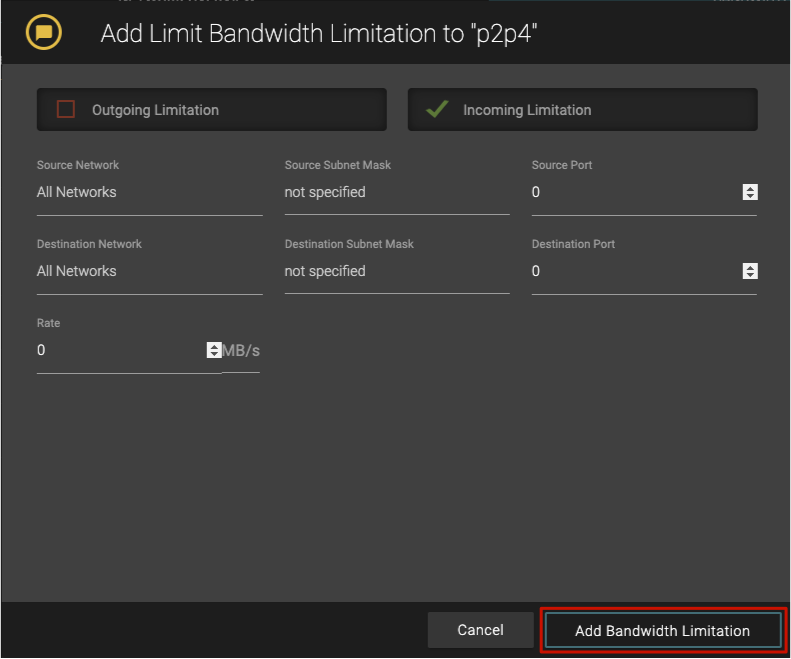
Press the Add Bandwidth Limitation button when you’re done.
The rule should now be reflected in the overview.
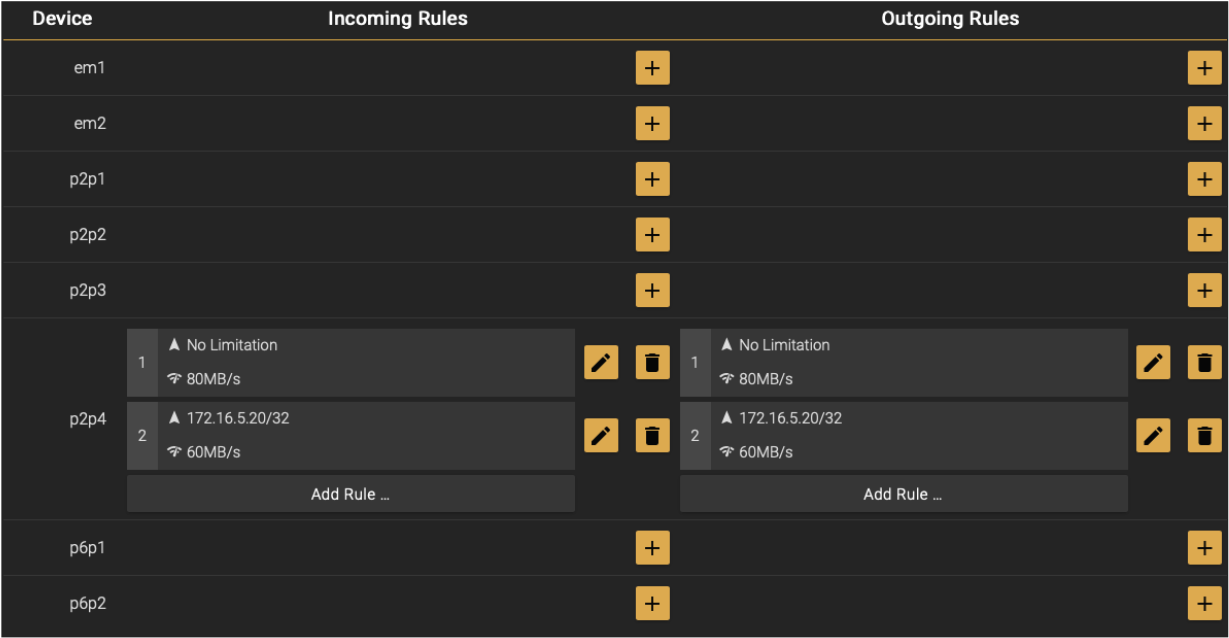
Get more info about a rule by hovering above it with the mouse. On mobile devices, tap a rule once.
Bandwidth Limitation Rule Options
Source Network: the IP address of the source (optional). This is required if you use multiple connections on a device.
Source Subnet Mask: enter the subnet mask of the source (optional).
Source Port: set the port for an specific application. Use “0” if you do not want to specify a specific port.
Destination Network: the IP address of the destination (optional). This is required if you use multiple connections on a device.
Destination Subnet Mask: the subnet mask of the destination (optional).
Destination Port: set the port for an specific application. Use “0” if you do not want to specify a specific port.
Rate: set the maximum rate of the interface in MB/s.
Changing a Bandwidth Limitation
Press the Edit button

Edit the bandwidth limit to your needs. The Bandwidth Limitation Rule Options are explained above.
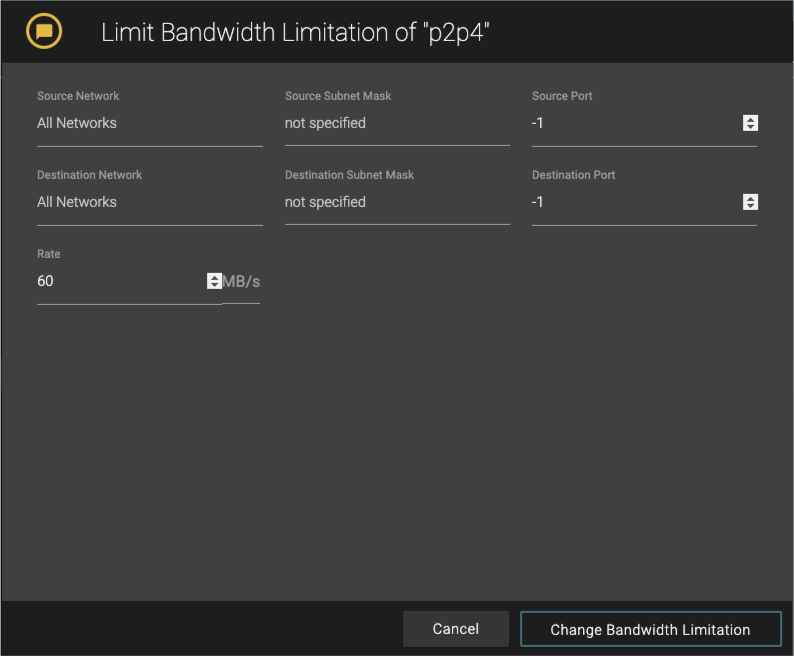
Press the Change Bandwidth Limitation button when you’re done.
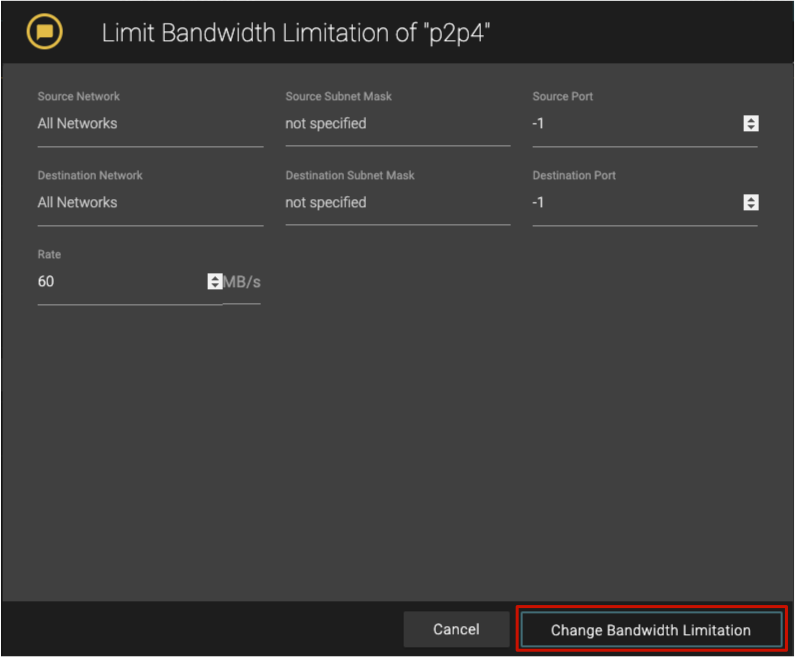
The changes should now be reflected in the overview.
Get more info about a rule by hovering above it with the mouse. On mobile devices, tap a rule once.
Deleting a Bandwidth Limitation
Deleting a rule in the column Incoming Rules will only delete this specific rule. The same is true for Outgoing Rules.
Press the Delete button on the rule your want to remove.
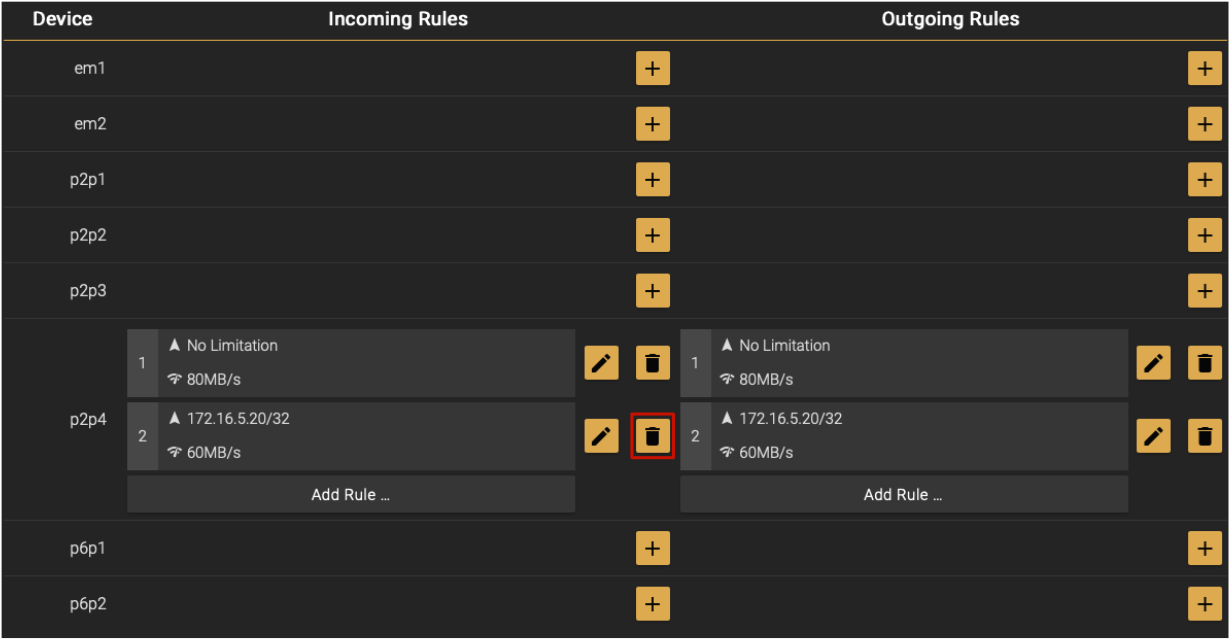
Confirm the dialog if you are sure. The deletion cannot be undone.

The changes should now be reflected in the overview.
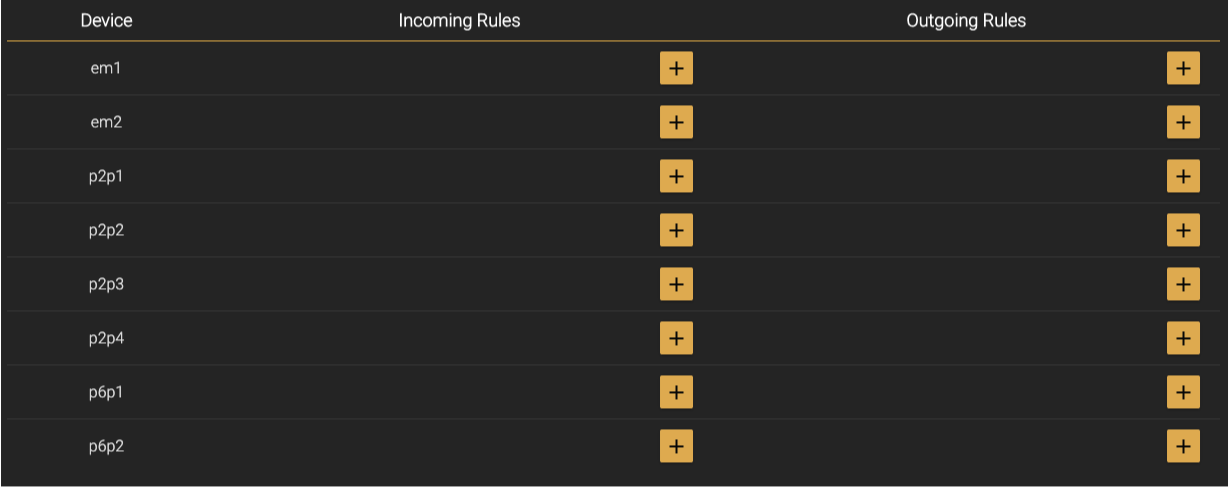
Deleting all Bandwidth Limitations of an Interface
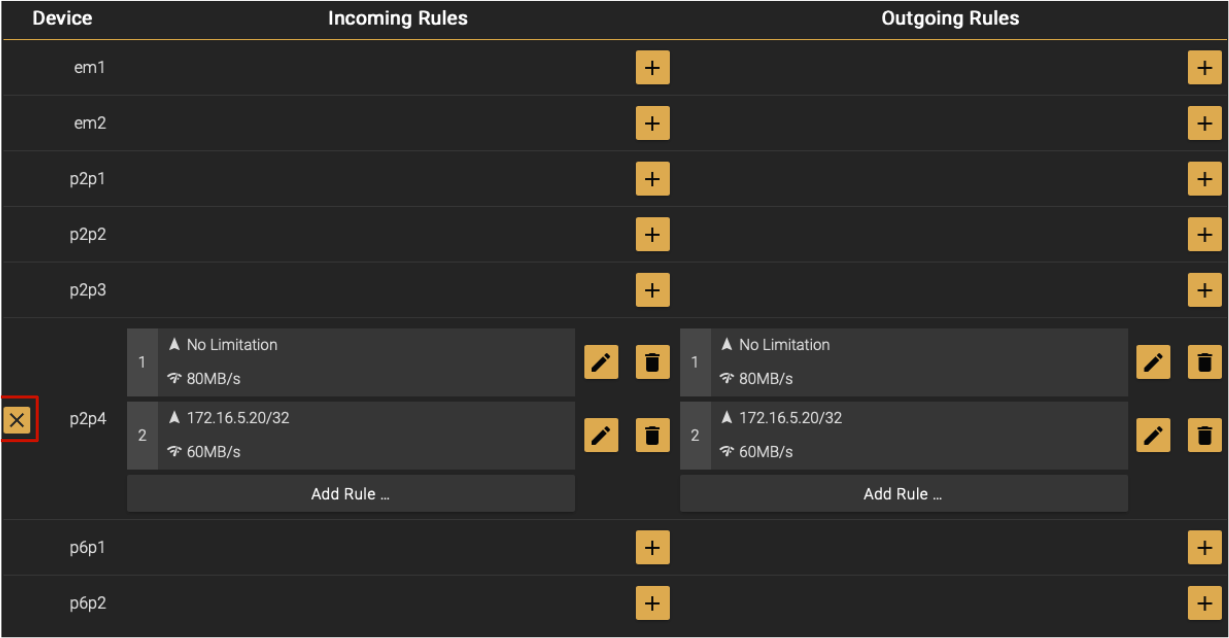
Hover above the name of the interface of which you want to delete all limitations. On mobile devices, single tap on the name of the desired interface.
Press the X button on the very left.
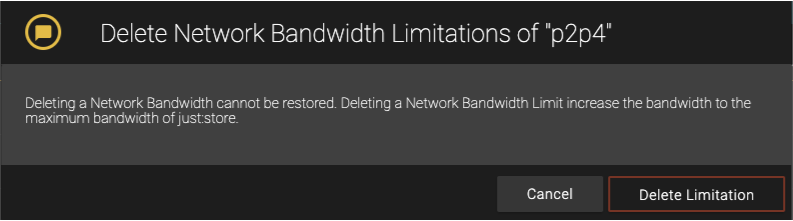
Confirm the dialog if you are sure. The deletion cannot be undone.
The changes should now be reflected in the overview.
Changing a limitation can change network speed at the time you apply your changes.