
Table of Contents
Accessing the Network Settings
Before continuing make sure to read the article Connecting to the Just Store Web-based Administration User Interface
Click on Network in the sidebar.
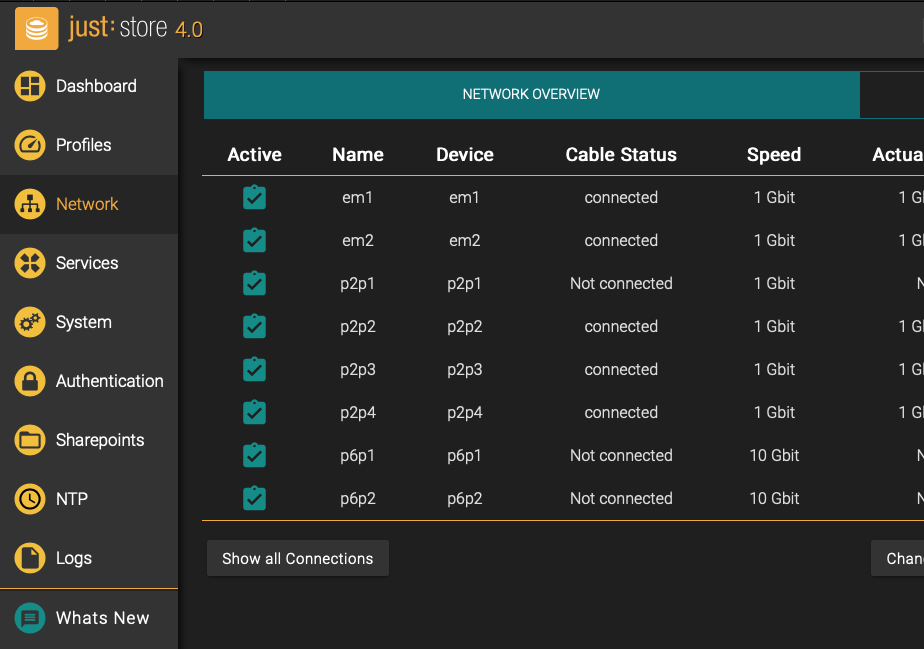
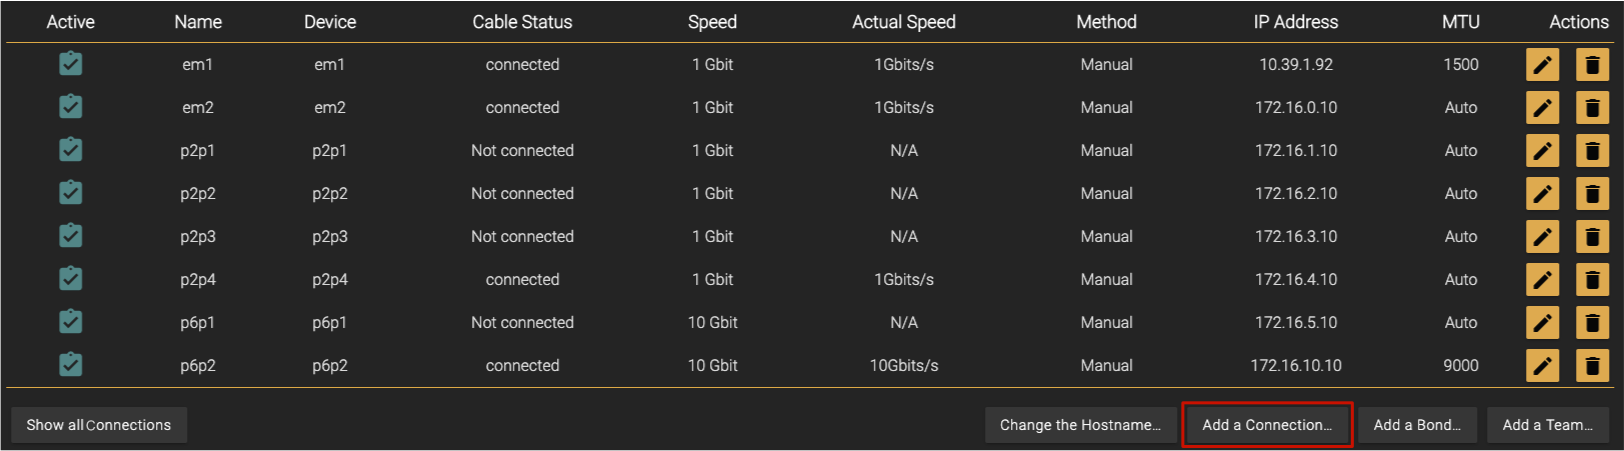
The Network Overview will be shown, allowing you to configure the network interfaces.
Network Overview

To see the Network Overview press the tab “NETWORK OVERVIEW“ as you can see above.
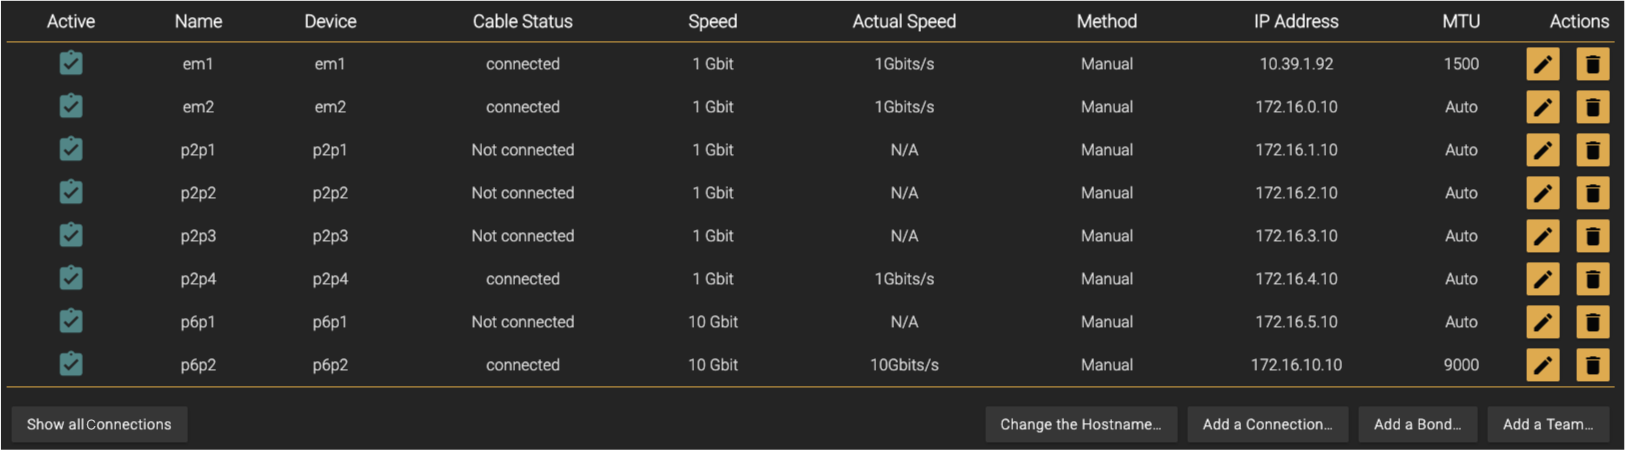
Network Overview: Columns
Active: the state of the connection, can either be online (green check mark) or offline (red exclamation mark).
Name: displays the name of the connection.
Device: displays the network interface device of the connection.
Cable Status: shows if a fibre channel or ethernet cable is connected.
Speed: shows the type of network interface.
Actual Speed: shows the maximum speed of the network connection.
Method: IP address acquisition method (either DHCP or manual).
IP Address: shows the address of the connection.
MTU: shows the maximum transmission unit of the connection.
Actions: allows you to edit or delete a connection.
Changing the Hostname
Press the Change the Hostname… button.
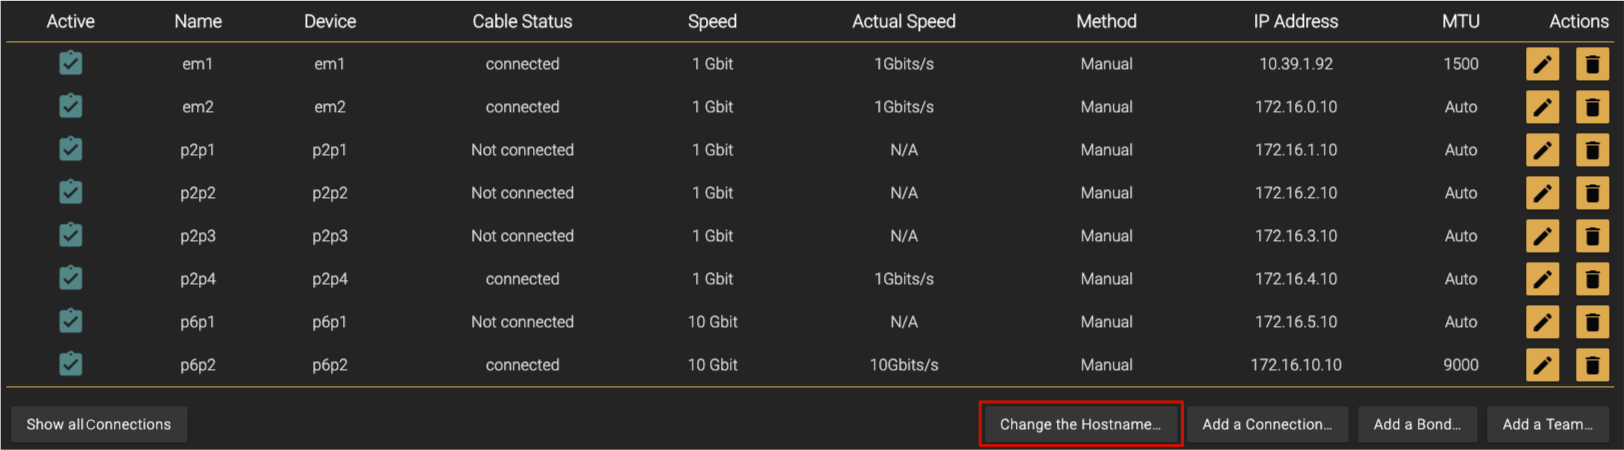
Edit the Hostname.
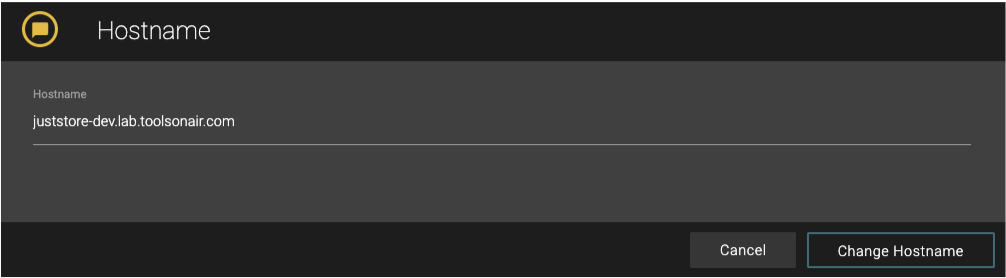
Press the Change Hostname button.
Managing and Editing Network Connections
Creating a new Network Connection
Click on the Add a Connection… button in the lower right area.
Configure the network connection to your needs (details below).
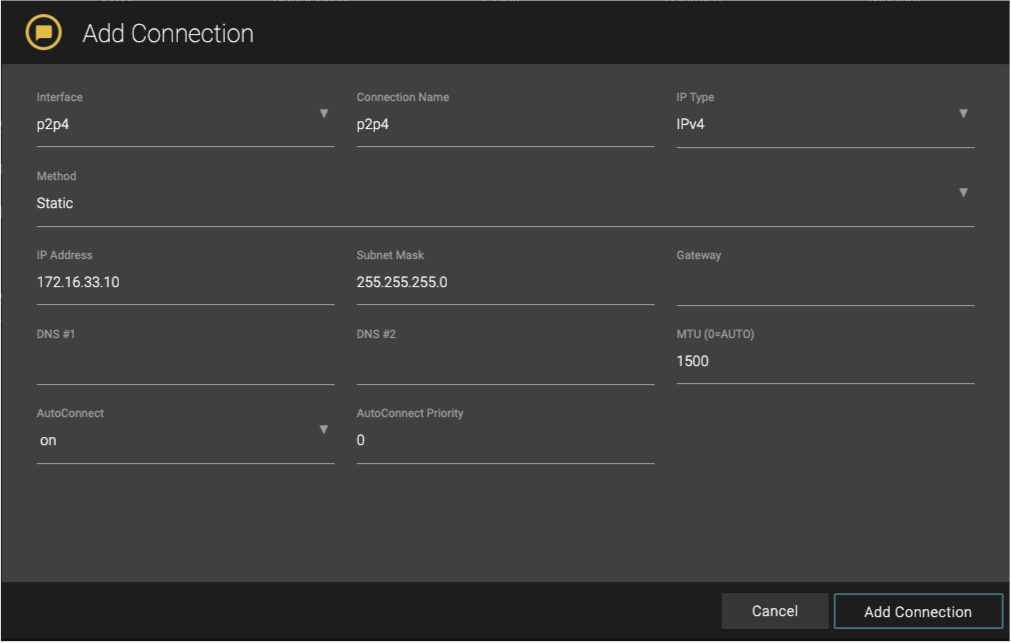
Press the Add Connection button when you’re done.
Network Connection Settings
Interface: the network interface for the selected connection.
Connection Name: set a custom connection name here, if desired.
IP Type: IPv4 or IPv6
Method “Manual”: manual address configuration.
Method “DHCP”: retrieves the address configuration from a DHCP server automatically.
IP Address: if method is set to Manual, you need to provide an IP address here.
Subnet Mask: if method is set to Manual, you need to provide a subnet mask here.
Gateway: shows the gateway of the connection and can be edited when the method is set to Manual. For a direct connection to a single client please leave this field empty.
DNS: shows the DNS server of the connection and can be edited when the method is set to Manual. For a direct connection to a single client please leave this field empty.
DNS #2: shows the DNS server of the connection and can be edited when the method is set to Manual. For a direct connection to a single client please leave this field empty.
MTU: select 1500 for 1Gbit connections or 9000 for 10Gbit connections.
AutoConnect: if enabled, a failed connection will be re-established, if possible.
AutoConnect Priority: set a priority if required or set it to zero for automatic order.
Editing a Network Connection
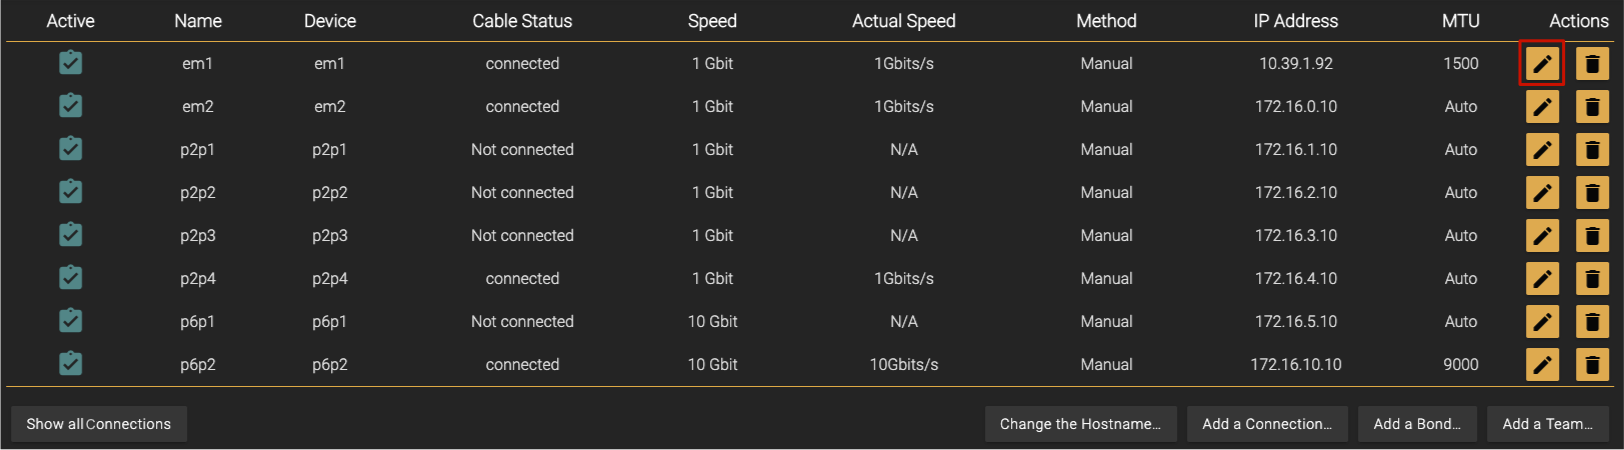
Press the Edit button of the network interface you want to edit.
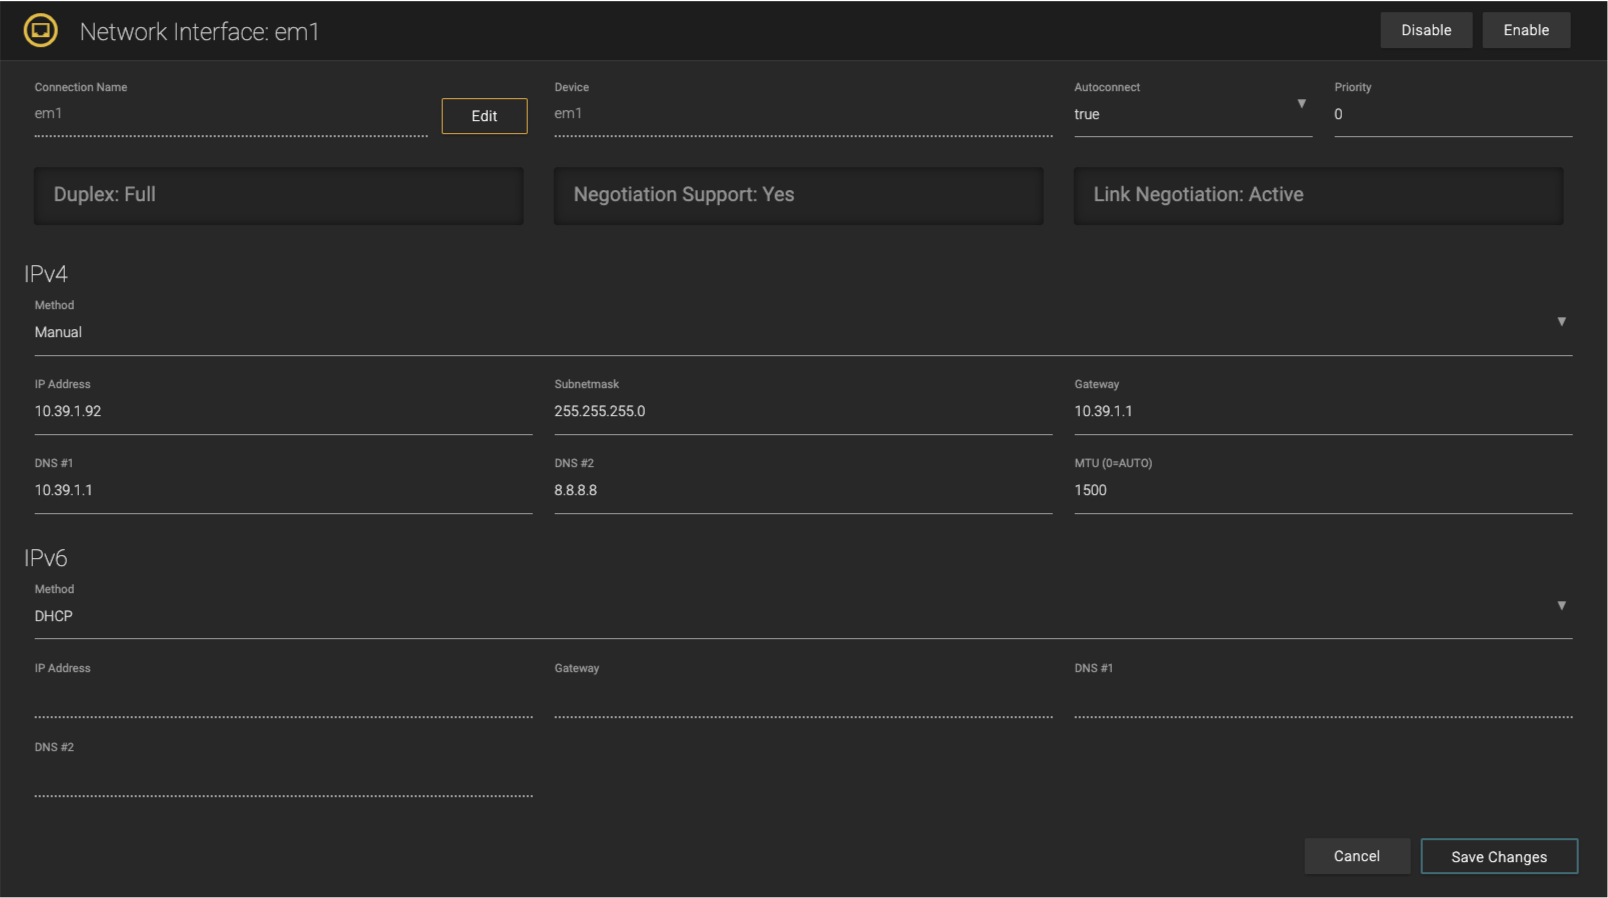
The network interface overview shows up.
Make your changes and press the Save Changes button afterwards. The network interface will then be restared.
Restarting a network connection will break all ongoing client connections to this connection.
Disabling and Enabling a Network Connection
Press the Edit button of the network interface you want to edit.
Press the Enable or Disable button in the upper right of the dialog.
Restarting a network connection will break all ongoing client connections to this connection.
Using Link Aggregation (Bonds, Teams)
This requires you to be logged in as an admin.
Creating a Bond
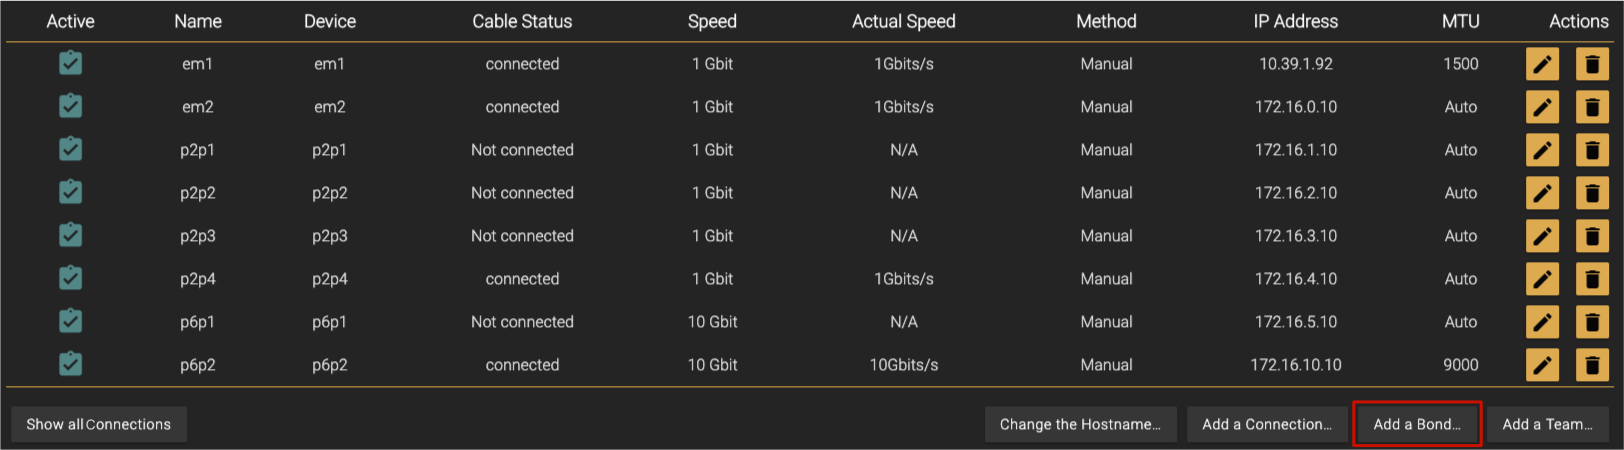
Press the Add a Bond… button.
Configure the bond to your needs.
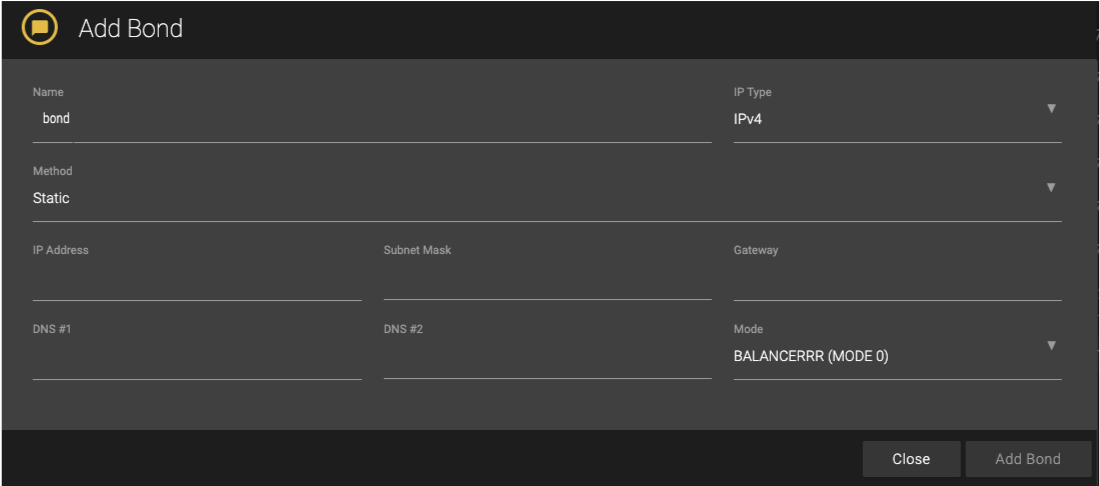
Press the Add Bond button to create the bond.

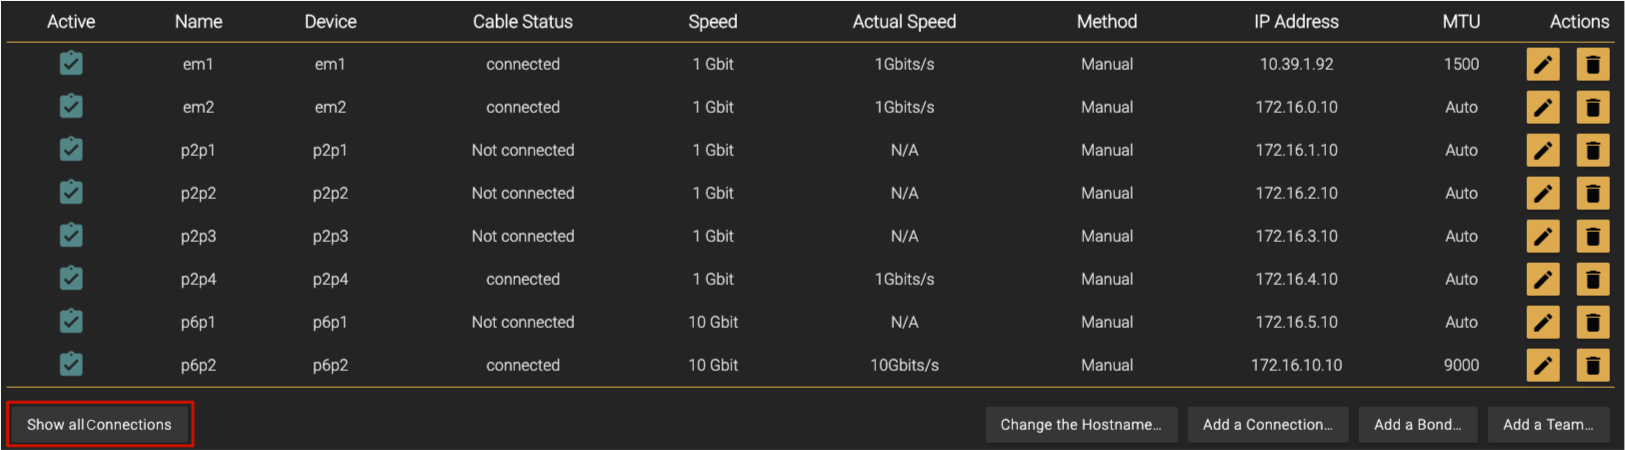
The Network Overview will be shown. In case the desired bond is not shown, press the Show all Connections button below the network interfaces list.
Adding or Removing a Member to/from an Existing Bond
In case the desired bond is not shown, press the Show all Connections button below the network interfaces list.
Press the Edit button of the desired bond.
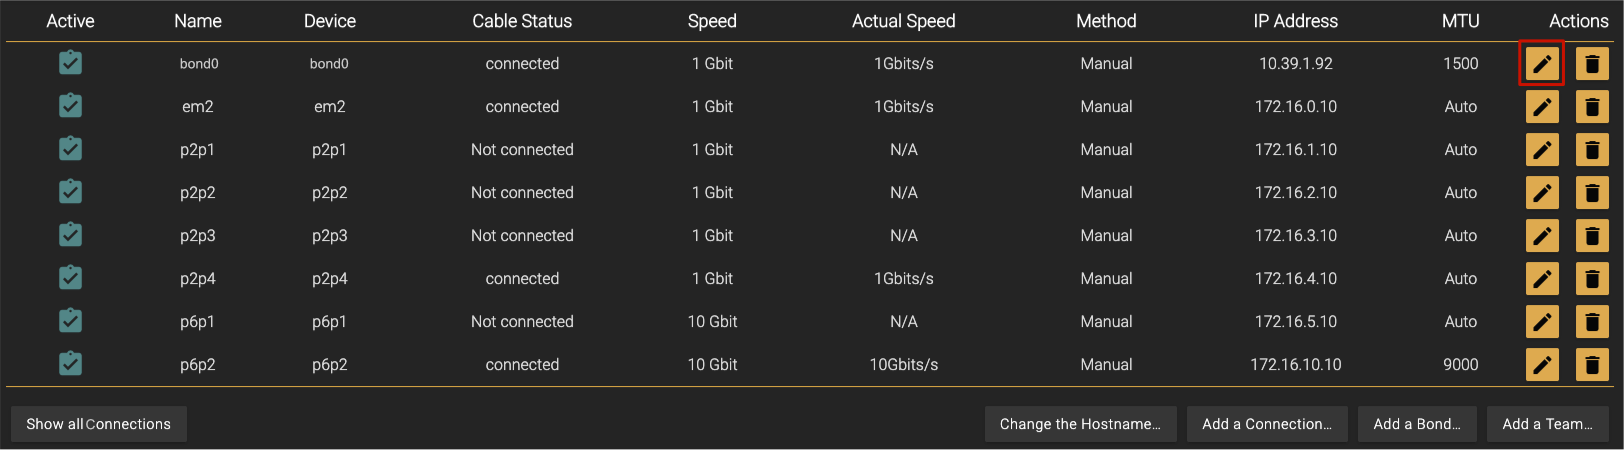
Click on the MEMBER OF BOND tab.
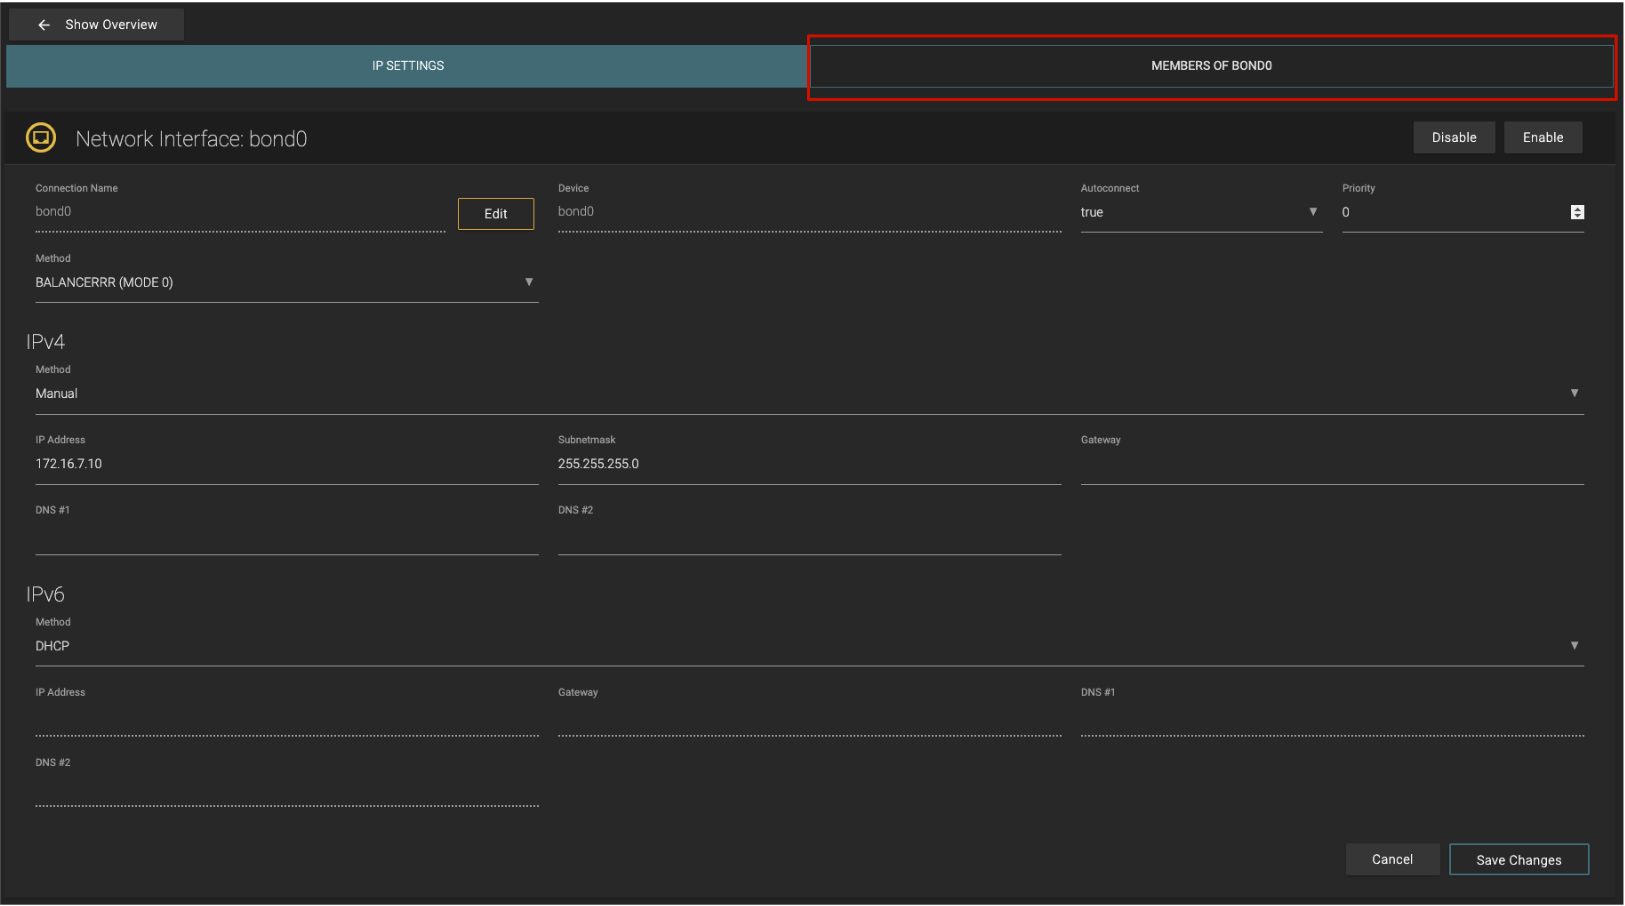
In the Interface drop-down box, select a connection that should be used as a member. The selected connection will be deleted and then added to the bond. Keep in mind that this will break all ongoing client connections to the corresponding connection.

Press the Add button to add the member, or the Delete button to remove it.

Configure the rest of the members, like Autoconnect and MTU.
Changing the Network Settings of an Existing Bond
In case the desired bond is not shown, press the Show all Connections button below the network interfaces list.
Press the Edit button of the desired bond.
Configure the network settings accordingly to your needs.
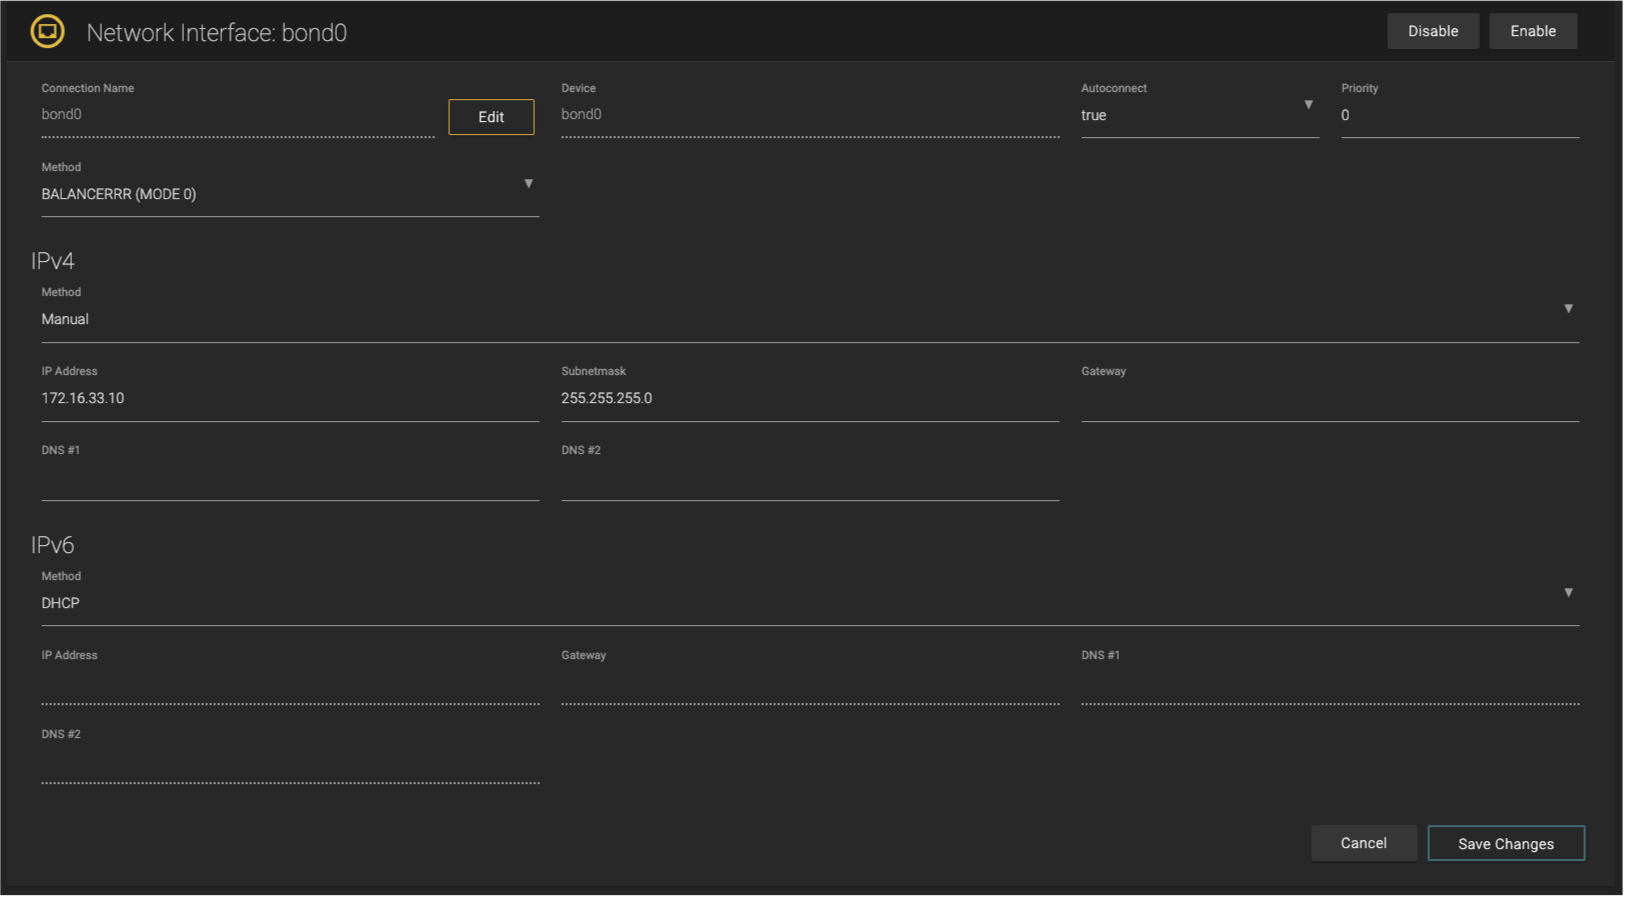
Press the Save Changes button to take over your changes.
Creating a Team
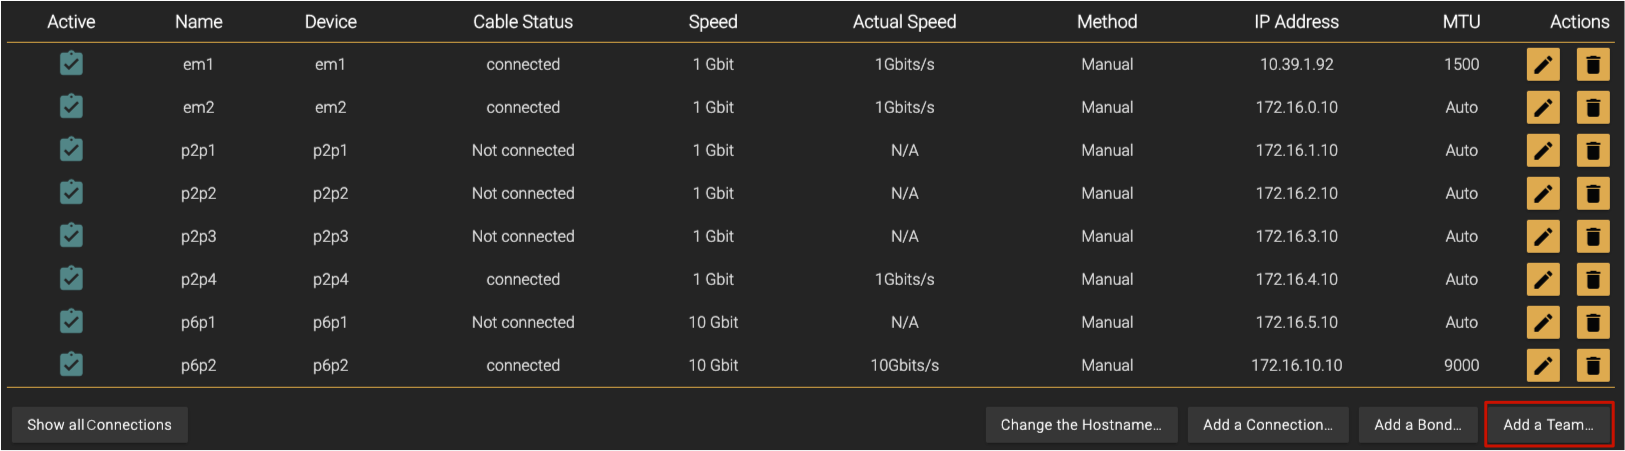
Press the Add a Team button.
Configure the team to your needs.
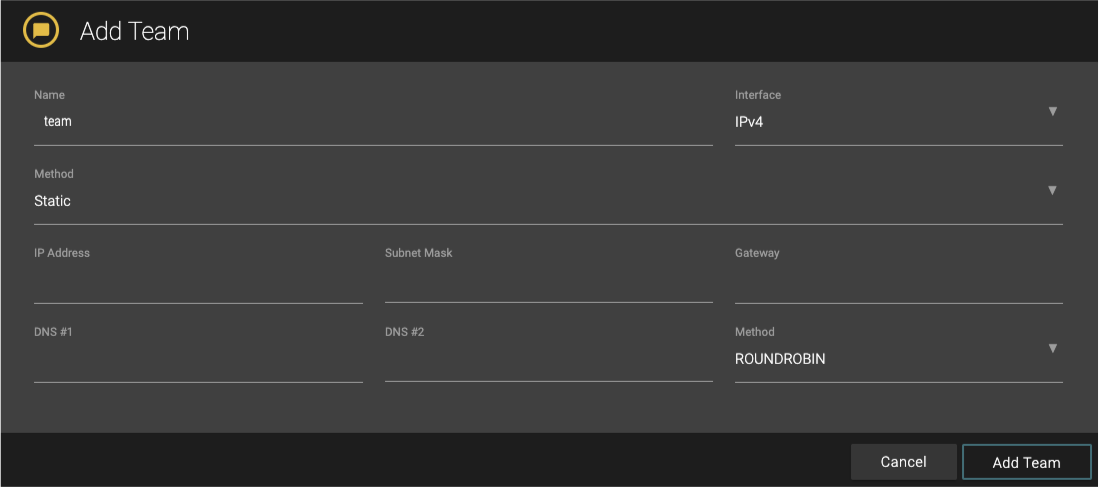
Press the Add Team button to add the team.
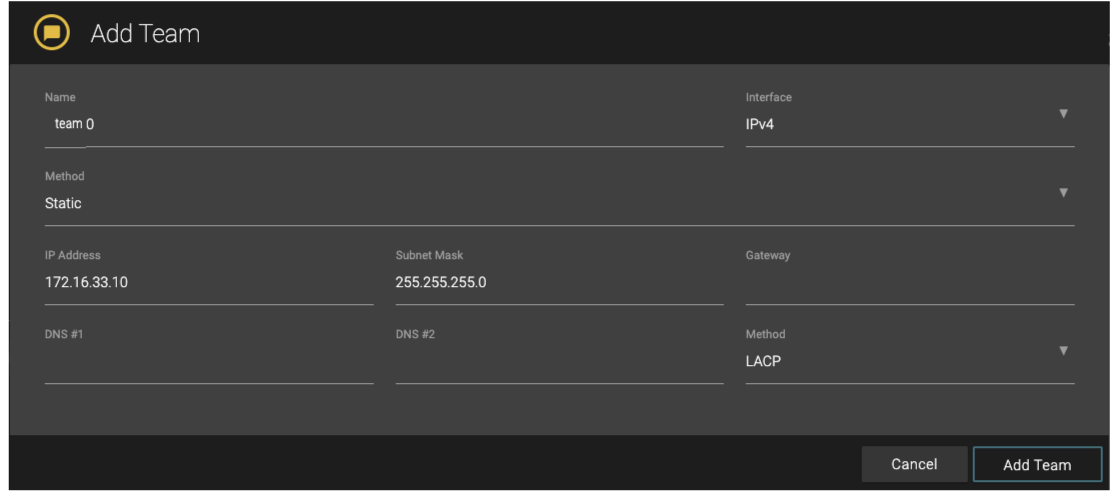
The Network Overview will be shown. In case the desired team is not shown, press the Show all Connections button below the network interfaces list.
Adding or Removing a Member to/from an Existing Team
In case the desired team is not shown, press the Show all Connections button below the network interfaces list.
Press the Edit button of the desired team.
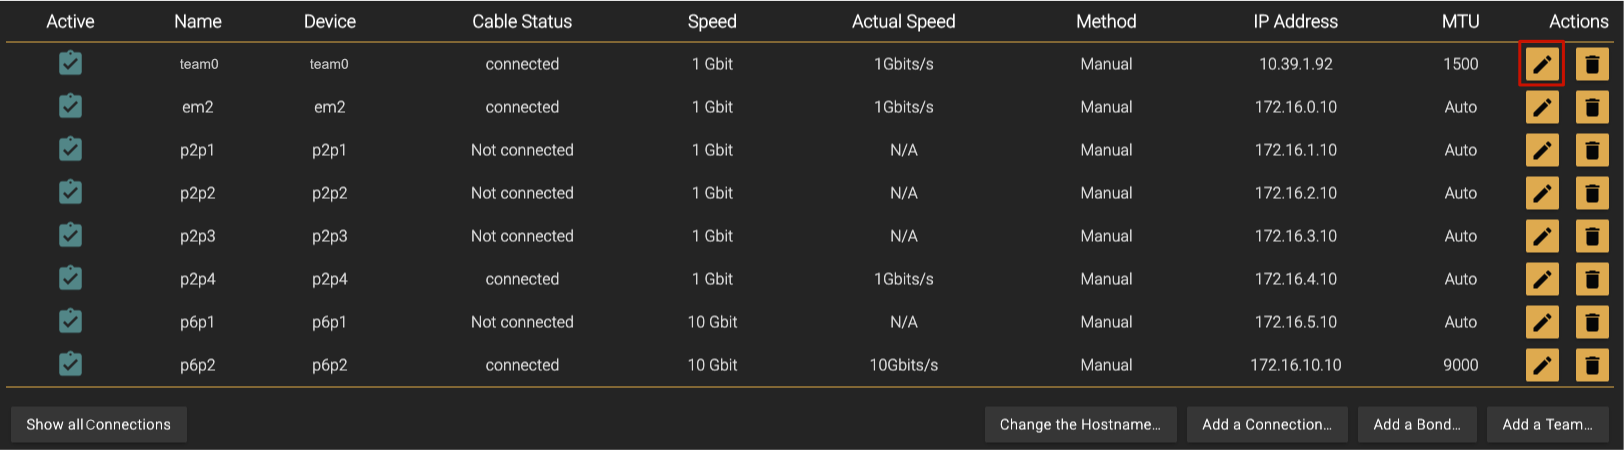
Click on the MEMBER OF TEAM tab.
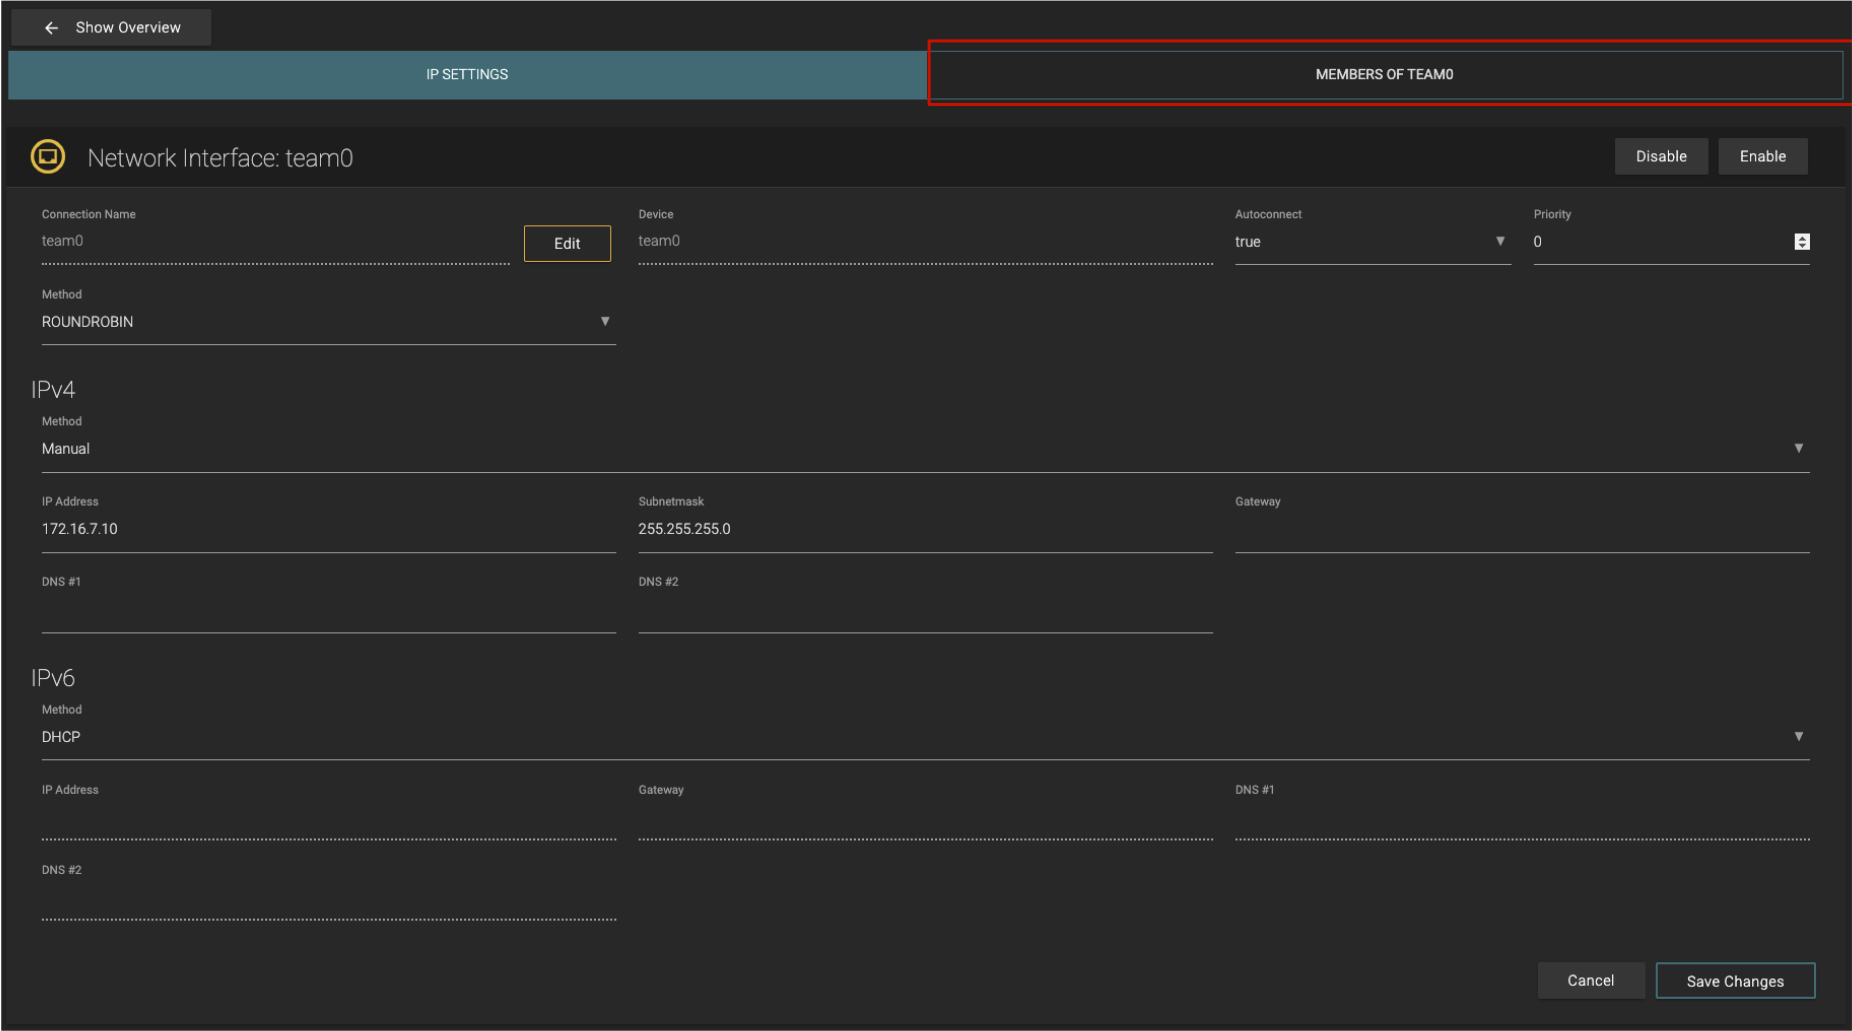
In the Interface drop-down box, select a connection which should be used as a member. The selected connection will be deleted and then added to the team. Keep in mind that this will break all ongoing client connections to the corresponding connection.

Click on the Add button to add the connection to the team, or press the Delete button to remove it.
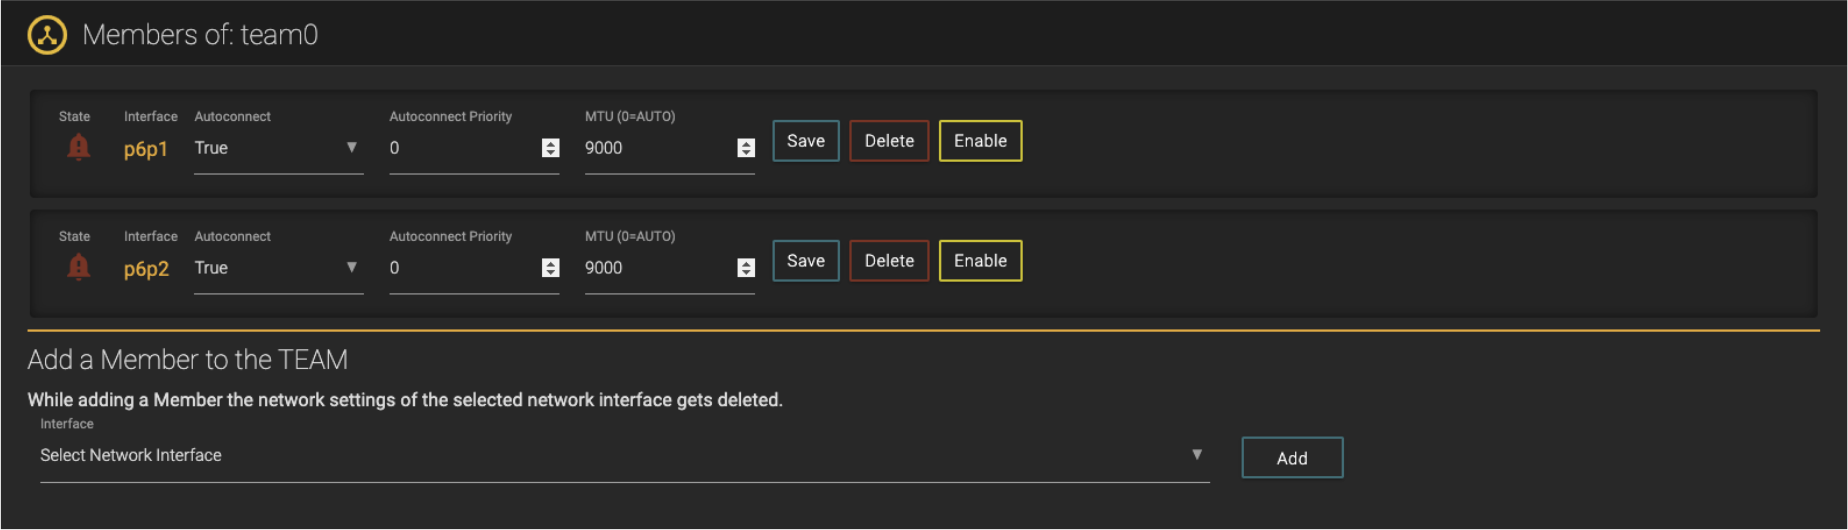
Configure the rest of the members, like Autoconnect and MTU.
Changing the Network Settings of an Existing Team
In case the desired team is not shown, press the Show all Connections button below the network interfaces list.
Press the Edit button of the desired team.
Configure the network settings accordingly to your needs.
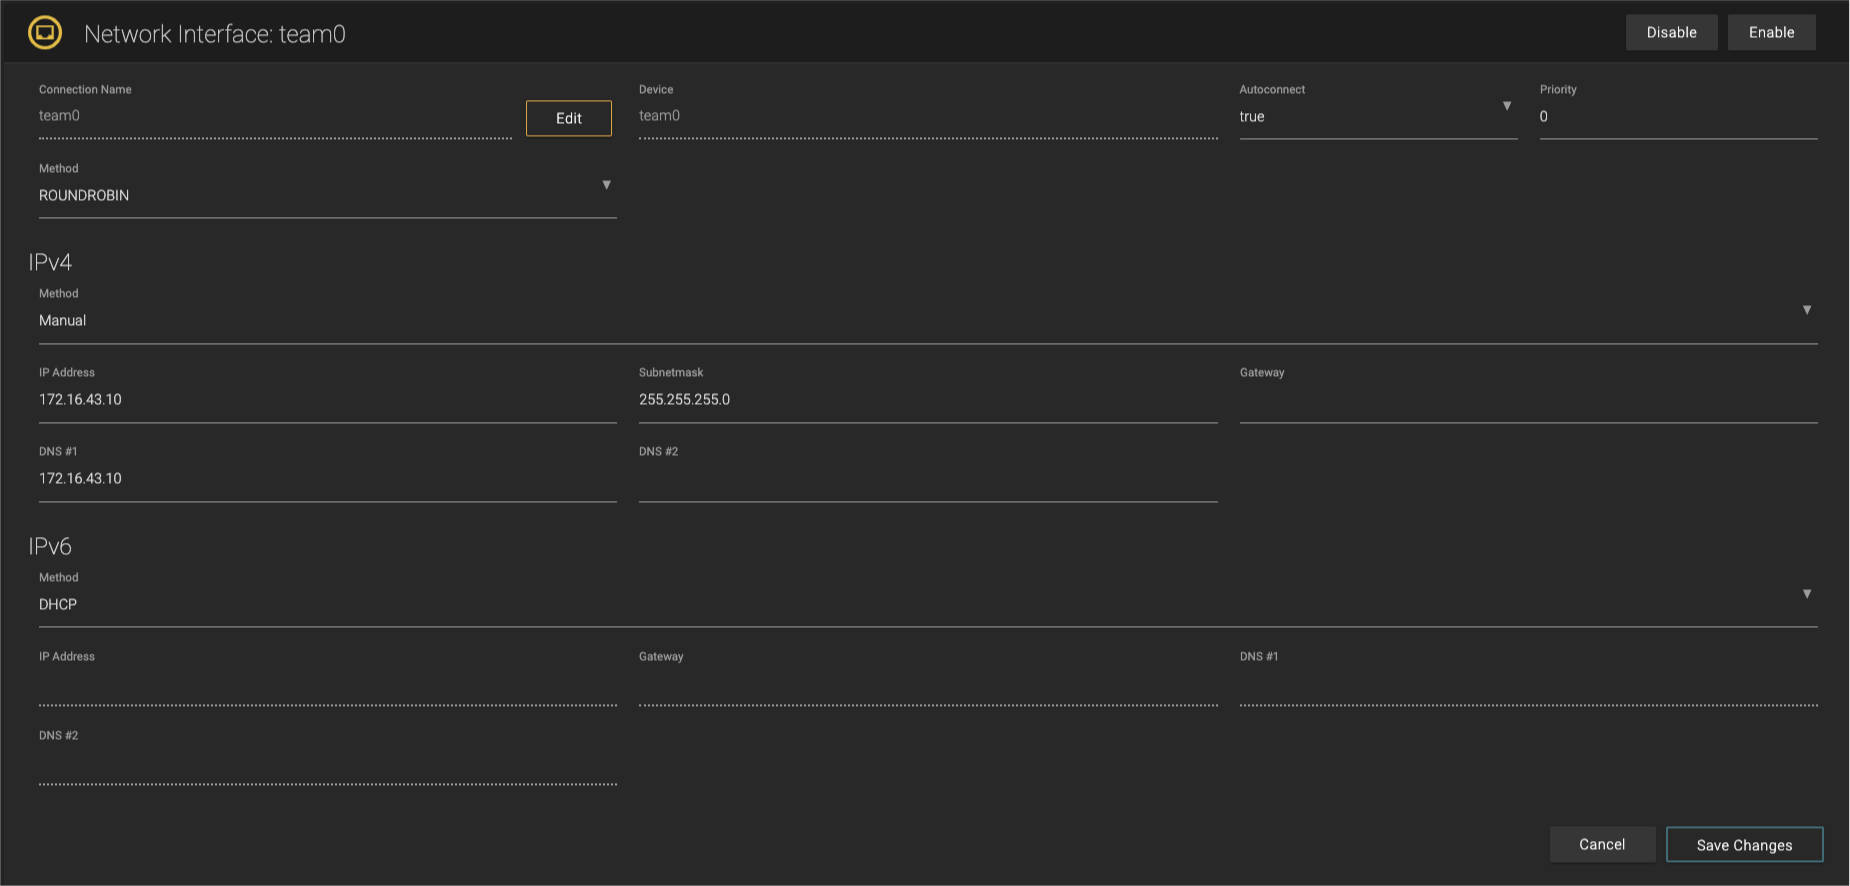
Press the Save Changes button to take over your changes.
Bandwidth Limitation
Refer to chapter Bandwidth Limitation (Just Store v4.0).
Bonding
Refer to chapter Bond and Team Options (Just Store v4.0).