Table of Contents
Mounting Sharepoints in macOS
There are two methods to mount sharepoints using a Mac:
Connecting to a Just Store system directly with the macOS Finder.
Using our mount application to streamline the sharepoint mounting process WILL BE RELEASED SOON.
The following instructions assume that the Just Store system has been set up properly and that you have the protocol and the IP address of the Just Store system you want to connect to.
Network Settings
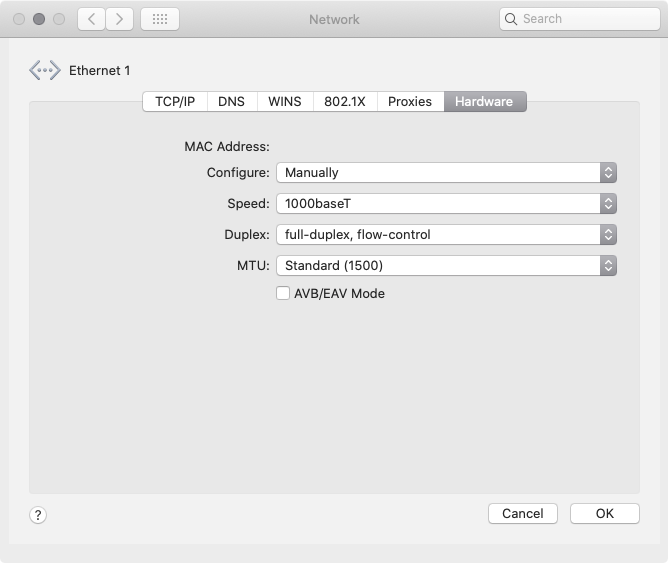
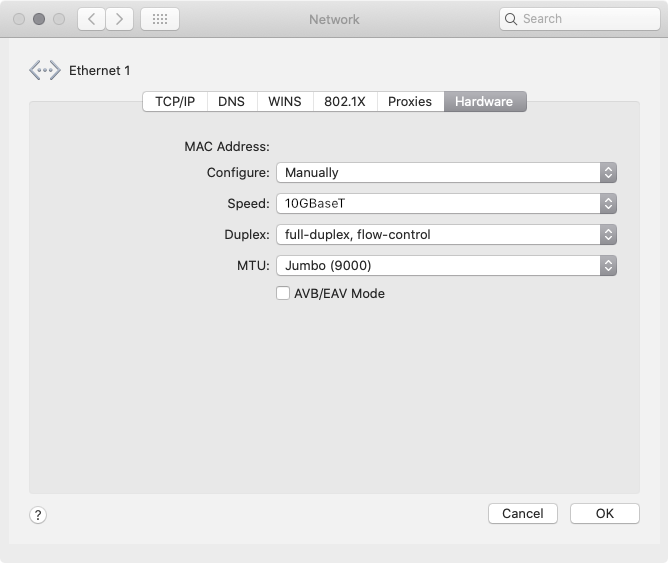
Depending on your network speed, configure the macOS client(s) like shown below.
You can find these settings in System Preferences → Network → Ethernet → Advanced… → Hardware.
Using a 1Gbit Connection
Using a 10Gbit Connection
Mounting Sharepoints in the macOS Finder
macOS Finder mounted sharepoints are being ejected upon restart.

Make sure Finder is the active app.
Click on the Go menu.
Select the Connect to Server... command (shortcut command + K).
In the Connect to Server window, enter the protocol of your choice (afp, smb, nfs), followed by "://" and the IP address of the Just Store system you want to connect to. If you don't know the Protocol or the IP Address of the Just Store system please consult your system administrator.
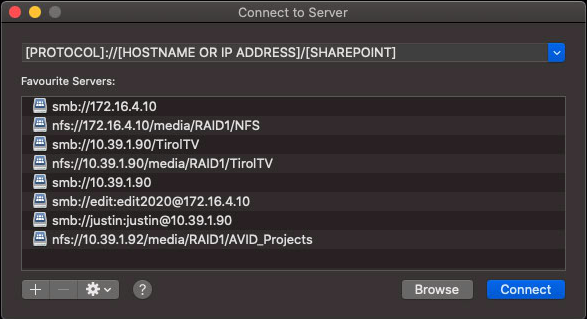
Example SMB: smb://[HOSTNAME OR IP ADDRESS]/[SHAREPOINT]
Example AFP: afp://[HOSTNAME OR IP ADDRESS]/[SHAREPOINT]
Example NFS: nfs://[HOSTNAME OR IP ADDRESS]/media/RAID[NR]/[SHAREPOINT][PROTOCOL] → either SMB,AFP or NFS
[HOSTNAME OR IP ADDRESS] → location of the Just Store either use the IP Address or hostname.
[NR] → RAID number. ONLY REQUIRED BY NFS
[SHAREPOINT] → name of the sharpoint.
Press the Connect button.
Accept the dialog by clicking the Connect button.

Select the desired sharepoint and press the OK button. Afterwards the sharepoint should be displayed in the sidebar of any Finder window and can be accessed right away.

Mounting Sharepoints in Windows
Currently, we do not offer a Just Store sharepoint mounting application for Windows. We suggest using Microsoft Explorer. The following instructions are tested on Windows 10 (1810 and newer).
The following instructions assume that the Just Store system has been set up properly and that you have the protocol and the IP address of the Just Store system you want to connect to.
Using Microsoft Explorer
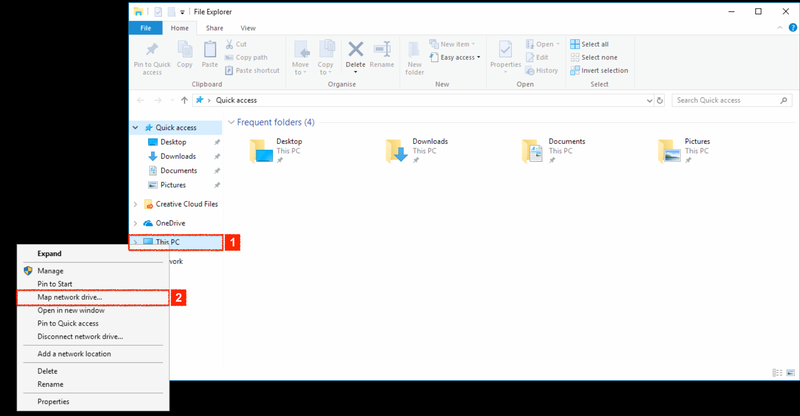
In the sidebar of an Explorer window, right-click This PC and select Map network drive…
Select the Drive letter and enter the Folder (i.e. hostname or IP address) followed by the sharepoint name. Also, enable the Reconnect at sign-in and Connect using different credentials options.
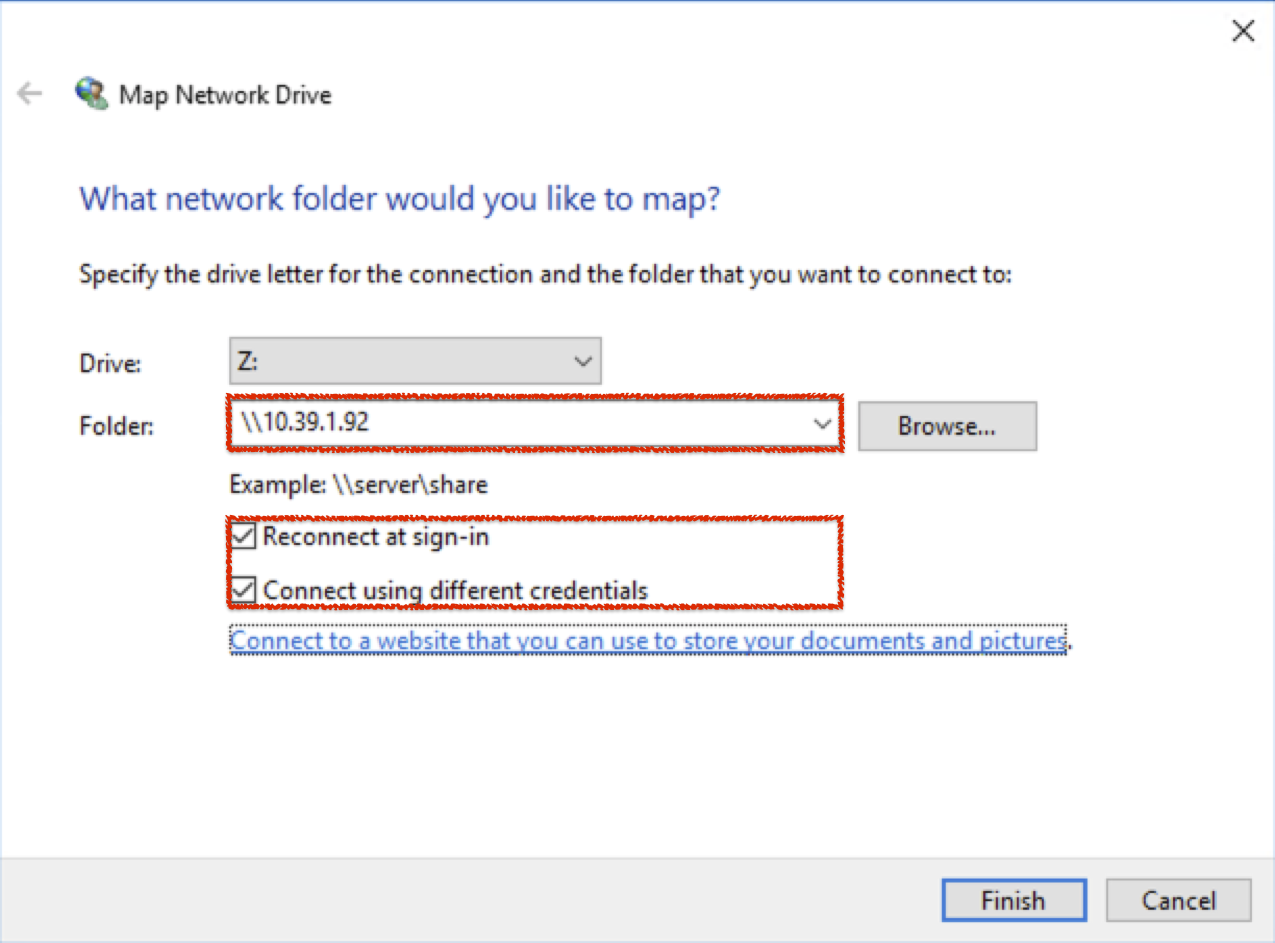
Alternatively, you may click the Browse… button to select the sharepoint. Press the OK button afterwards.

Press the Finish button.

Enter the network credentials in the popup. For guest access enter “guest” in the username field and leave the password field empty. Activate the Remember my credentials checkbox.
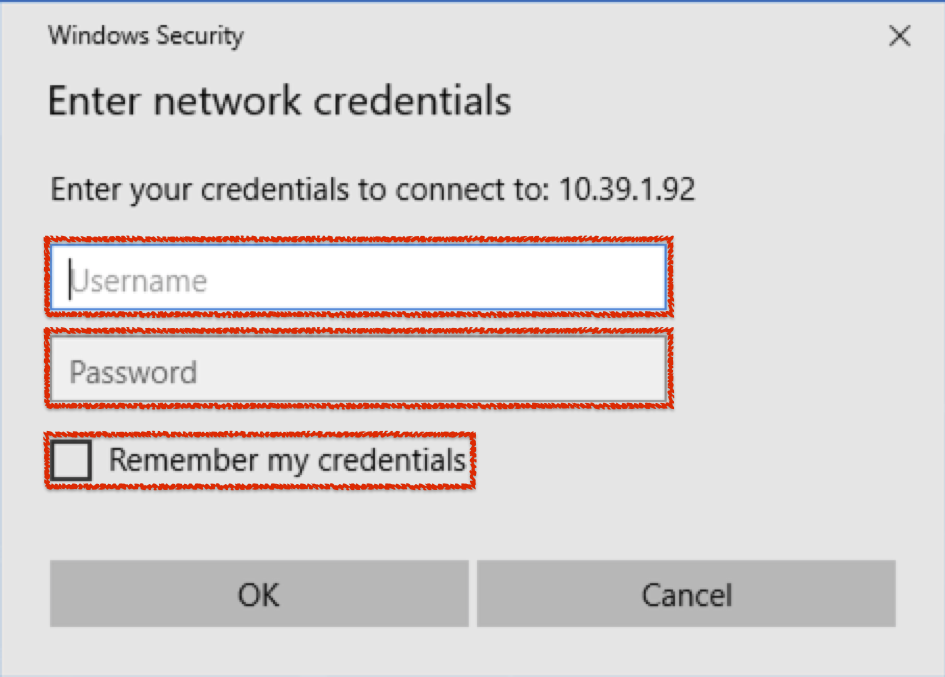
Press OK
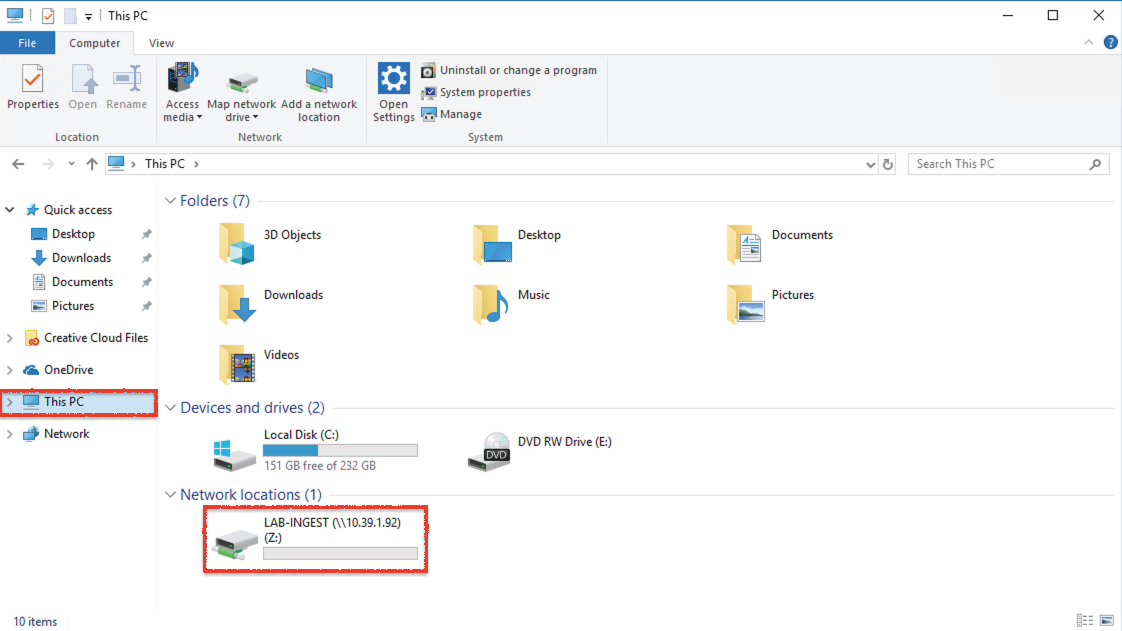
The sharepoint should now be mounted under This PC → Network locations.