
The following instructions are also available as a video:
https://www.toolsonair.com/wp-content/uploads/Just Store-install-process_hd.mp4
Create a ticket in the ToolsOnAir helpdesk to access a download of the installation ISO of Just Store.
You will receive a link which leads to the website displayed below. Download the Just Store ISO, you will need it later.

Login to the IPMI User Interface with the following credentials:
• Non-European countries: username “toaadmin” and password “admin”. If you have received a specific password beforehand, use this password instead of “admin”.
• European countries: username “admin” and password “admin”. If you have received a specific password beforehand, use this password instead of “admin”.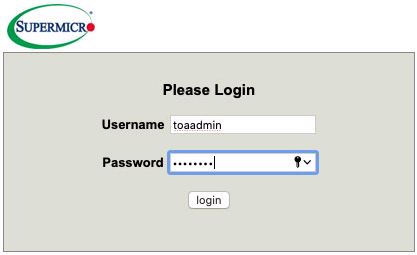
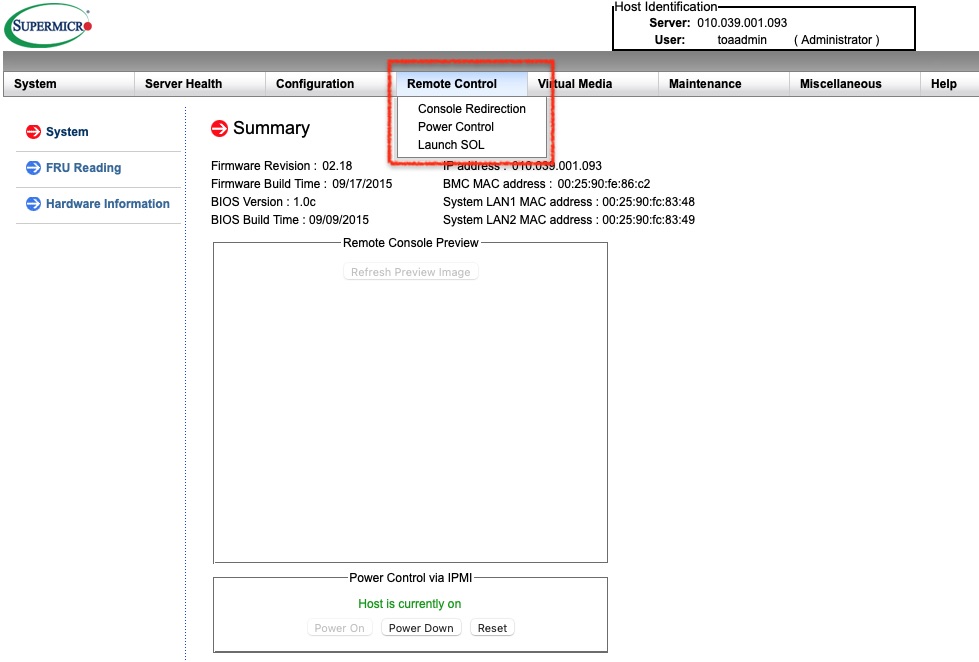
Select Remote Control → Console Redirection.
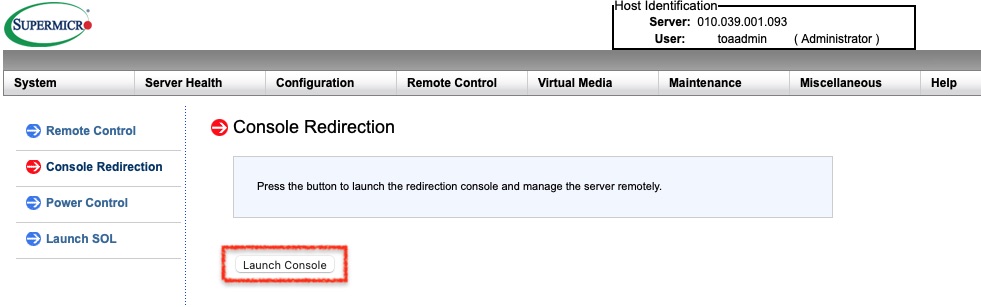
Click on the Launch Console button and allow the file called launch.jlnp to be saved on your computer.
Open the file launch.jlnp and accept the risk to run this application. Now press the Run button.

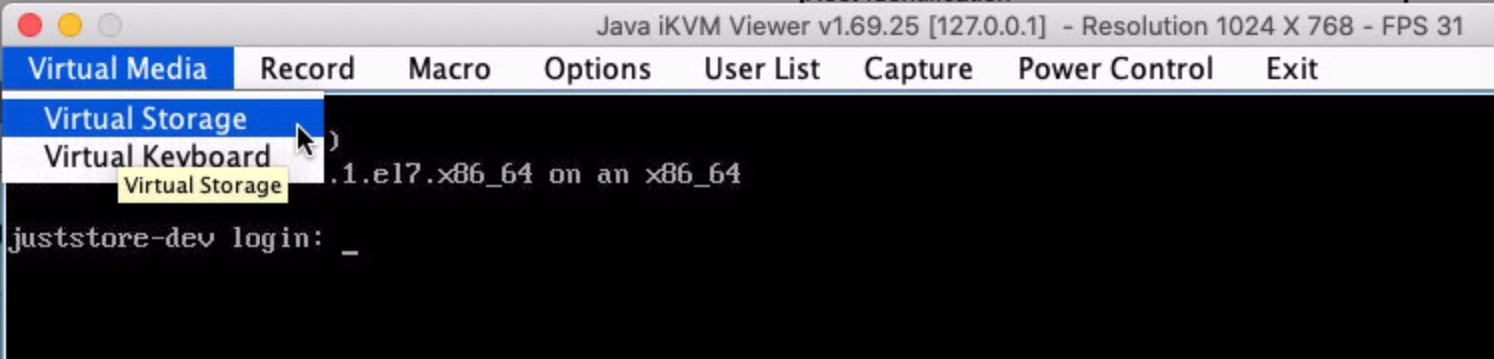
You should now see the Java iKVM Viewer application. Open the menu Virtual Media → Virtual Storage.
Select ISO File as Logical Drive Type.

Press the Open Image button and select the ISO file you have downloaded previously.
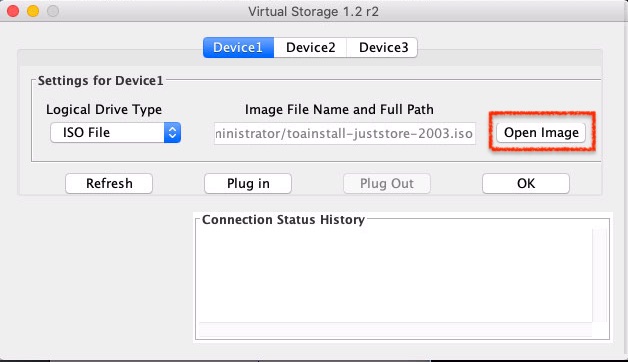
Press the Plug in button afterwards, and close the window.
Open the Virtual Keyboard by selecting Virtual Media → Virtual Keyboard. The Virtual Keyboard must be visible before proceeding to the next step, as we need the F11 key.
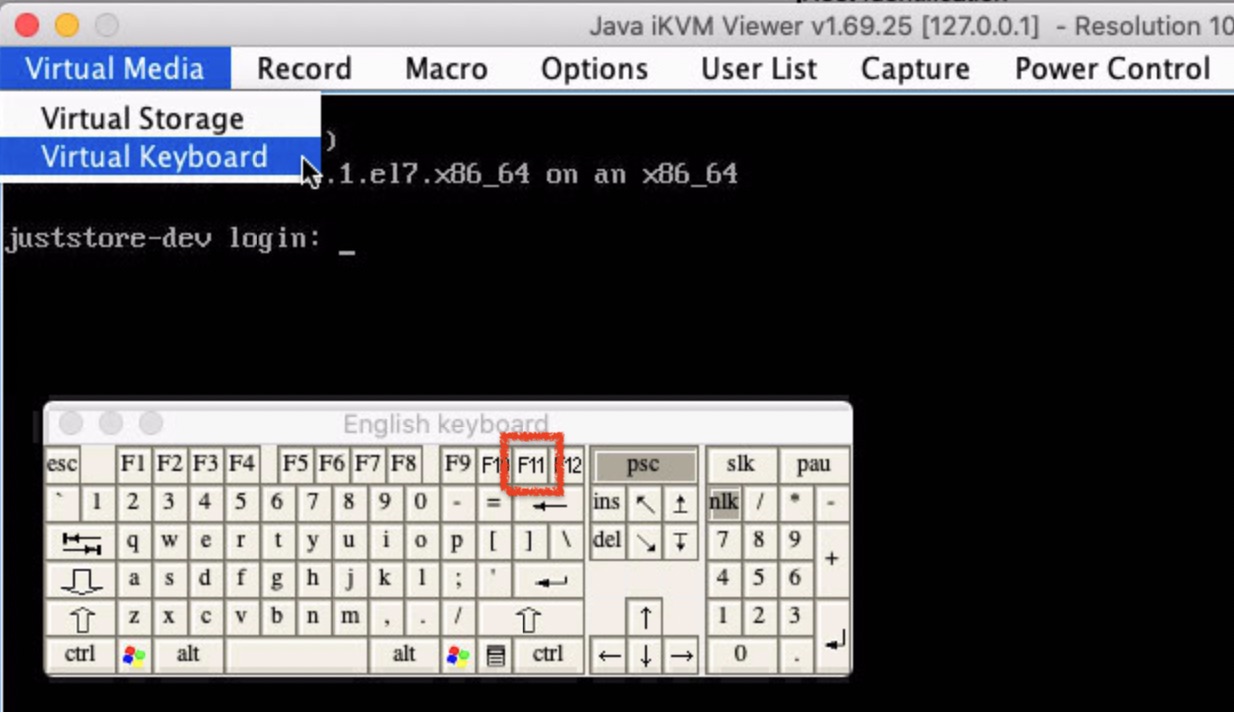
Restart the Just Store by selecting Power Control → Set Power Reset. After selecting this command, iImmediately press the F11 key on the Virtual Keyboard for a couple of times, until the message Invoking Boot Menu is displayed.

When the boot menu is displayed, select ATEN Virtual CDROM.

Wait until the ToolsOnAir installation selection screen is displayed. Select either Install Just Store offline (CentOS7-2003, v7.8) or Install Just Store offline (CentOS7-2009, v7.9) and press the enter key.

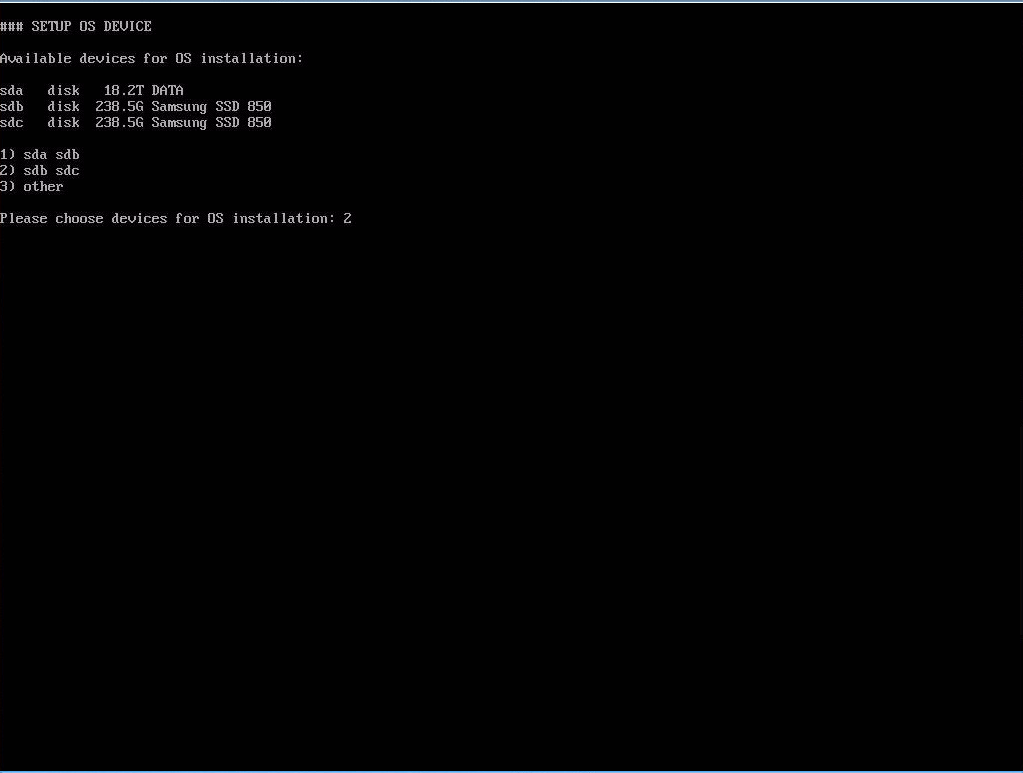
After a couple of minutes, you should see the drive selection. Select the choice where both SSDs are included, in this case, this would be choice 2 because it includes the drives sdb and sdc – which both are SSDs.
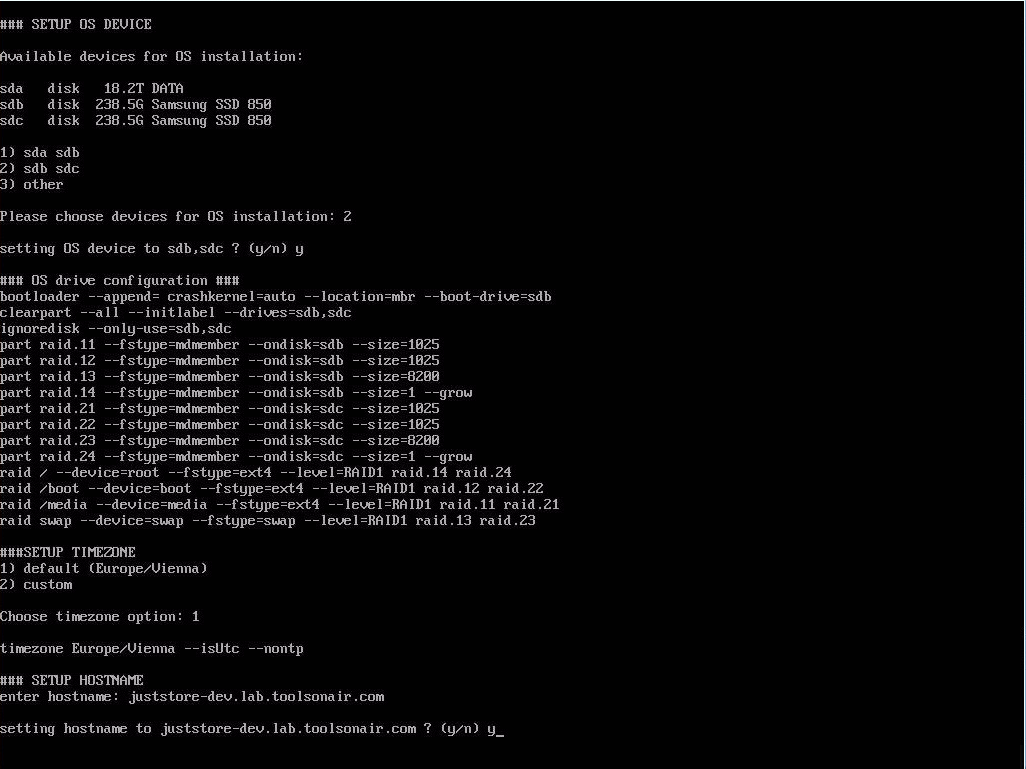
Set the Timezone and Hostname.
Choose the Partner option. This info will be displayed in the Just Store User Interface.

If you need a static IP address, configure the network interface em1.

Wait for the installation process to be finished. Afterward, you can access the web-based Just Store administration user interface and continue with the configuration process as outlined in the Just Store v4.0 Administrator Manual.
After a successful installation, the IPMI user and password will be changed automatically.
Username: toaadmin
Password: Bkikv10!