
Capture Presets define the output format of a Recording (codec, container, resolution, audio channels, etc.). Before you can start recording with the Just In Mac Lite 2026 application, you need to create one or multiple Capture Presets. After defining the Capture Preset(s), you can quickly access them in the Just In Mac Lite Channel Inspector. This accelerates the recording process and helps to keep things organized.
Overview
Open the Configuration panel, select the Device, and switch to the “Capture Presets” tab.
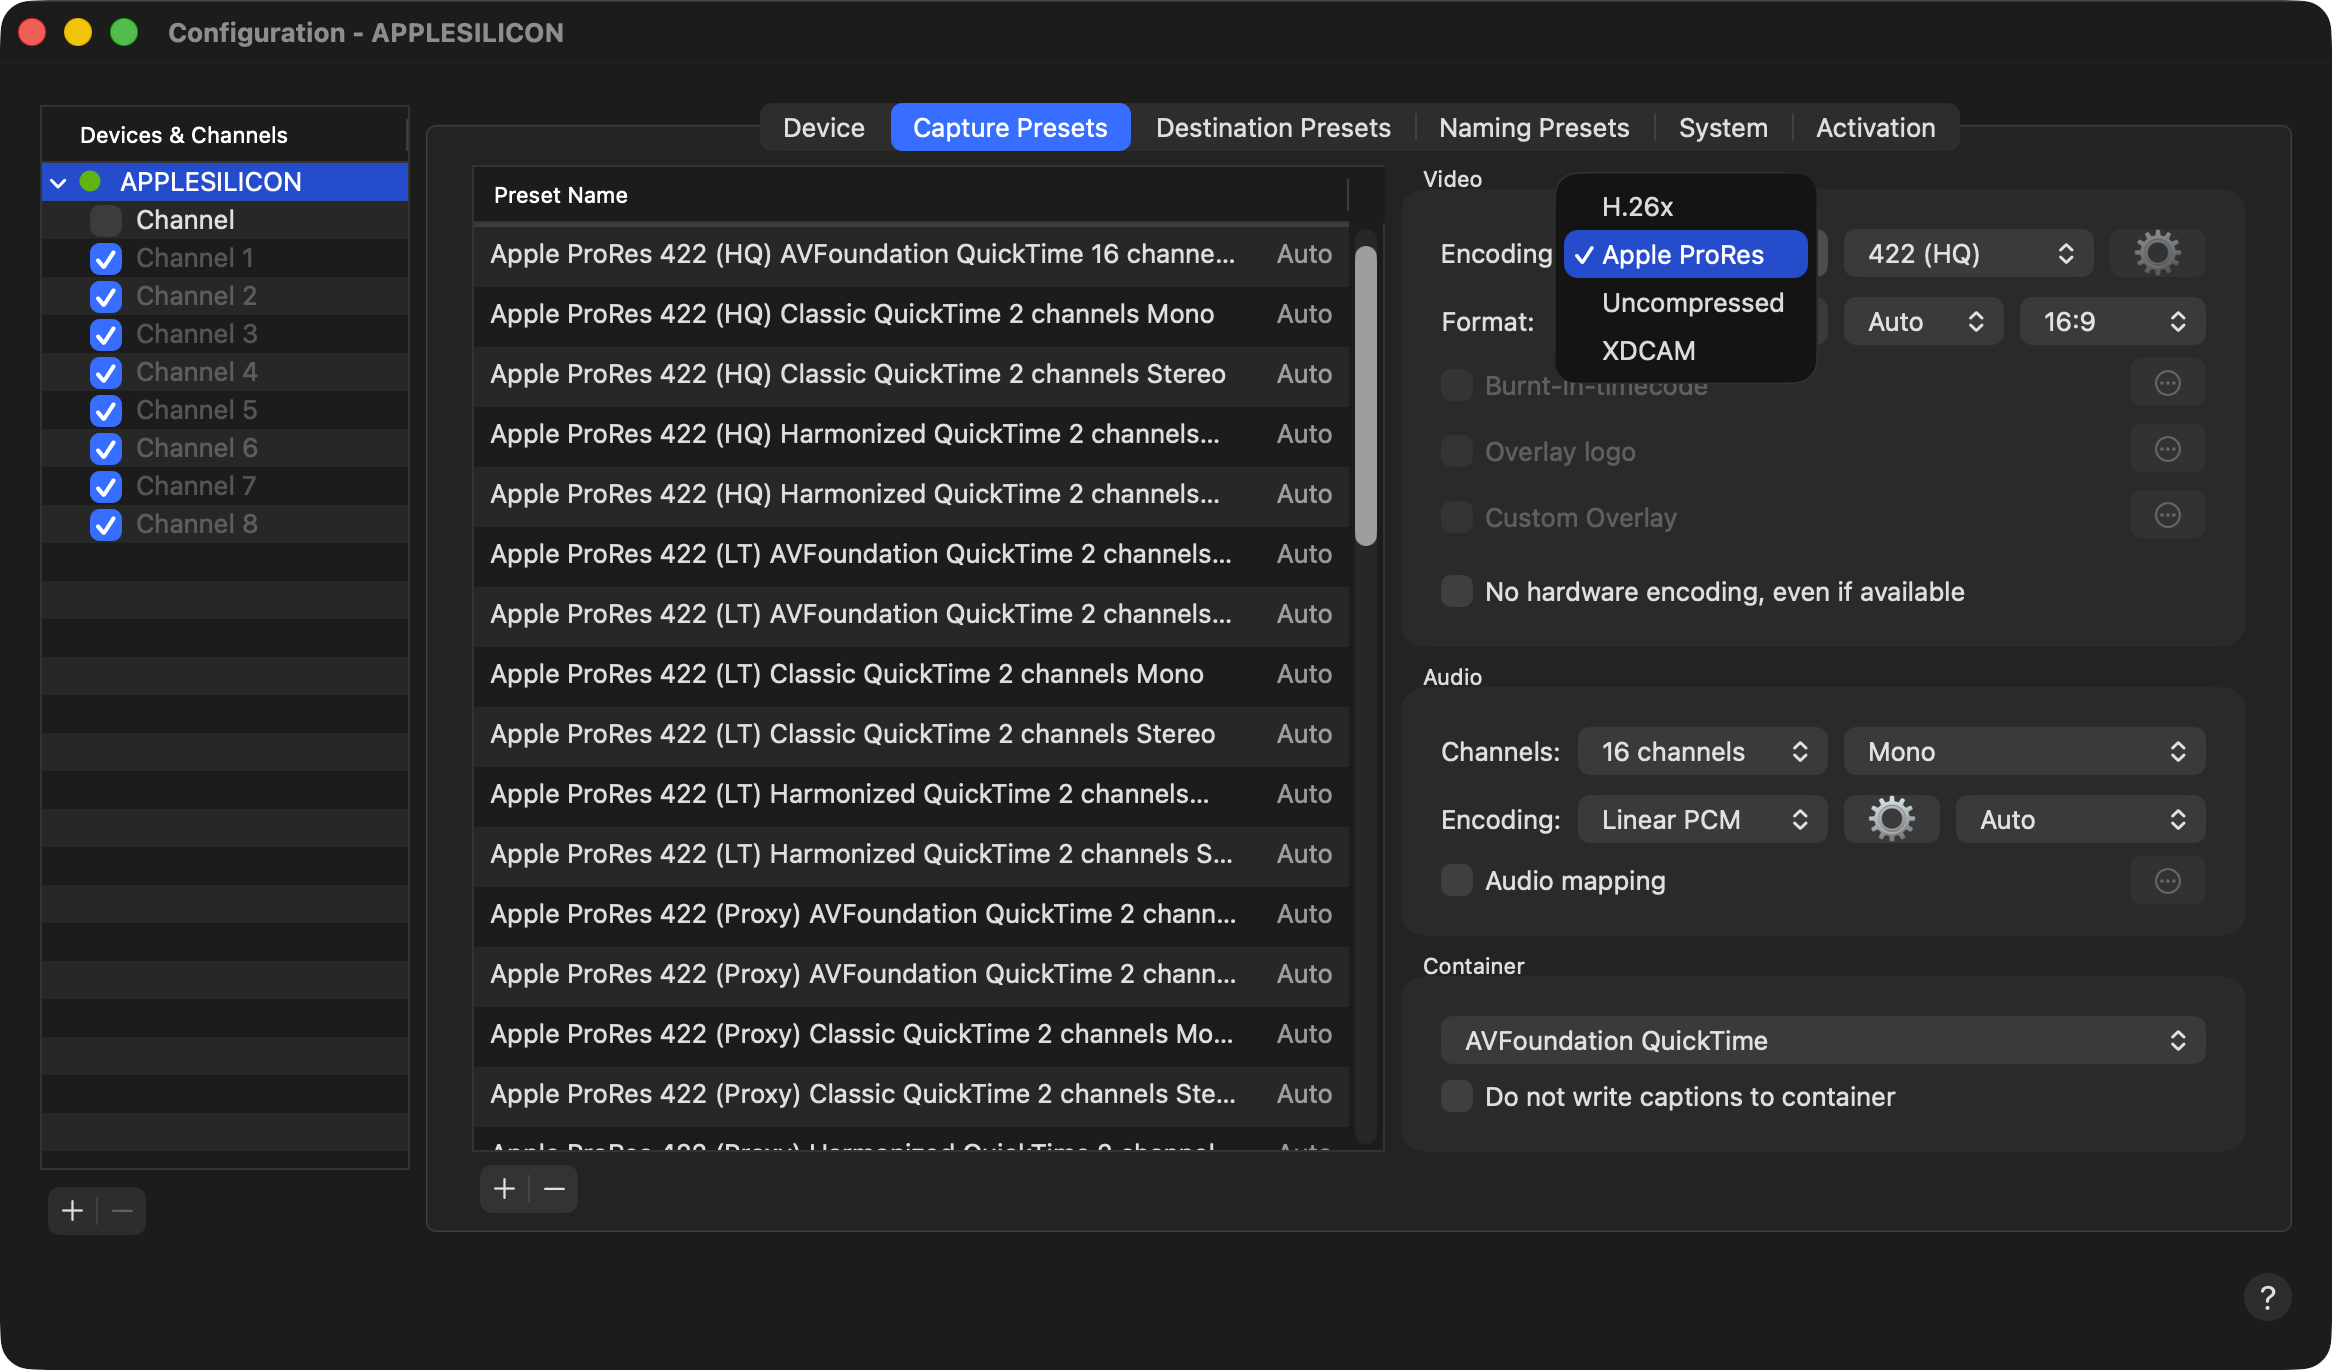
Capture Preset List: shows all available Capture Presets. Use the buttons below to add and remove Capture Presets. Double-click on a Capture Preset Name to adjust the Preset Name.
Capture Preset Configuration Options: Set the required options for a Capture Preset:
“Encoding”: select the appropriate Codec and one of the available profiles (e.g. 422 (HG) for ProRes)
“Format”: select either “Auto” (to match the Channel video mode “Auto” setting) or one of the available resolutions (e.g., HD 1080) or frame rates.
“Aspect Ratio”: select the Aspect Ratio.
“Audio Channels”: select the number of Audio Channels and the Audio Track Alignment (Mono or Stereo). For “Linear PCM” encoding, you can choose between 16 bit, 24 bit and 32 bit rate by clicking on the cogwheel icon. For AAC (H.264 MP4) encoding, you can select 44100 Hz or 48000 Hz sample rate by again clicking on the cogwheel icon.
“Container”: choose the appropriate container (AVFoundation QuickTime (MOV), MXF or MP4)
“Audio Mapping”: use this option to change the audio output mapping for the recorded files.
“No hardware encoding, even if available”: Activate this setting if you wish to bypass encoding using the designated hardware encoder. Instead, opt for CPU-based processing for this particular encoding procedure. This feature proves exceptionally beneficial when dealing with multichannel recording situations involving the utilisation of multiple capture IDs.
“Do not write captions to container”: enable this option if you would rather not write closed caption data into the recorded file.
Add a Capture Preset
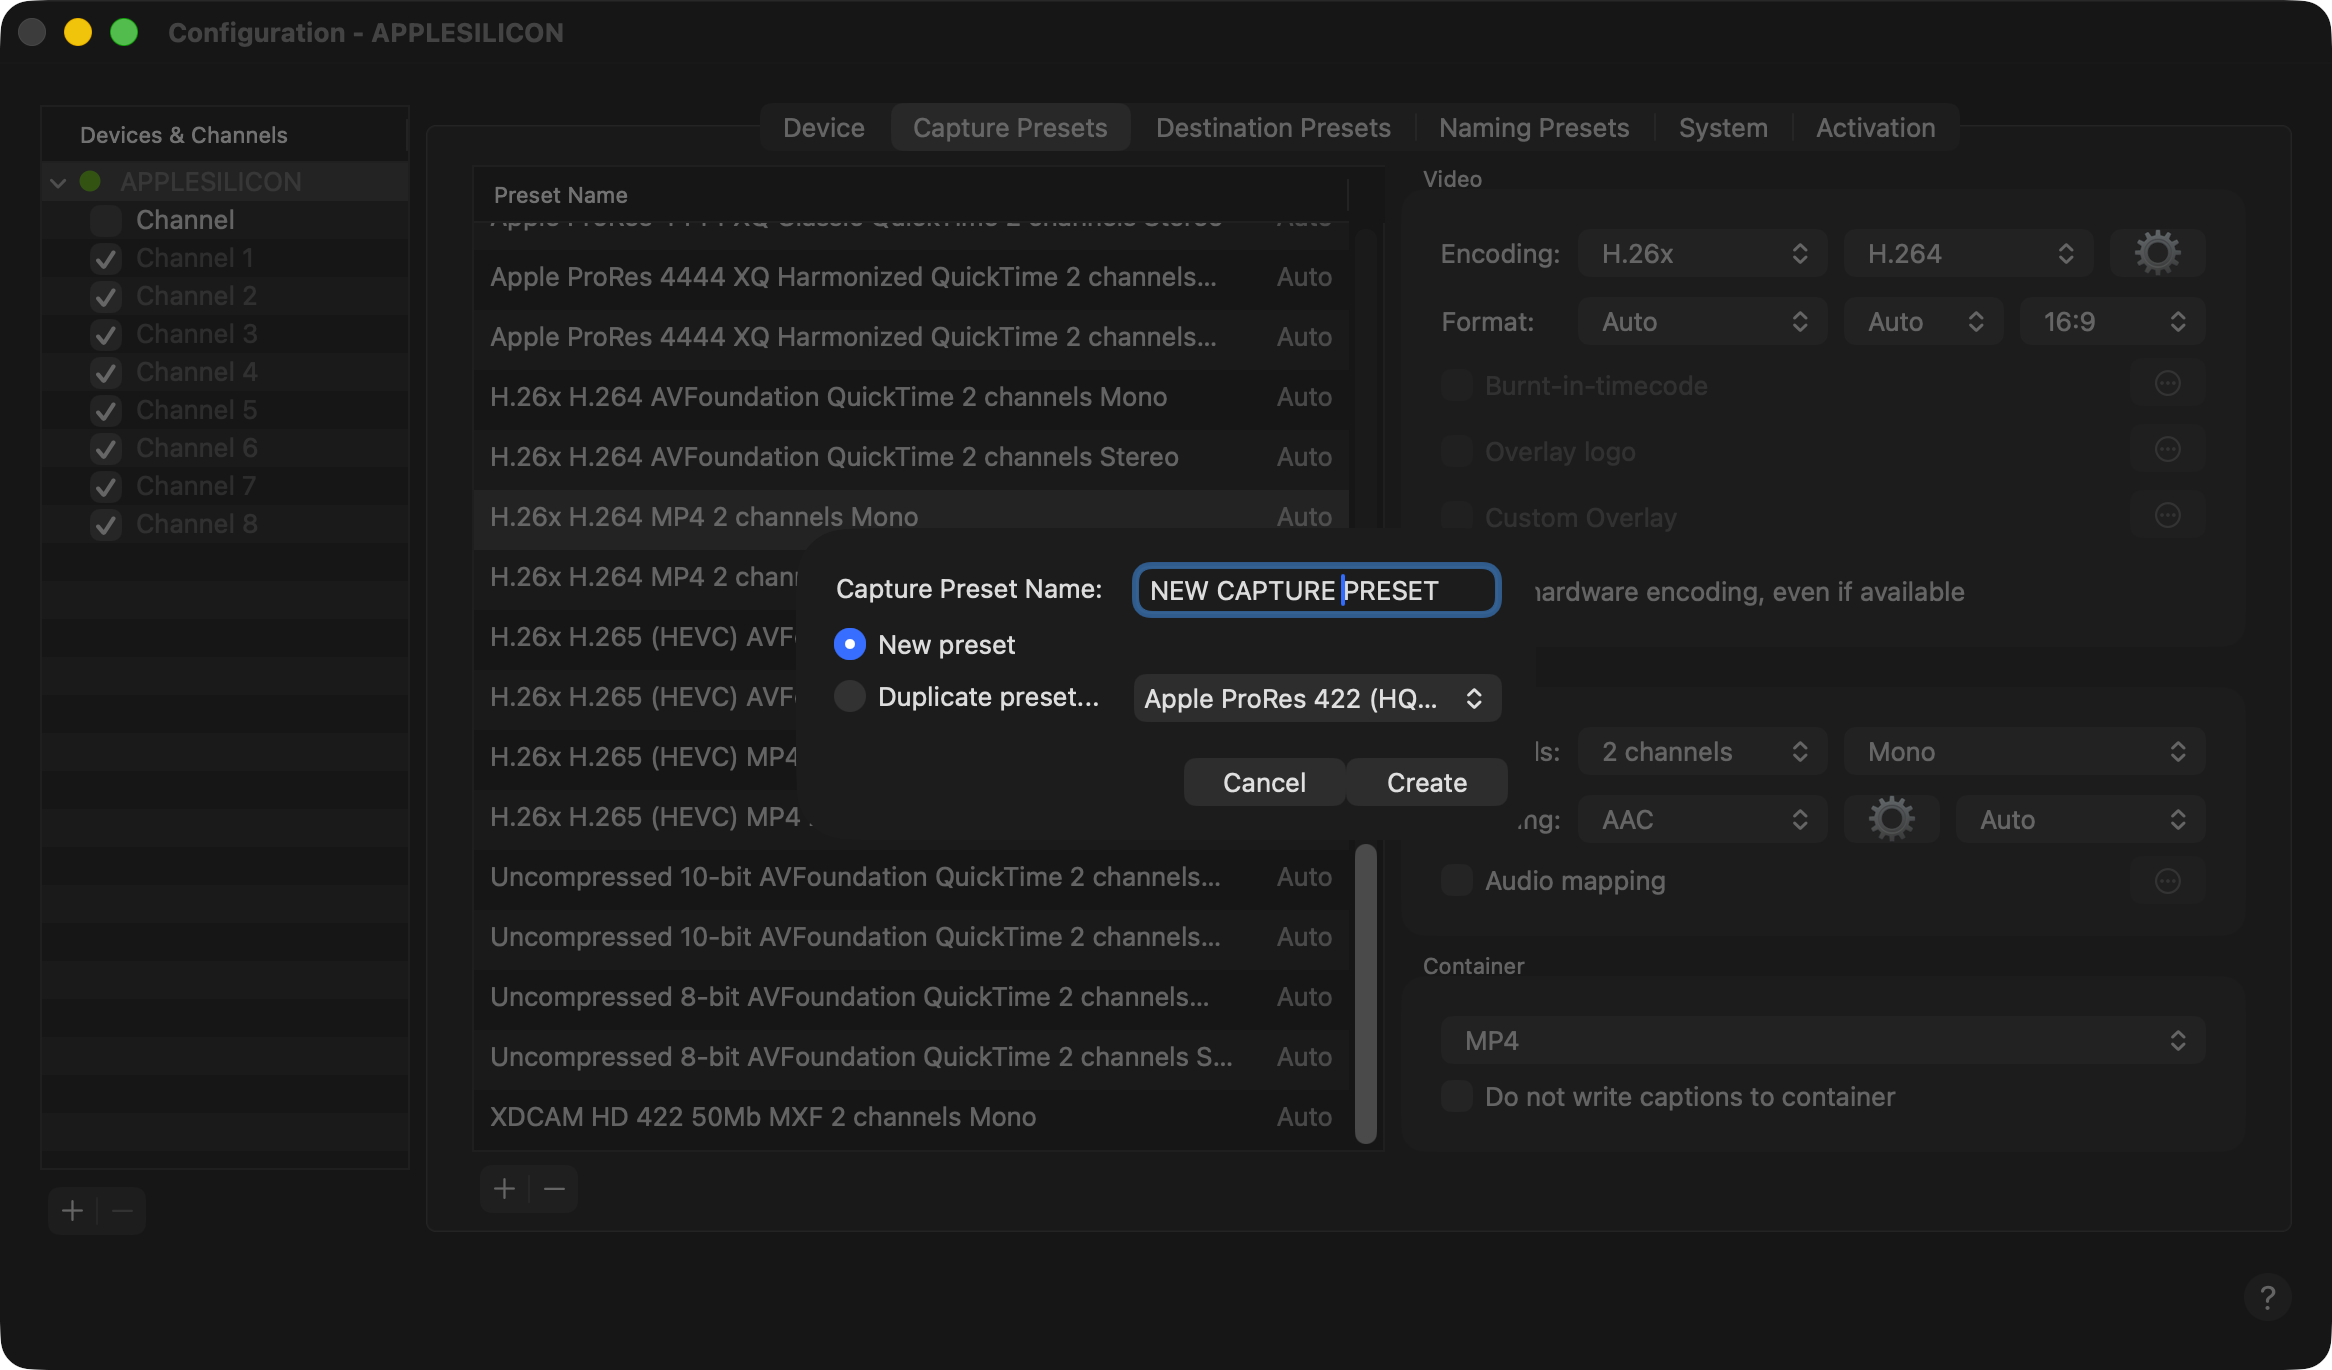
In the “Device & Channel List” select a Device. Click on the “Capture Presets” tab and press the Plus ("+") button to add a new Preset.
A new window appears, where you have to enter the Name of the new “Capture Preset”. Press the “Create” button to go back to the Preset option.
Next, configure the new “Capture Preset”. It will be saved automatically after all options have been set.
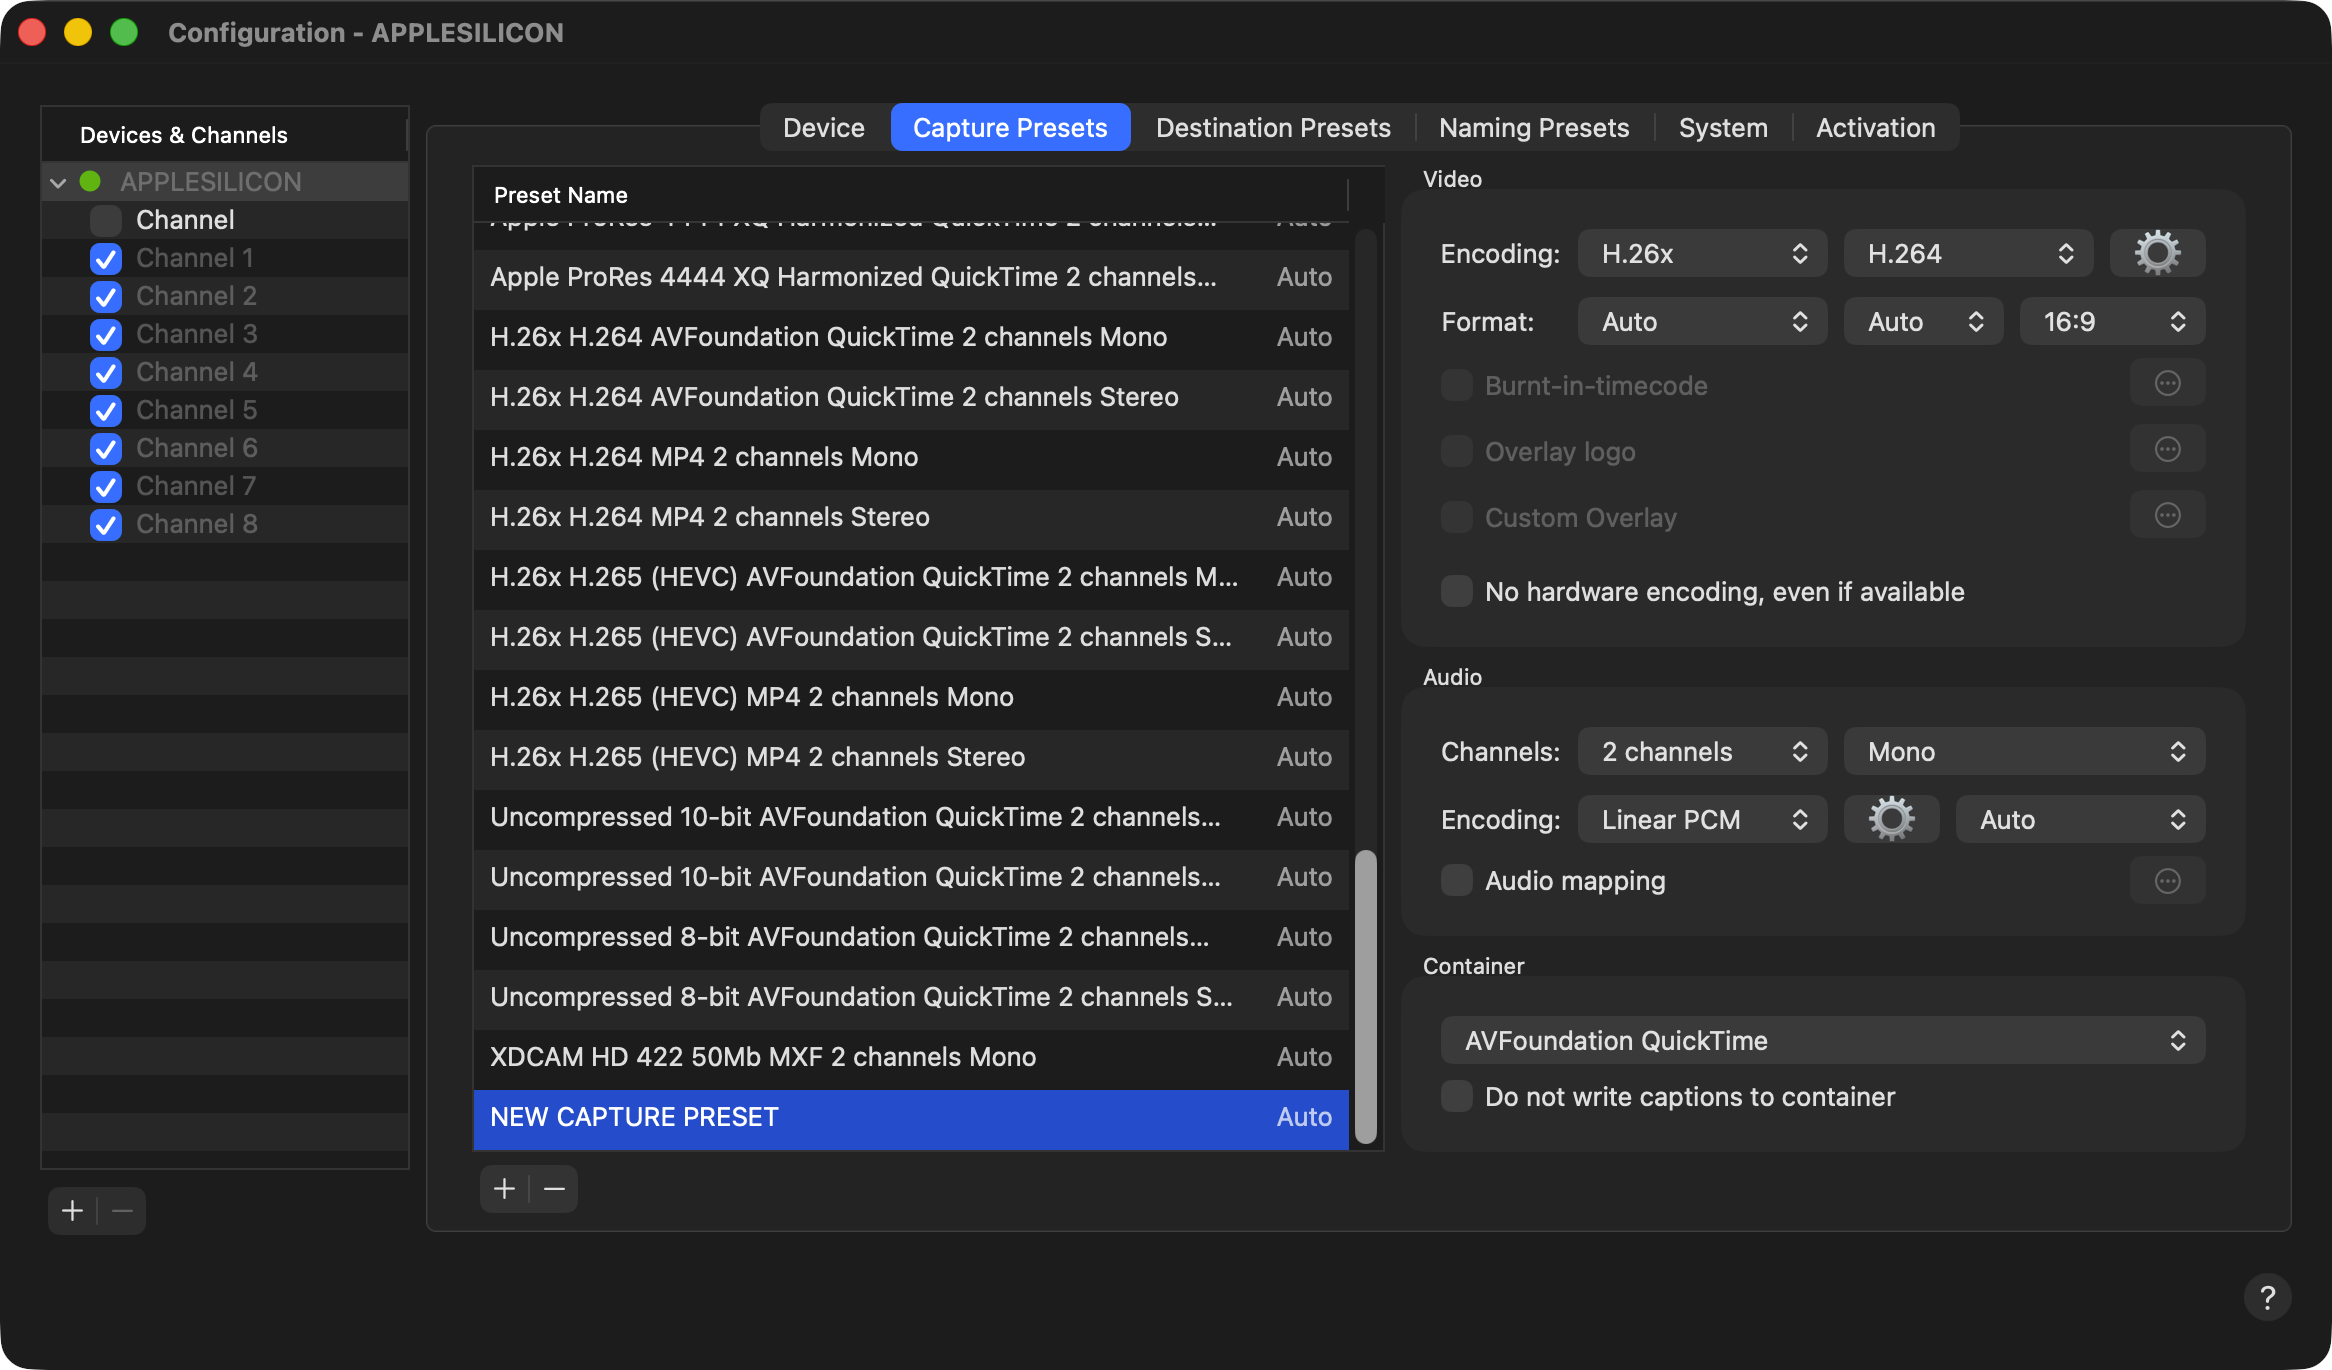
Capture Preset options can be changed at any time.
Edit an existing Capture Preset
Select an existing Capture Preset and change the options on the right side. The changes will be saved automatically.
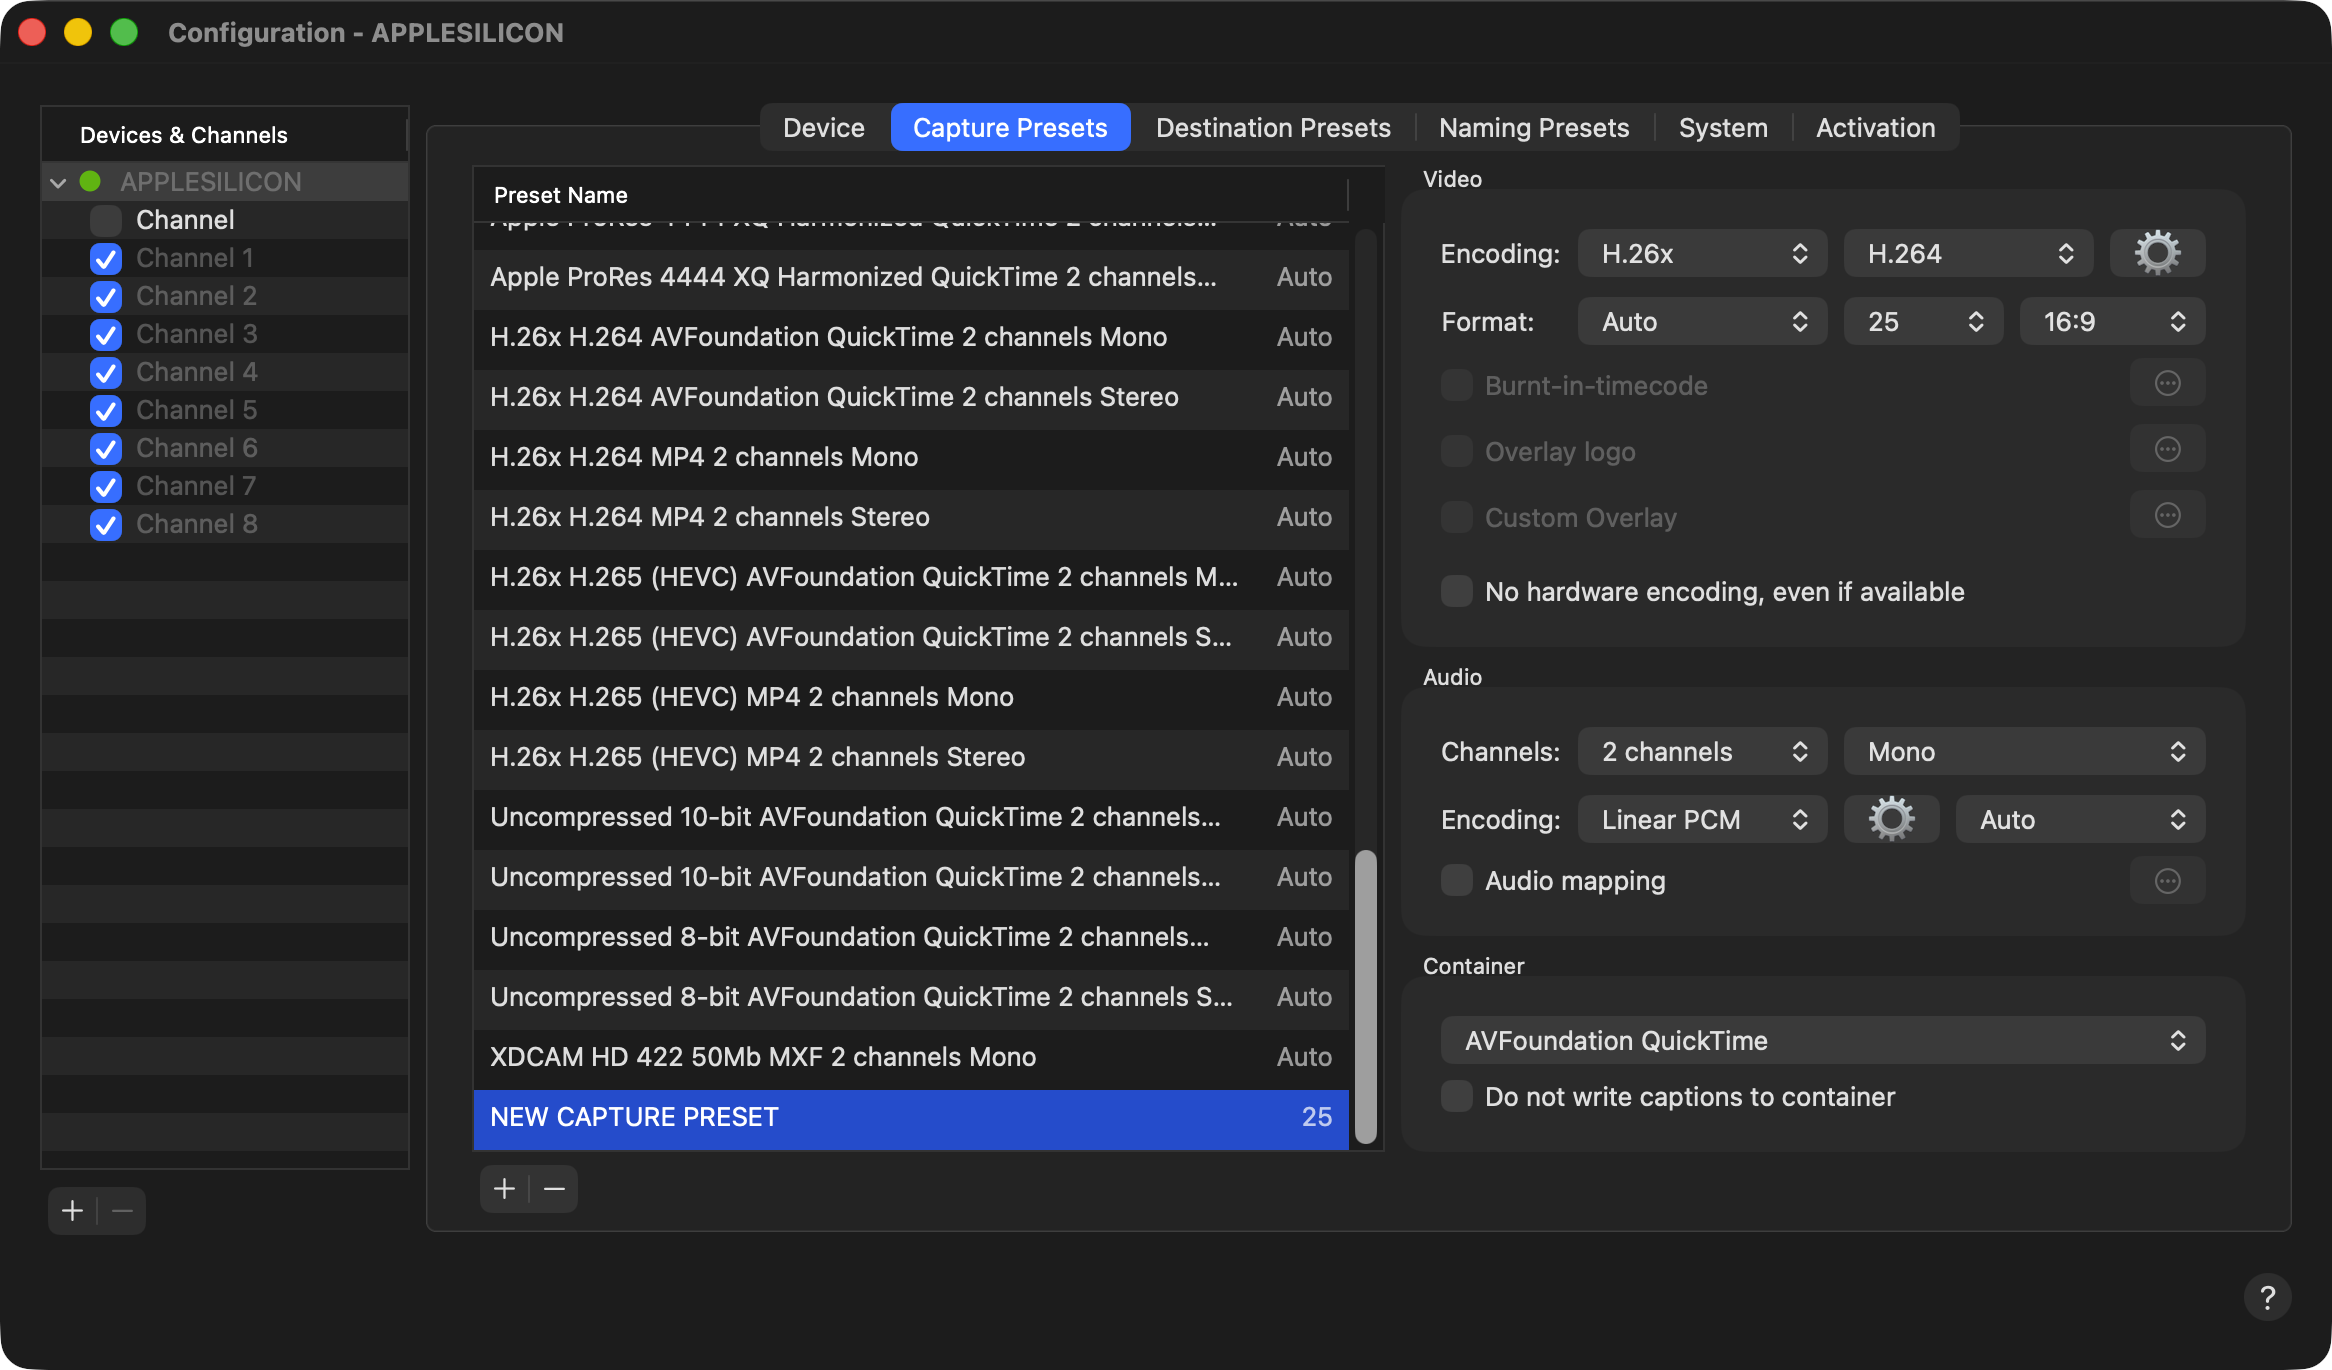
Remove a Capture Preset
Select an existing Capture Preset and use the Minus ("-") button below the Capture Preset list to remove the selected Capture Preset.
Audio Channels Settings
You can choose between “2”, “4”, “8” and “16” Audio Channels as well as Audio Track Alignment (“Mono” or “Stereo”), Sample Rate and Audio Bit Rate (16-32 bit) for “Capture Presets”.
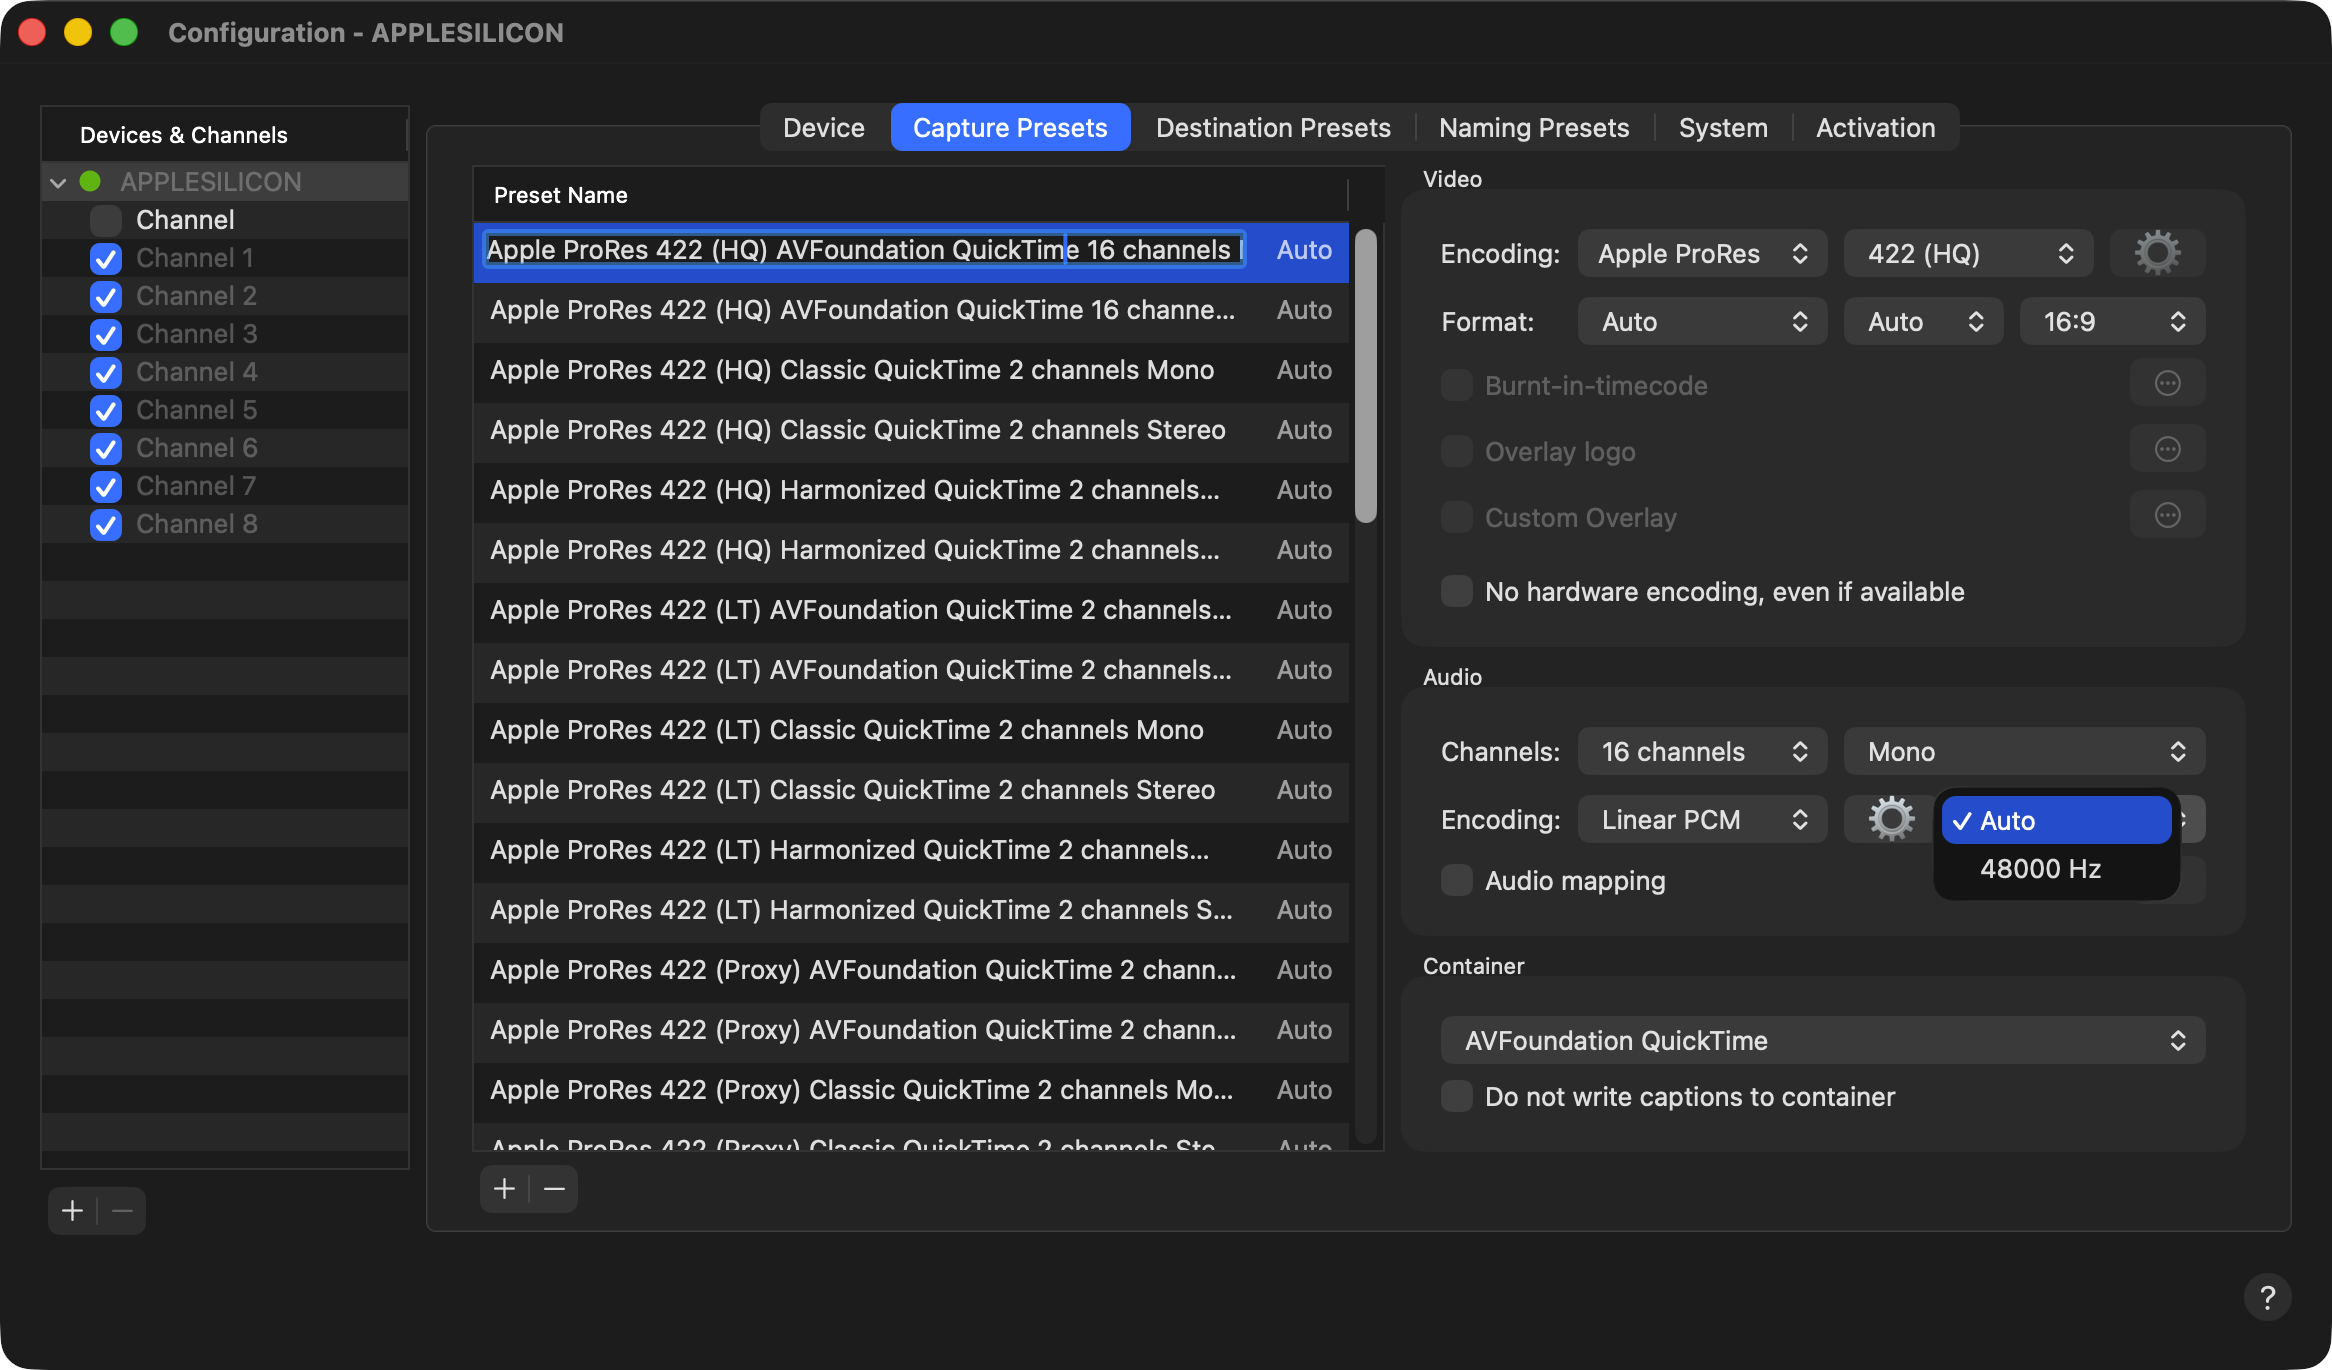
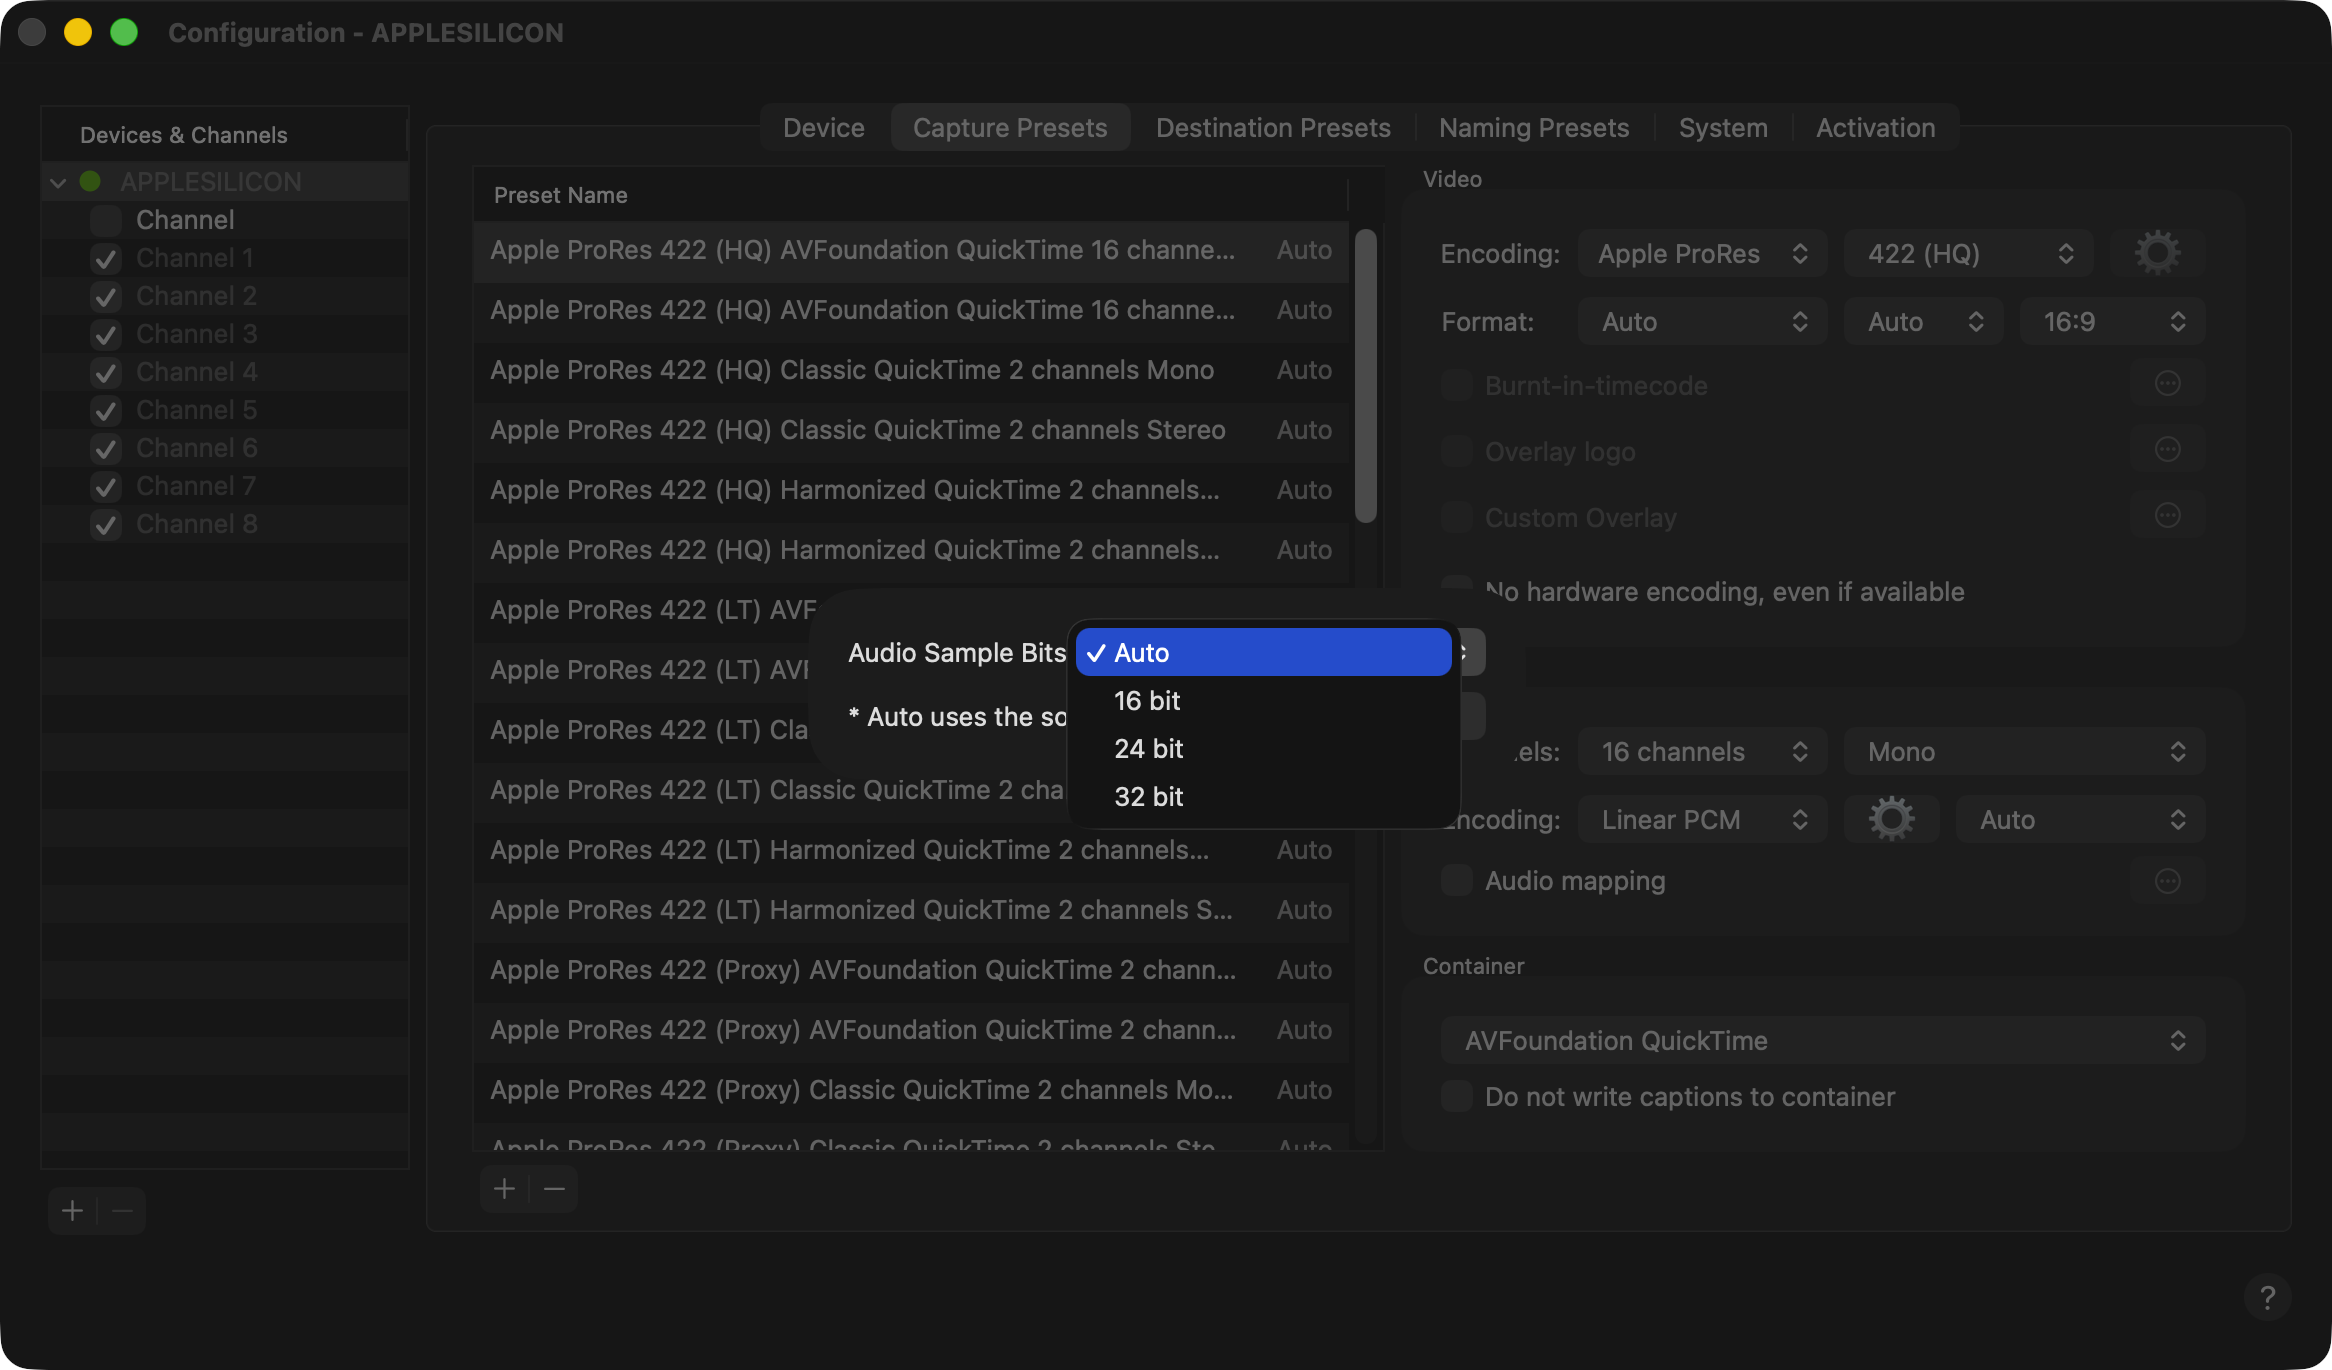
Please note, that some codec/container options allow only “2”, “4” or “8” Audio channels as options.
Audio Mapping
The “Audio Mapping” option enables the possibility to adjust the output mapping for the recorded video files of the incoming audio channels in a simple way.
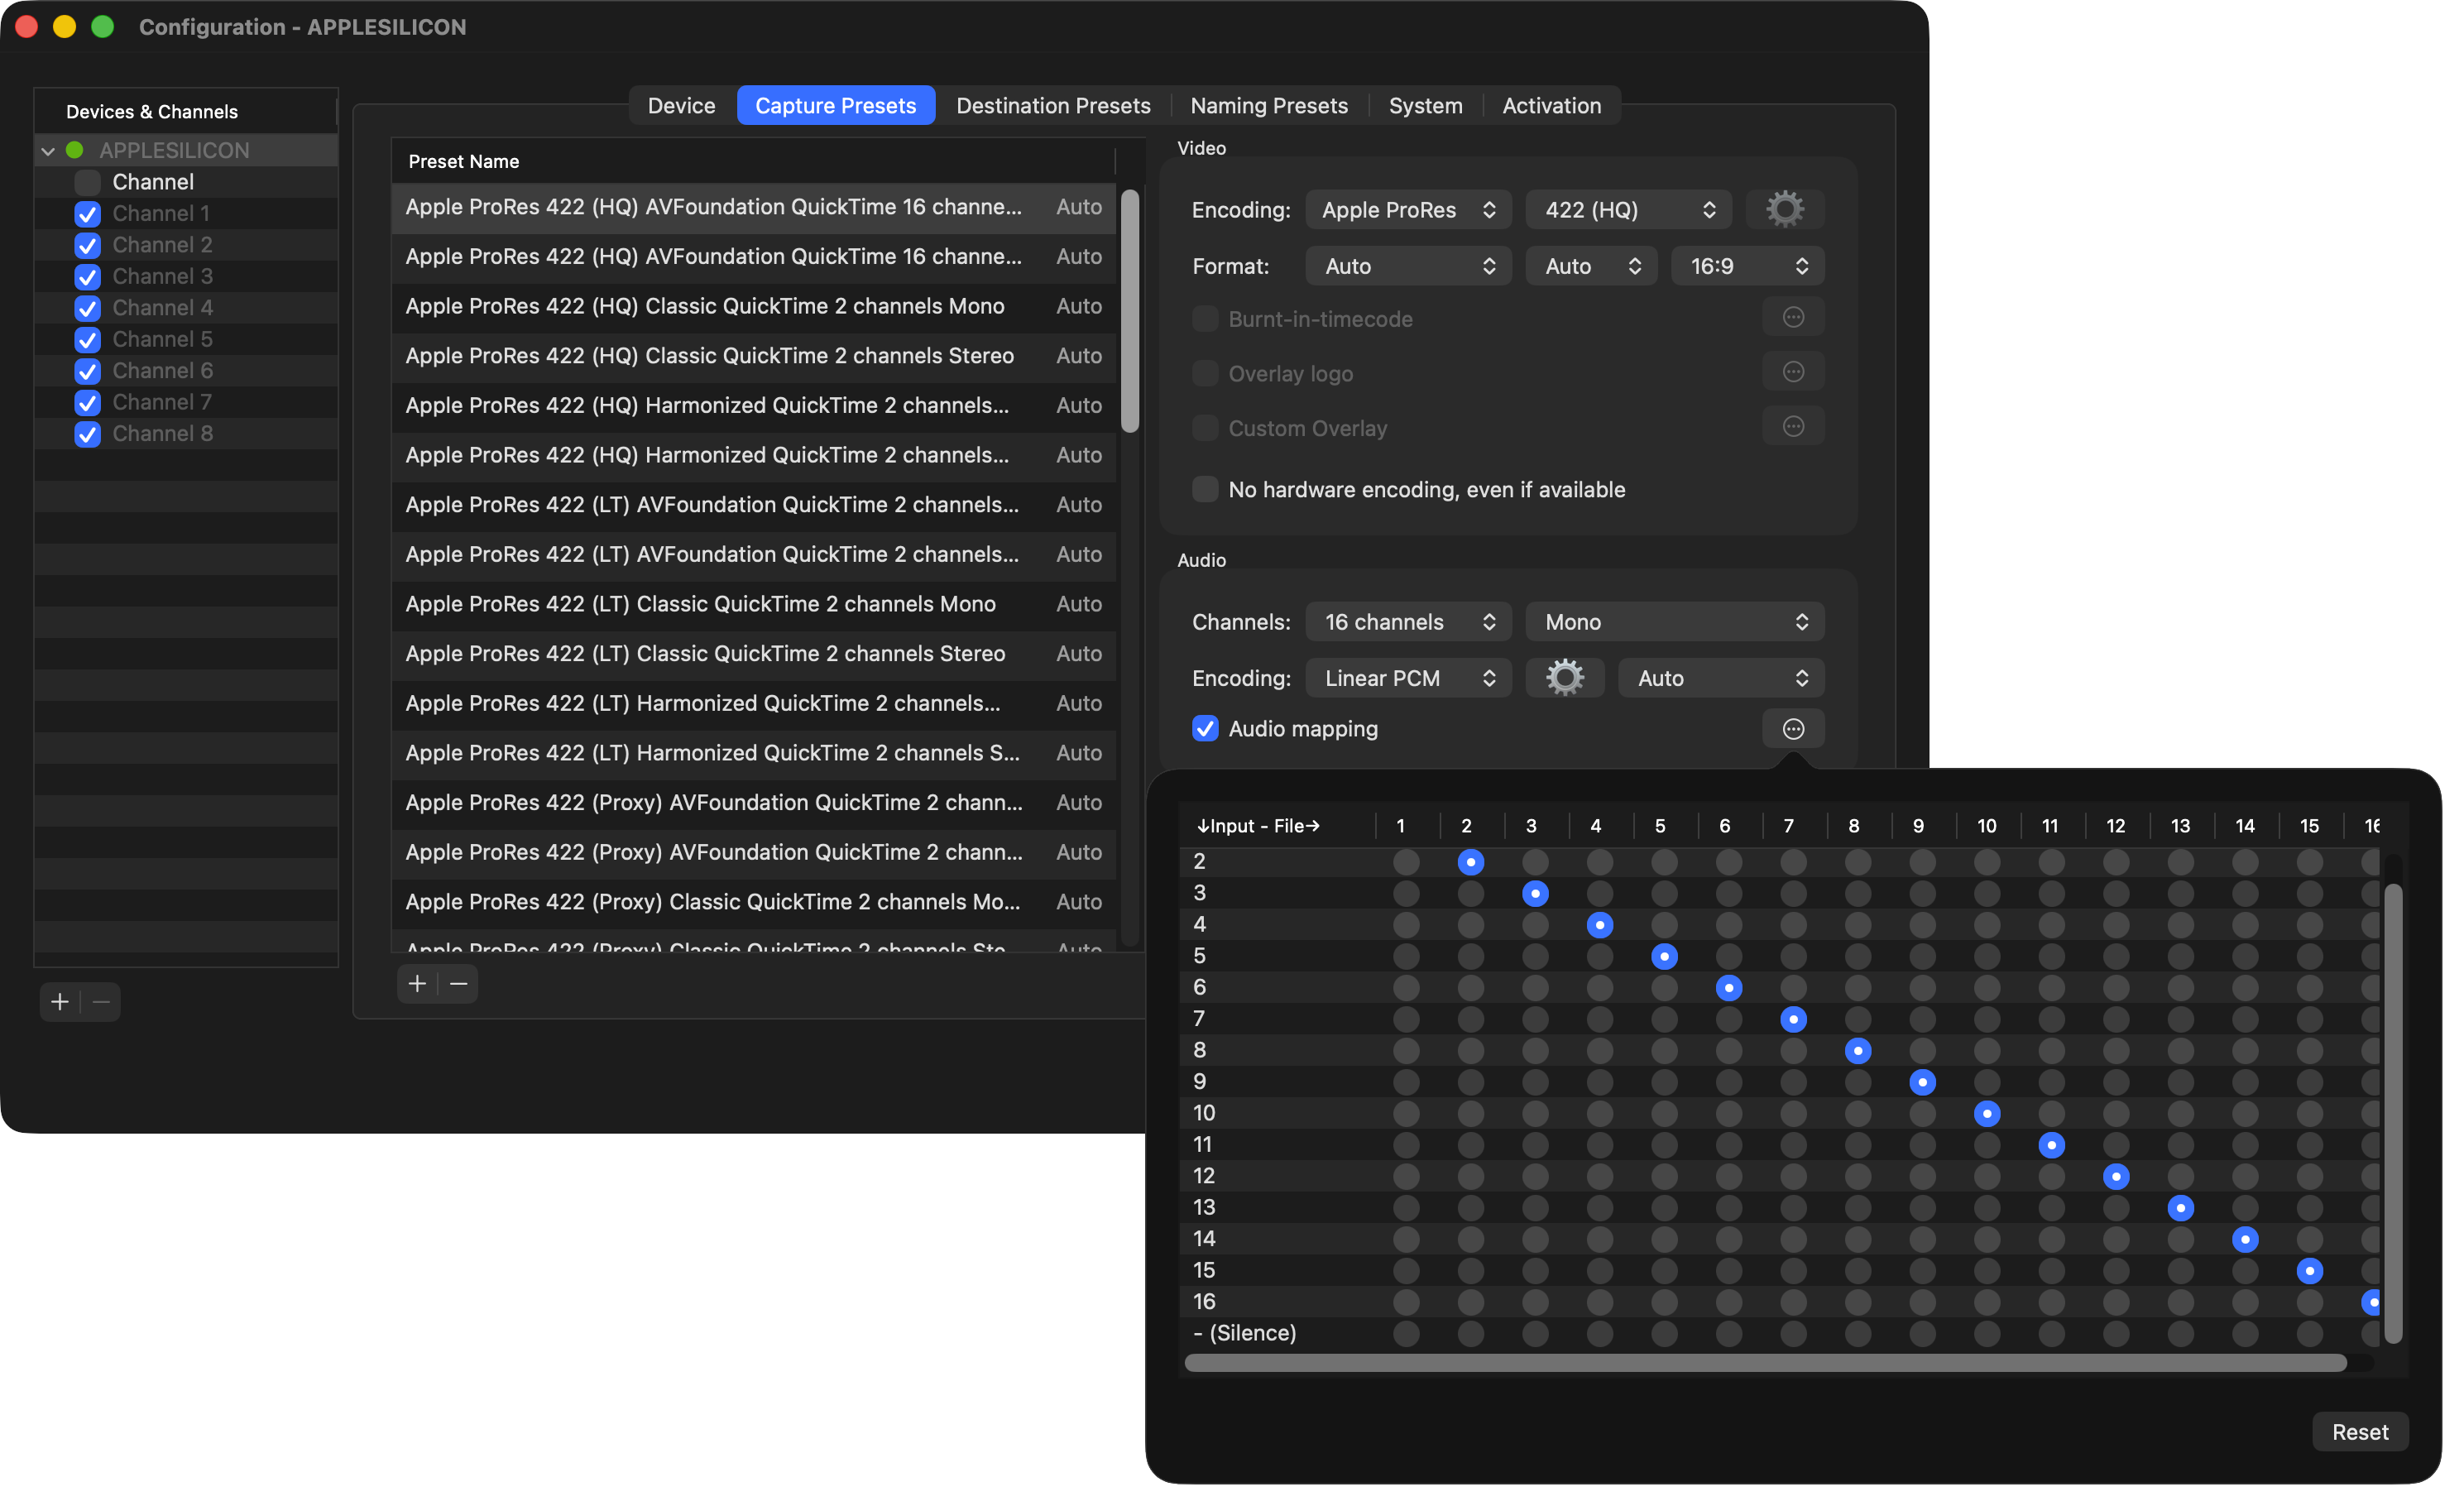
You can set an Audio Output Track to “Silence” as well if needed.
Enhanced Growing Files Support in v.2026.x
Just In Mac Lite 2026.x supports growing files (for macOS and Windows-based NLEs) with various formats. If you have specific needs or questions, please do not hesitate to contact us. When working with Adobe Premiere Pro as your NLE of choice, please refer to this https://helpx.adobe.com/premiere-pro/using/supported-file-formats.html?x-product=Helpx%2F1.0.0&x-product-location=Search%3AForums%3Alink%2F3.6.4 article as well.
Please only use Adobe Premiere Pro v. 26.0.2 and do not upgrade to v. 26.2.0 or higher as version 26.2.x does not parse the video essence information correctly and therefore the video will not grow!
Adobe Premiere Pro MOV Container Support
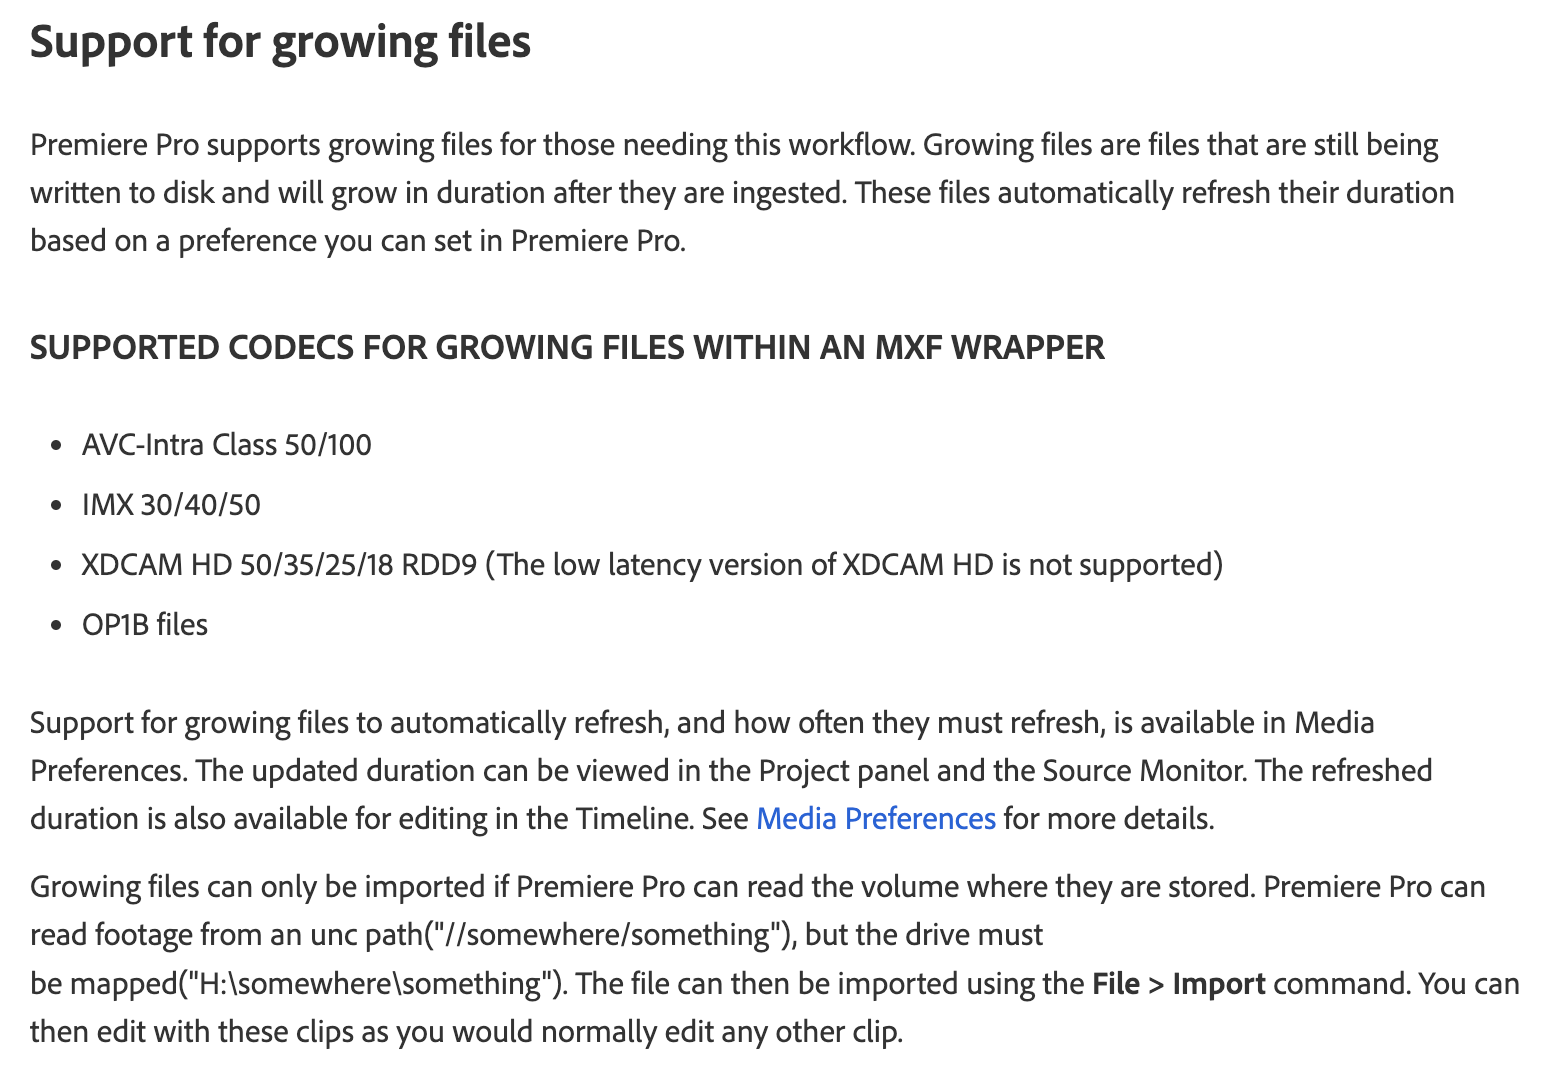
Although the official recommendation of Adobe is to use the MXF container with the supported codecs, we are introducing the seamless new Classic QuickTime container format to allow the usage of growing files in a MOV container within Adobe Premiere Pro 25.x and 26.0.2. This container will work in combination with Apple ProRes codecs to take advantage of the hardware accelerated Media Engines available in the Apple silicon (M1-M5) Macs.
DaVinci Resolve MOV Container Support
When using Blackmagic Design’s DaVinci Resolve v.18.6.x/19.x/20.x/21.x, working with growing files is partially possible by using direct-attached storage and with specific codec/container combinations. Tests with network-attached storage showed inconsistent behaviour, and therefore it is not recommended. Please do not hesitate to contact us, to get additional information or to discuss your recording and editing workflow when using DaVinci Resolve 18.6.x/19.x/20.x/21.x.
Although the Just In Mac Lite 2026 application generates correct and standard-compliant Growing files in an AVFoundation MOV container, there’s an ongoing issue with parsing them correctly within DaVinci Resolve v.18.6.x/19.x/20.x/21.x resulting in the non-continuous display of the audio waveform. This means that editors cannot hear any audio after a short amount of time when a growing file in an AVFoundation MOV container is imported into DaVinci Resolve v.18.6.x/19.x/20.x/21.x. This issue is unfortunately out of our control and has been reported to the DaVinci Resolve team to be reviewed.
That’s why we are introducing the seamless new Harmonized QuickTime container format to allow the usage of growing files in a MOV container within DaVinci Resolve 19.x/20.x/21.x. This container will work in combination with Apple ProRes codecs to take advantage of the hardware accelerated Media Engines available in the Apple silicon (M1-M5) Macs.
You can download a PDF document describing the “Supported Formats and Codecs” from the Blackmagic Design homepage (URL may change over time):
For DaVinci Resolve 18.6.x:
DaVinci Resolve 18 Supported Codecs
For DaVinci Resolve 19.x:
DaVinci Resolve 19.1 Supported Codecs
For DaVinci Resolve 20.x: