
Trim Window
Select a movie in the Library, Workbench, or Timeline and press “Command-T” (or press the “Trim” button at the bottom of the Library) to open the Trim Window. This window, allows you to set a new In- and Outpoint as well as a new Poster frame.
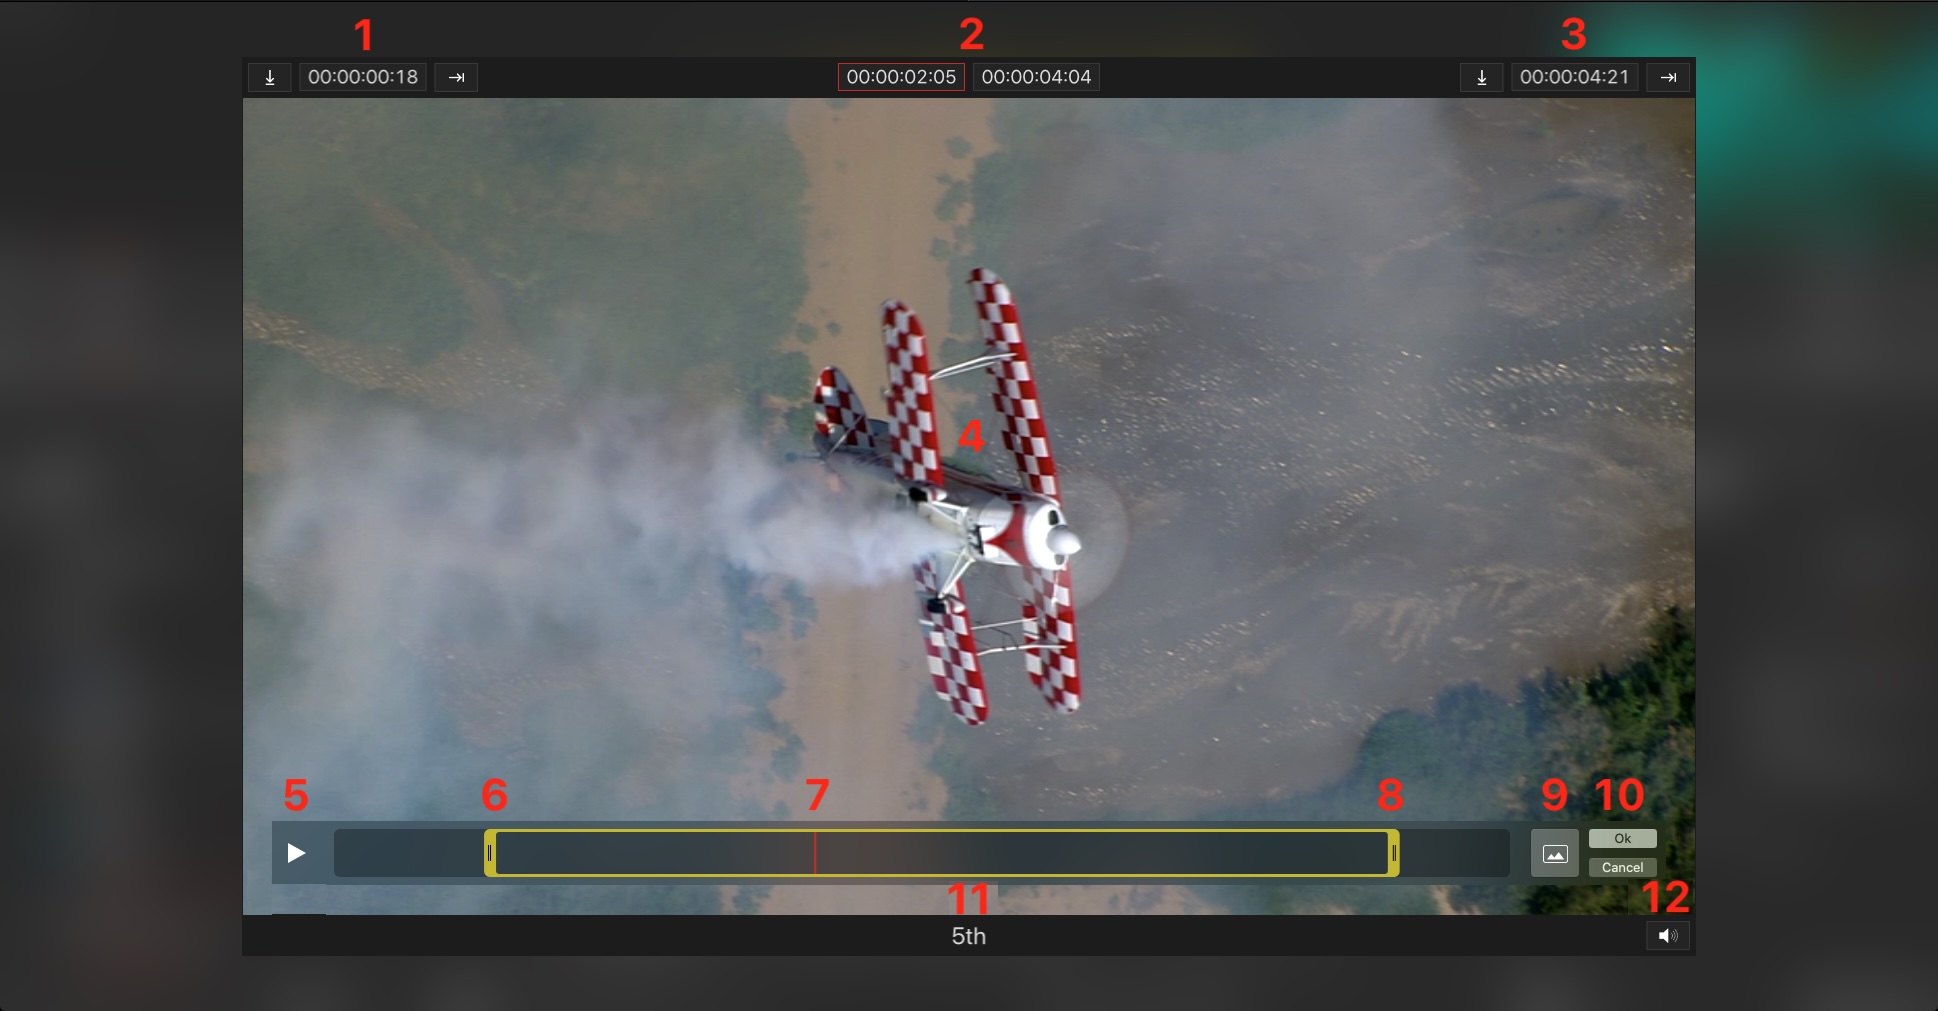
In-Point: Defines the in-point of a Video clip. Shows the current in-point. Go to in-point.
Timecode: Shows the position of the CTI. Shows the duration defined by in- and out-point.
Out-Point: Defines the out-point of a Video clip. Shows the current out-point. Go to out-point.
Viewer: Shows the Video clip depending on the position of the CTI.
Play Button: Play/Pause the Video clip. You can also use the “J-K-L” keys on your keyboard.
Trim handle In-Point: Move the YELLOW (🟡) Trim Handle to define the in-point.
CTI: Shows the current time. Drag and scratch in the timeline to scrub through the Video clip.
Trim handle Out-Point: Move the YELLOW (🟡) trim handle to define the out-point.
Set Poster frame or Split Movie: Allows to define the image which is shown in the Viewer as the poster frame of the Video clip, in case the Video clip has been selected in the Library. In case the Video clip has been selected in one of the other preview windows, the ability to change is not available and the button changes, so the Video clip can be split at the current position.
OK/Cancel: Click on the “OK” button to take over the changes you made, otherwise click on “Cancel”.
Name of the Movie: Shows the name of the Video clip currently loaded in the Trim Editor
Audio Preview: Toggle the ability to hear the audio or not
Defining a new in/out-point and/or poster frame of a video in the Library, will write this information to the metadata XML sidecar file, which has the same name as the Video file and which is stored in the same repository as the respective Video files. Doing so, those new attributes will be taken over from now, every time the Video clip is added to the Workbench.
The resulting length can be seen in the corresponding column of the Library.
Defining a new in/out-point and/or poster frame of a video in the Workbench/Timeline, will change the attributes only for the selected video, but not for the same video in the Library or Workbench/Timeline.
Splitting a Video Clip
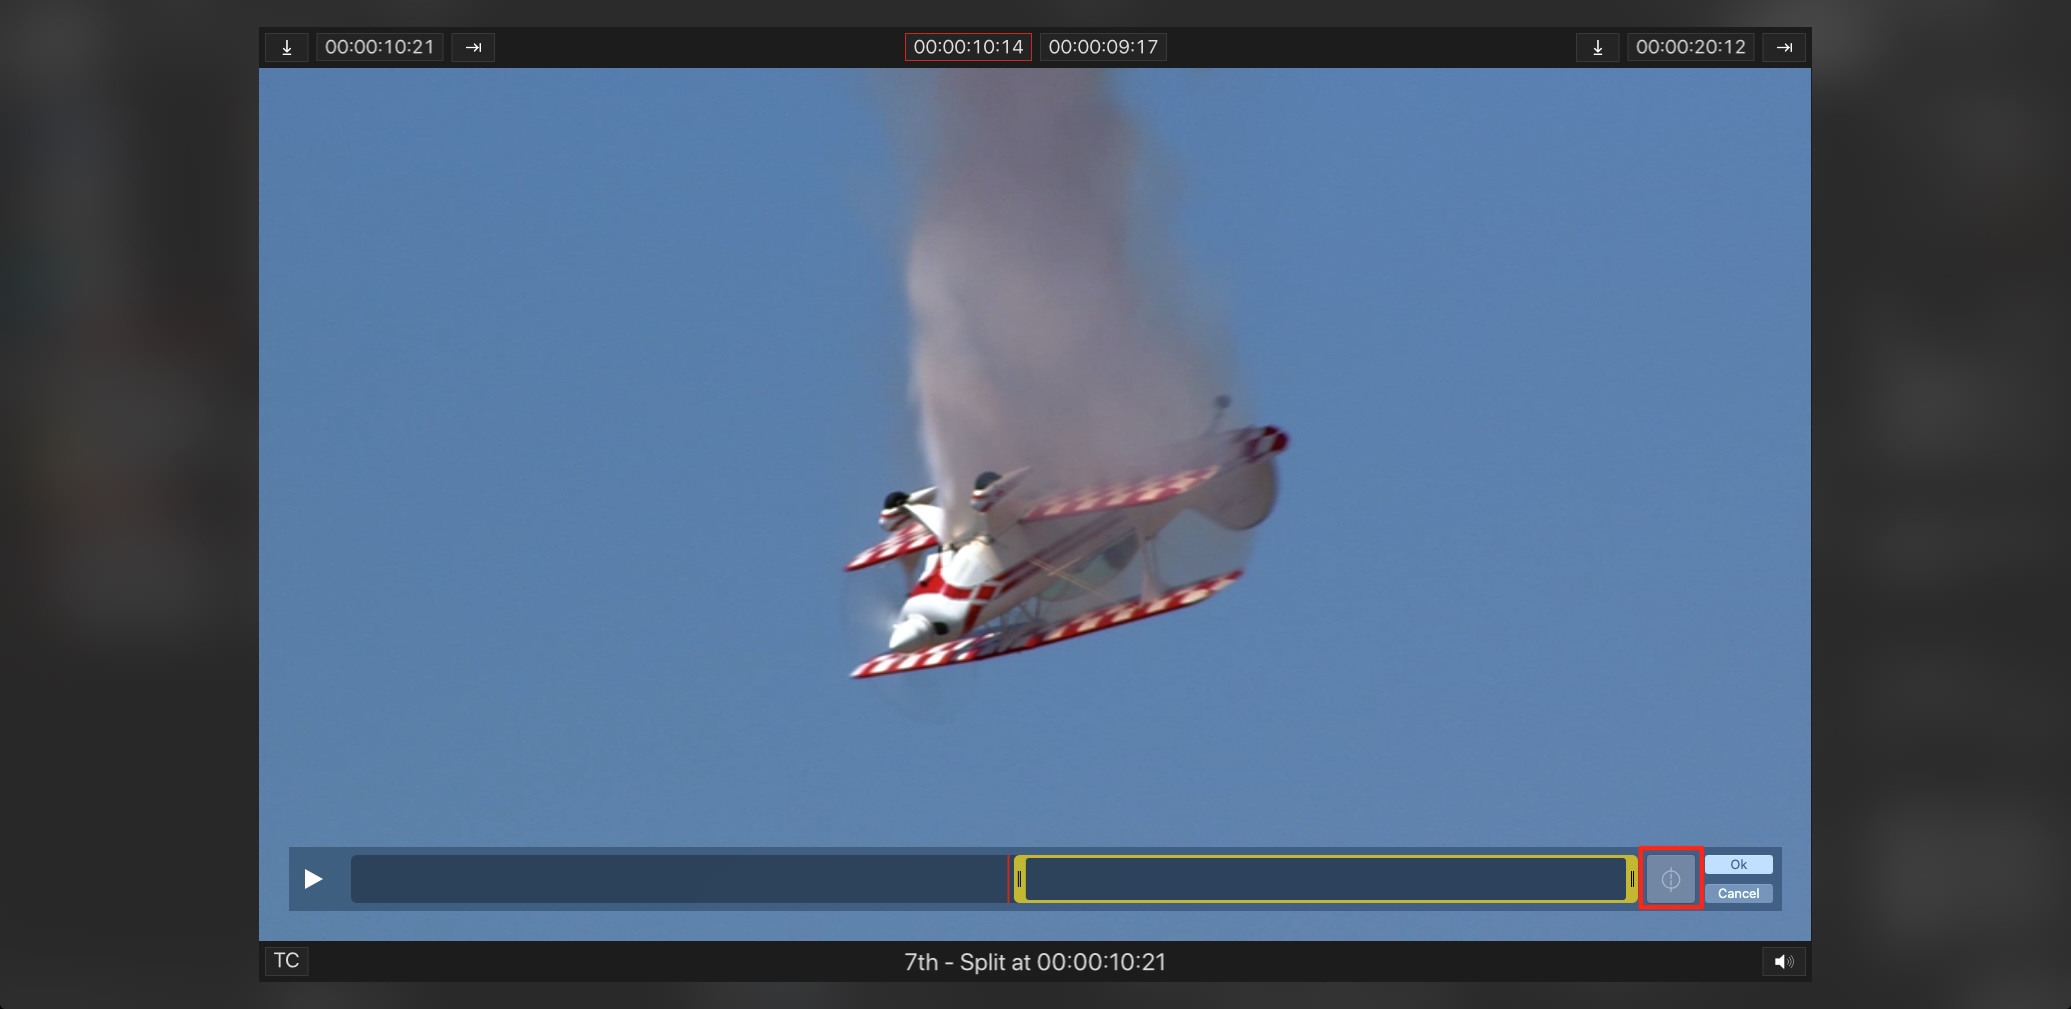
Select the video you want to trim in the Workbench or the Timeline.
Press “Command-T” or use the Trim Clip button in the lower right of the Inspector to open the Trim editor.Move the CTI to the position you would like to do the split.
Press the “Split Clip” button in the lower right of the “Trim window” to split the Video at the selected position.
The second part of the split is loaded for more splits.
Trim window shortcuts
Control-J: If the player is stopped or playing, play backwards 1x, otherwise cycle between playing backwards at 2x/5x/10x/30x/60x
Control-K: Stop
Control-L: If the player is stopped or playing backwards, play forwards 1x, otherwise cycle between playing forwards at 2x/5x/10x/30x/60x
Control-I: Jump to the current in-point
Control-Option-I: Set the in-point to the current time
Control-O: Jump to the current out-point
Control-Option-O: Set the out-point to the current time
Left cursor: Move back one frame
Right cursor: Move forward one frame
Space: Cycle between play and stop