
Just Live Lite NDI · 2026 documentation

Inspector (v.2026.x)

Tabs

The Just Live Lite NDI Inspector has two or three tabs showing

  • SCHEDULE - the attributes of a selected item

  • INFINITE Graphics - the Attributes of the Infinite realtime GFX element defined by the Administrator

  • CHANNEL - channel related settings which you can change without stopping the Channel

Using the Inspector

  • Enter values directly using the keyboard.

  • Use the “Up/Down Arrow” keys to increase/decrease values.

  • Use the “Left/Right arrow” keys to switch between values.

  • Use the “Tab” key to switch between fields.

Inspector Overview

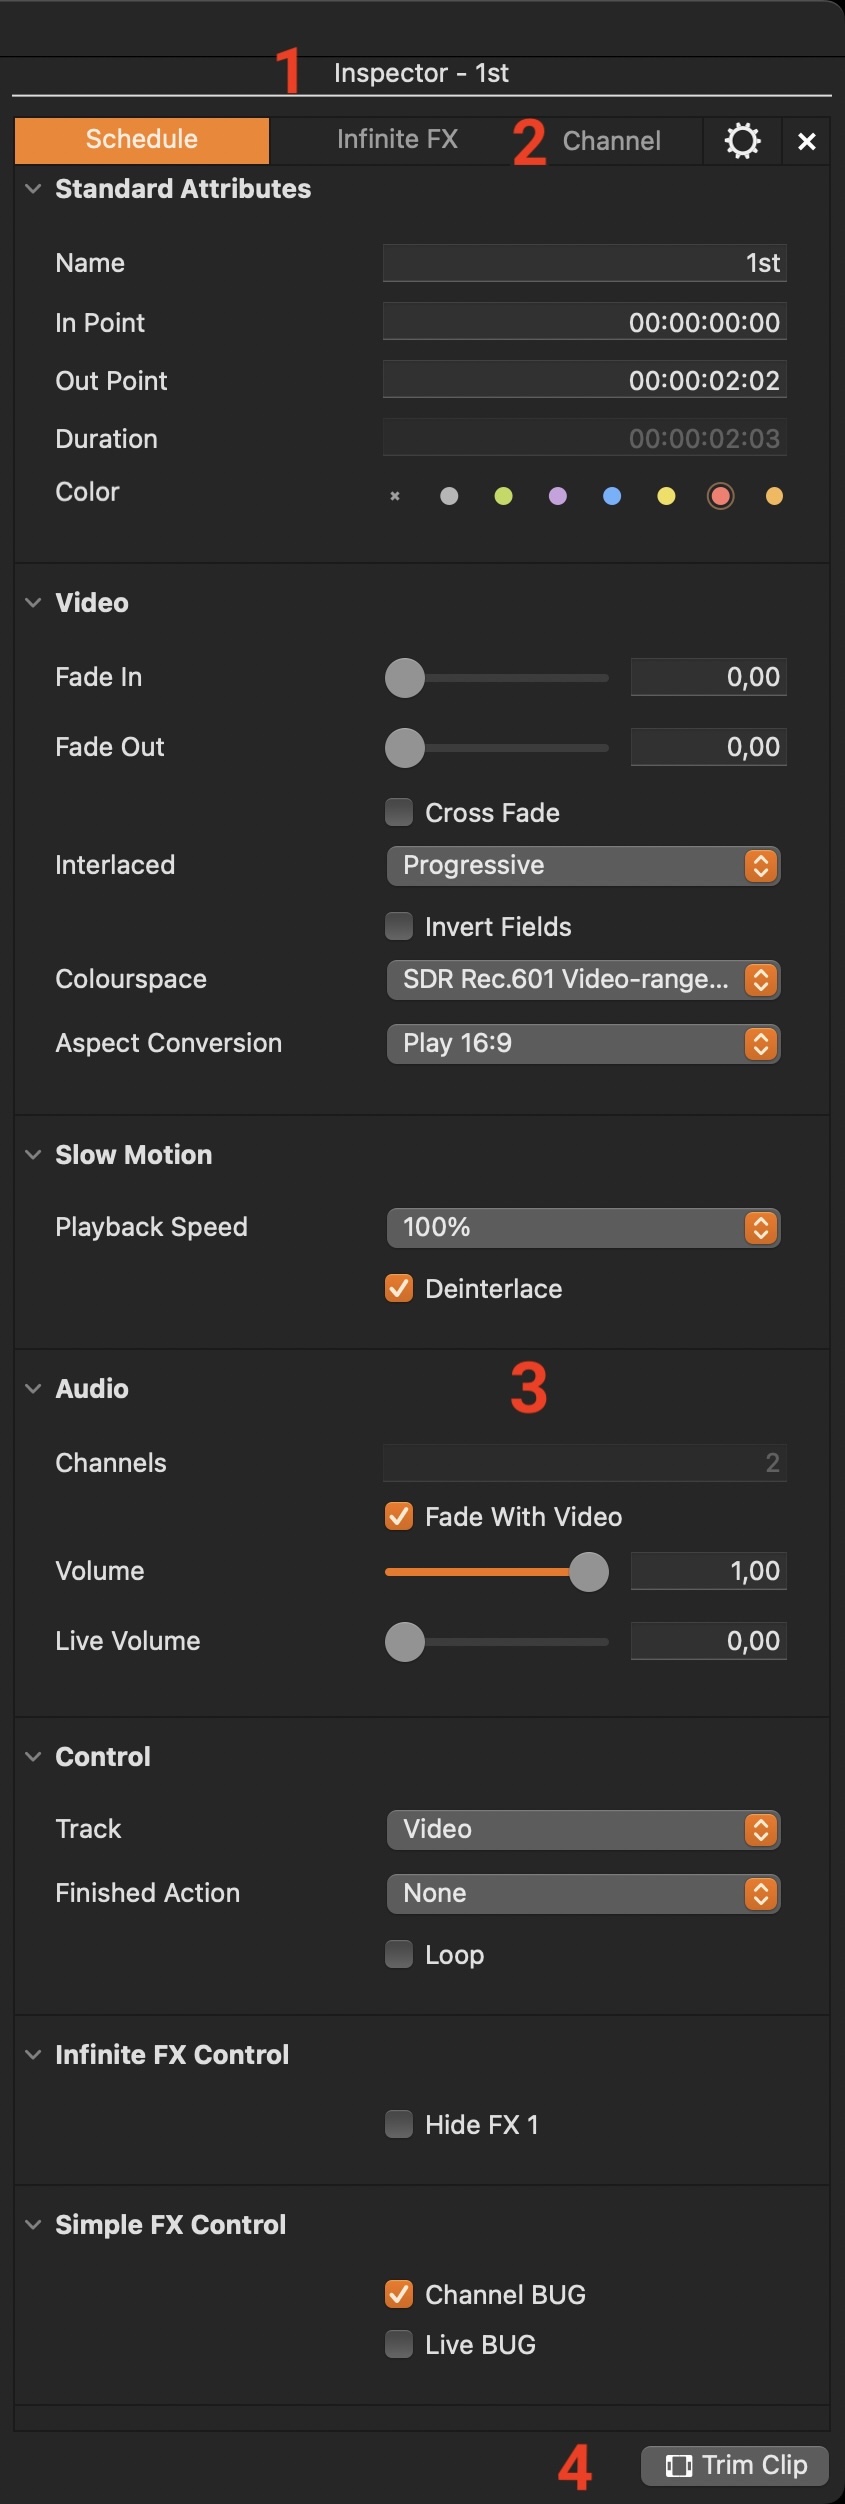
The following picture shows the Just Live Lite NDI Inspector. It may look different on your system.
live Inspector.jpg

  1. Name Of The Selected Item: Shows the name of the selected item.

  2. Tabs: 

  • Schedule: Change attributes of selected (scheduled) item(s).

  • Infinite Graphics: Change attributes of the Infinite Graphics. This tab is only available if an Infinite Graphic has been defined by the administrator.

  • Channel: Shows the channel settings which can be changed without the need to restart Just Live Lite.

  • Gear: Click to open the Configuration Panel.

  1. Attributes:

  • Standard Attributes: Shows all standard attributes like name, start/end time and so on.

  • Item Specific Attributes: Item specific attributes (if available).

    • Control items: where applicable.

  1. "Fast Access" Button (changes in context to the selected item):

  • Video is selected: Allows you to Trim (Split) the Video.

  • Audio/Still Image is selected: No function.

  • Graphic is selected: Allows you to reset all input ports (= reset all attributes to their default value).

  • Folder is selected: Allows you to reset all Folder specific attributes to their default value.

You can hide/show the Inspector using the corresponding menu options under the “View” menu.

Video Specific Attributes

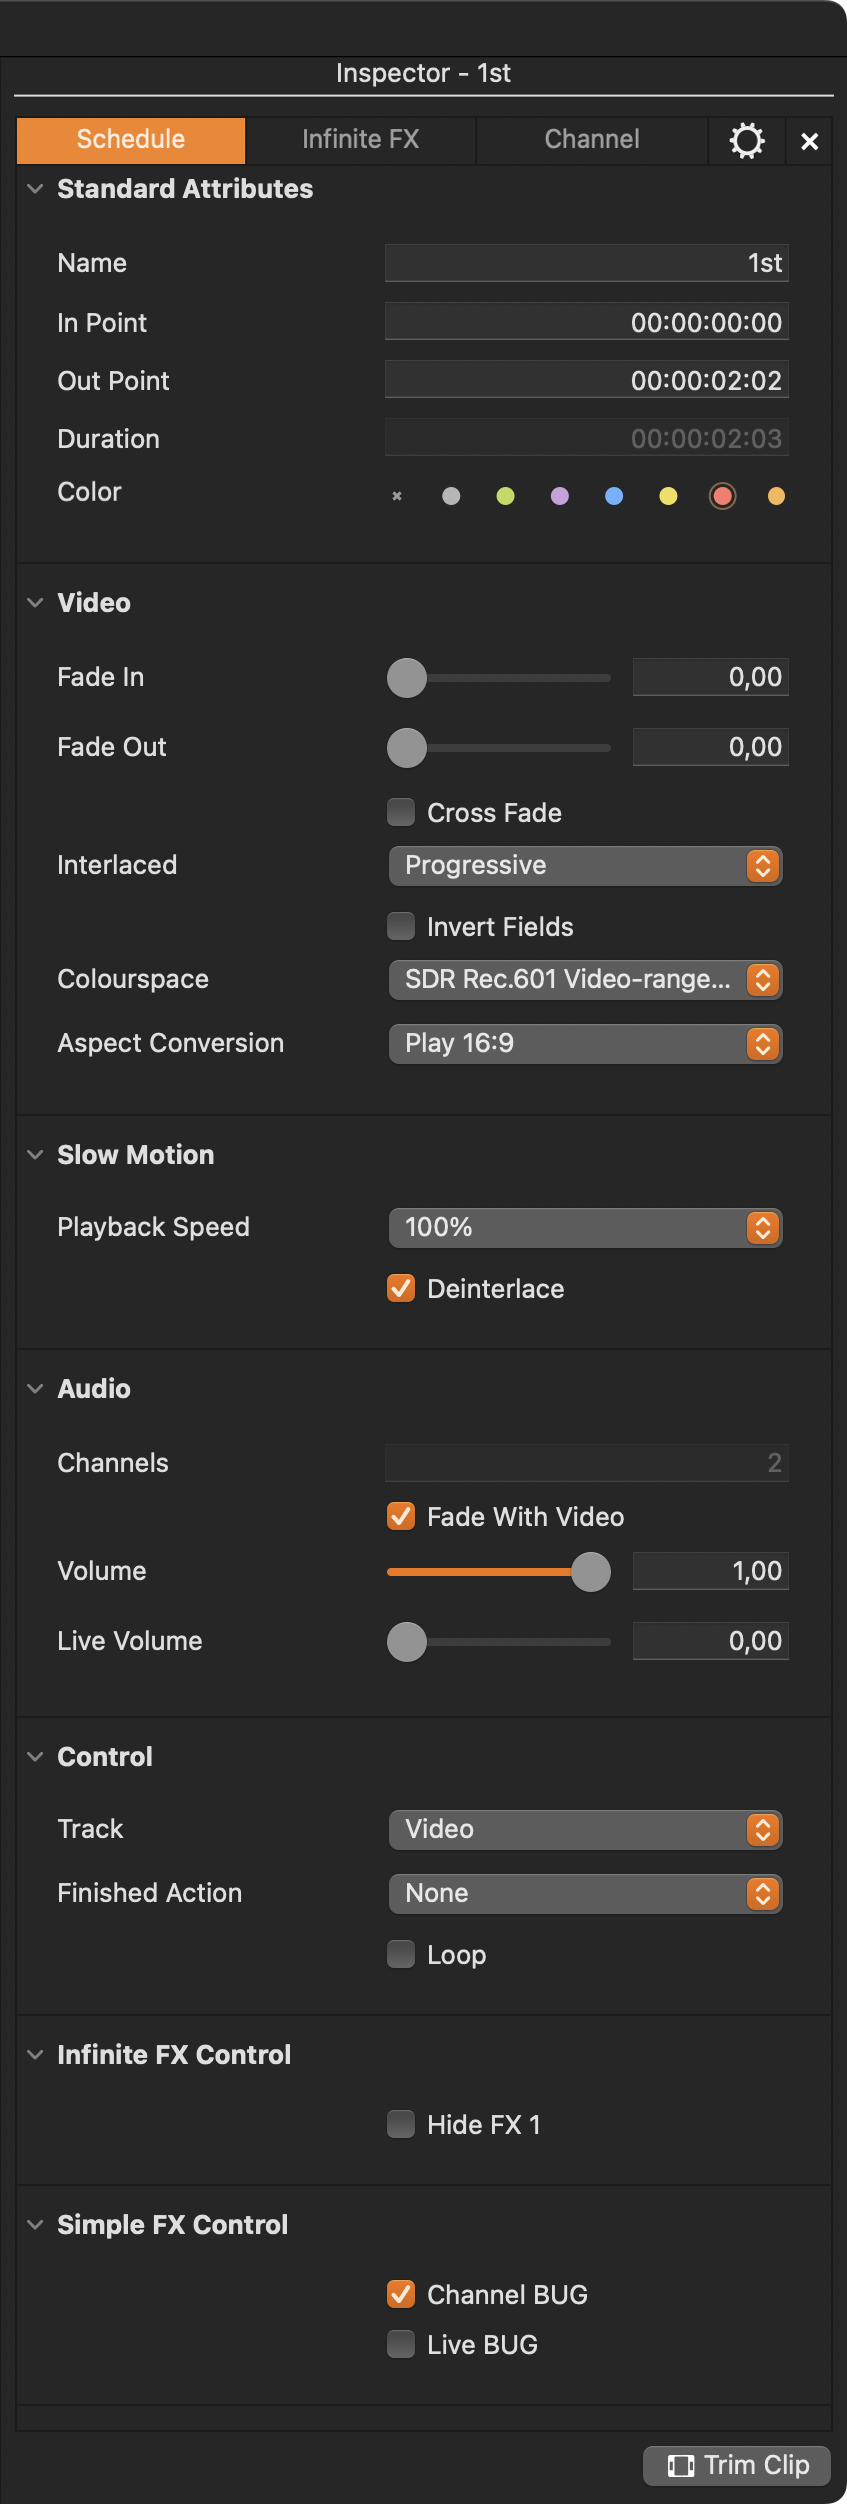
Click on a Video clip in the Workbench to load it into the preview window and to change its attributes in the Inspector.
live video.png

  1. Standard Attributes

  • Name: Name of the Video clip.

  • In/Out Point: Set the in/out point by TC.

  • Duration: Shows the duration of the selected Video clip.

  • Color: When dragging and dropping elements from the Library, a defined Finder colour will automatically be taken over or can be changed/defined here.

  1. Video clip

  • Fade In/Out: Video clips can fade in/out up to 10 seconds from and to black.

  • Cross Fade: Activate the checkbox to fade from/to the passed-through live signal.

  • Invert Fields: Activate the checkbox to invert the field order even during Playout.

  • Colour Space: Shows the Colour Space which will be used to process the video.

  • Aspect Conversion: Shows the aspect ratio of the selected Video clip which can be changed while a Video is on air.

  1. Slow Motion

  • Playback Speed: Allows you to set the playback speed of a Video clip.

  • Deinterlace: Deselect this option in case you are using another playback speed than 100% and the Video clip has fields.

  1. Audio

  • Fade With Video clip: When enabled, the Audio will automatically fade with the Video clip's fade-in/out settings.

  • Volume: Allows you to adjust the Audio volume of a Video clip even while on air.

  • Live Volume: Defines the Audio volume of the live input - default “0” (muted).

  1. Control

  • Track: For Audio files only

  • Finished Action: Defines the action which is executed at the end of the Video clip.

  • Loop: Activate this checkbox to play the selected Video clip in a loop.

  1. Infinite FX Control (if configured)

Defines, if the Infinite FX should be shown with this Video clip or not.

  1. Simple Graphics (SFX) (if configured)

Defines, if the Channel Bug and/or the Live Bug should be shown with this Video clip or not.

  1. Trim Clip

Click, to open the full screen Trim Editor.

Audio Specific Attributes

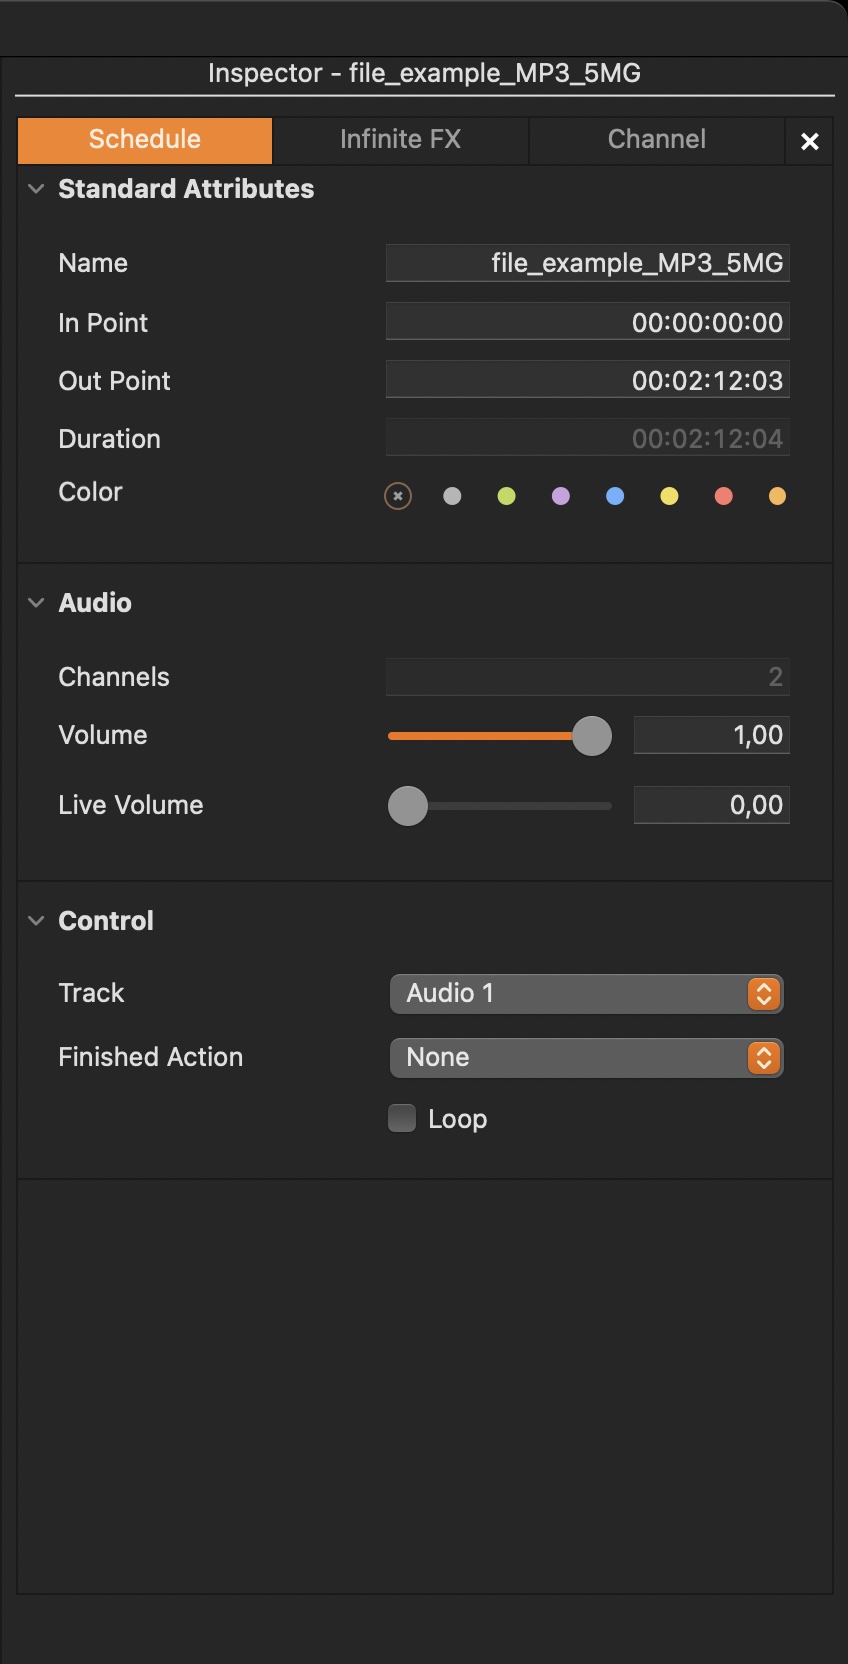
Click on an Audio file in the Workbench to change its attributes in the Inspector.
Untitled.jpg

  1. Standard Attributes

  • Name: Name of the audio clip.

  • In/Out Point: Sets the in/out-point by TC.

  • Duration: Shows the duration of the selected audio clip.

  • Color: 

    When dragging and dropping elements from the Library, a defined Finder colour will automatically be taken over or can be changed/defined here.

  1. Audio

  • Channels: Shows the number of Audio tracks coming with this Audio file.

  • Volume: Allows you to adjust the Audio volume of a Video clip even while on air.

  • Live Volume: Defines the Audio volume of the live input - default “0” (muted).

  1. Control

  • Track: Select the target Audio Layer for the selected Audio clip.

  • Finished Action: Defines the action which is executed at the end of the Video clip.

  • Loop: Activate this checkbox to play the selected Video clip in a loop.

Realtime Graphic Specific Attributes

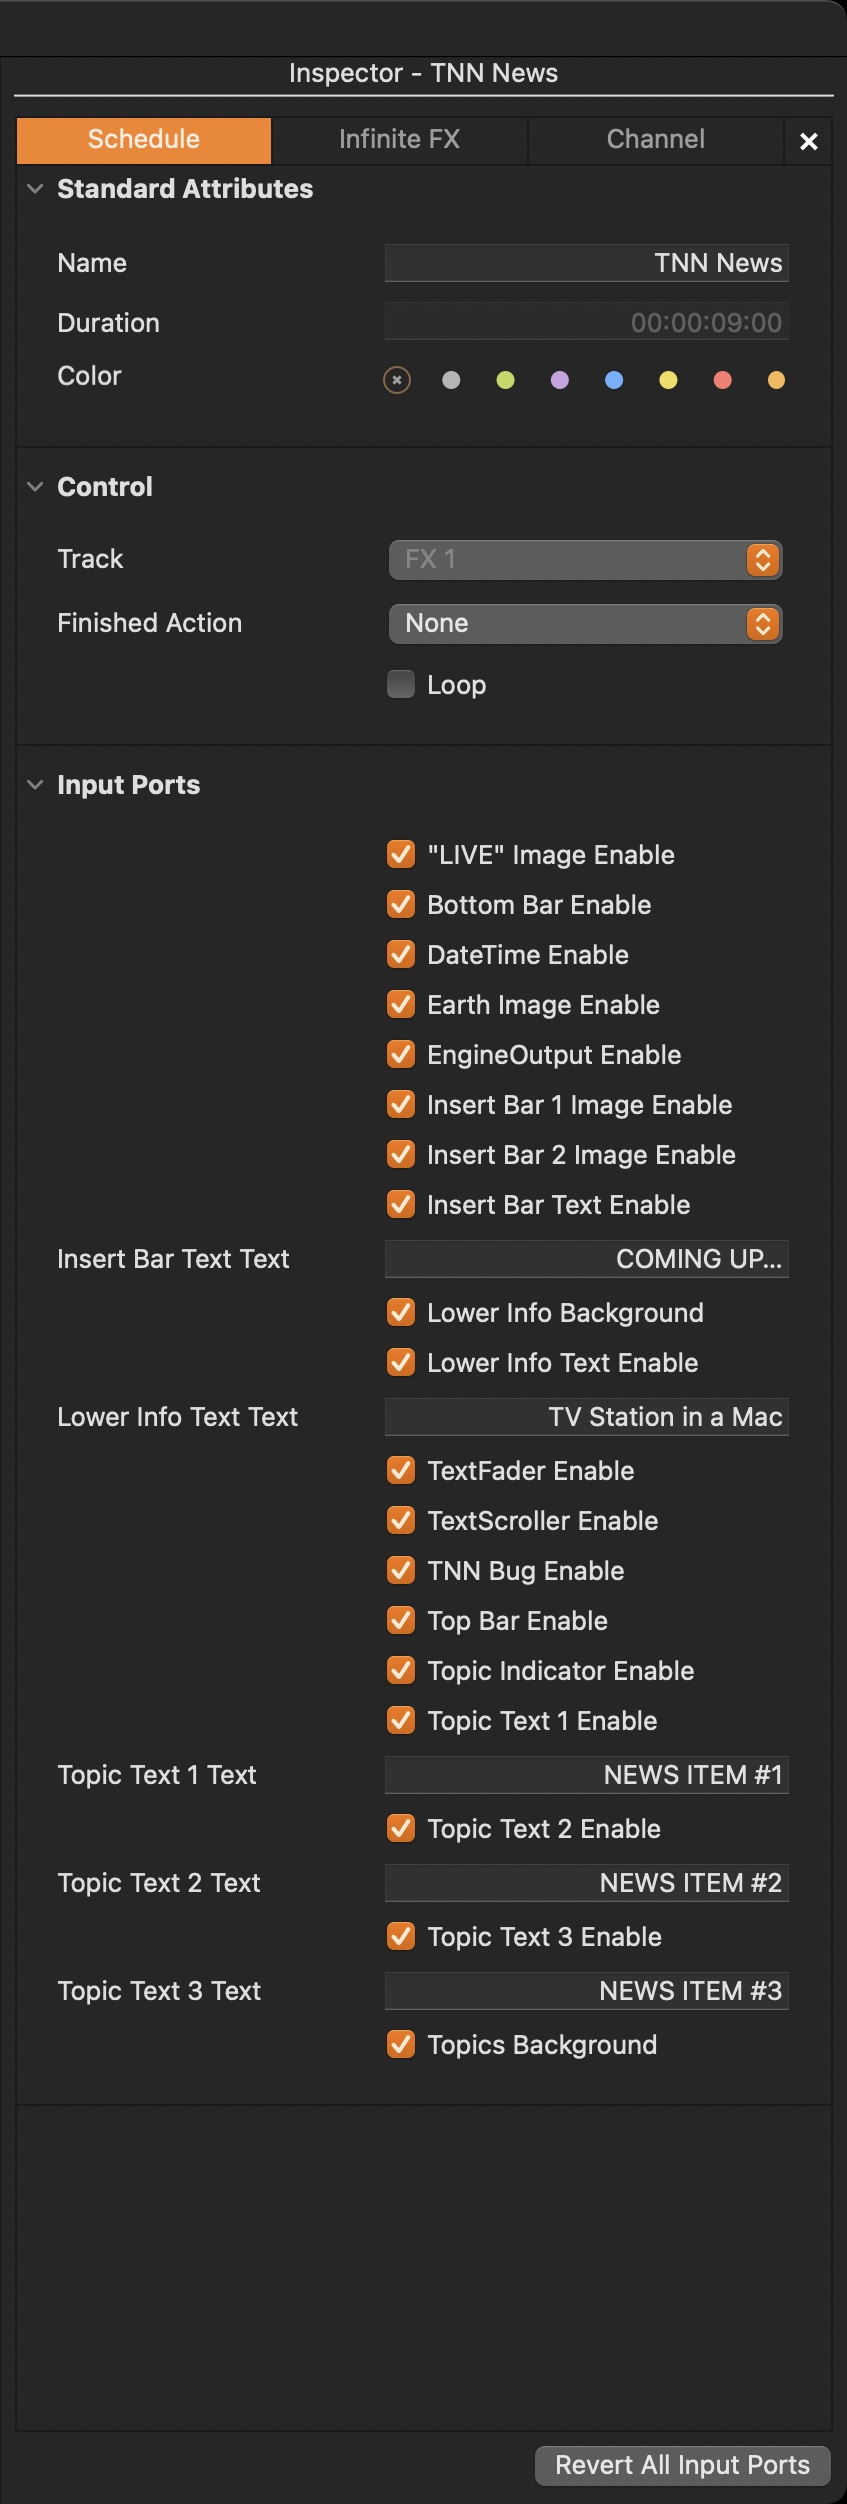
Click on a realtime Graphic file in the Workbench to change its attributes in the Inspector. All published input ports of a realtime Graphics item can be changed while it is on air.
Untitled2.jpg

  1. Standard Attributes

  • Name: Name of the selected GFX clip.

  • Duration: Shows the initial duration of the selected element. In case the GFX element has one or more stop frames, the length can change depending on the length of a stop frame will be on hold.

  • Color: When dragging and dropping elements from the Library, a defined Finder colour will automatically be taken over or can be changed/defined here.

  1. Control

  • Track: For Audio files only

  • Finished Action: Defines the action which is executed at the end of the GFX clip. Finished actions that are not available for realtime Graphics are greyed out.

  • Loop: Activate this checkbox to play the selected GFX element in a loop.

  1. Input Ports

  • Slider (not visible): A slider can be used to define a value, roughly. The exact slider value is displayed in the text box on the right of it.

  • Number Variable: A number value that can be positive or negative.

  • Text Field: Text in this field can be changed at any time. It accepts all characters.

  • Checkbox: A checkbox is a boolean value (it can be unchecked or checked, “False” or “True”). In this case, the checkbox enables or disables a certain element inside the selected Graphic.

  • Color Value (not visible above): Clicking on the colour bar opens a colour picker.  

  1. Revert All Input Ports: Click to reset all input ports (attributes) to their default value).

Folder Specific Attributes

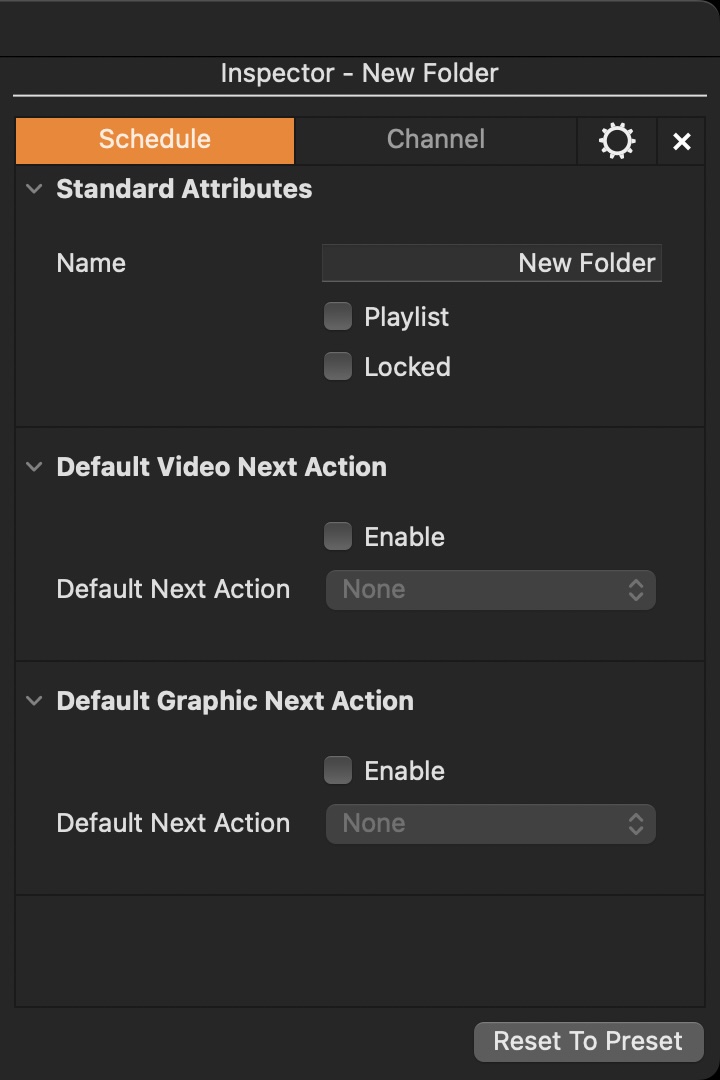
To define the attributes of a Folder, select the Folder in the Workbench and define the attributes in the Inspector. Doing so, all Video clips and all Graphic elements that are dropped into that Folder will get the attributes defined here.
Untitled 4.jpg

  1. Standard Attributes

  • Name: Name of the selected Folder.

  • Playlist: Activating the "Playlist" option adds a Playlist icon beside the Folder name in the Workbench. Click on this icon loads all elements into the Timeline.

  • Locked: Activate the checkbox so that the content of the folder can not be changed.

  1. Default Video Next Action

  • Activate the “Enable” option first. This allows you to define which “Next Action” will be automatically assigned to each Video clip dropped into that Folder.

  1. Default Graphic Next Action

  • Activate the “Enable” option first. This allows you to define which “Next Action” will be automatically assigned to each Graphic dropped into that Folder.

  1. Reset To Preset: This button allows you to reset the “Next Actions” ports to the value defined in the Just Live lite Settings.

Infinite Graphics Tab

.qtz or .composition realtime graphics template used as an Infinite Graphics must contain ONE stop frame. Otherwise the Graphics will go off-air once the composition reaches its predefined composition end. Refer to the Composition Builder manual if you want to find out how to add a stop frame to your composition.

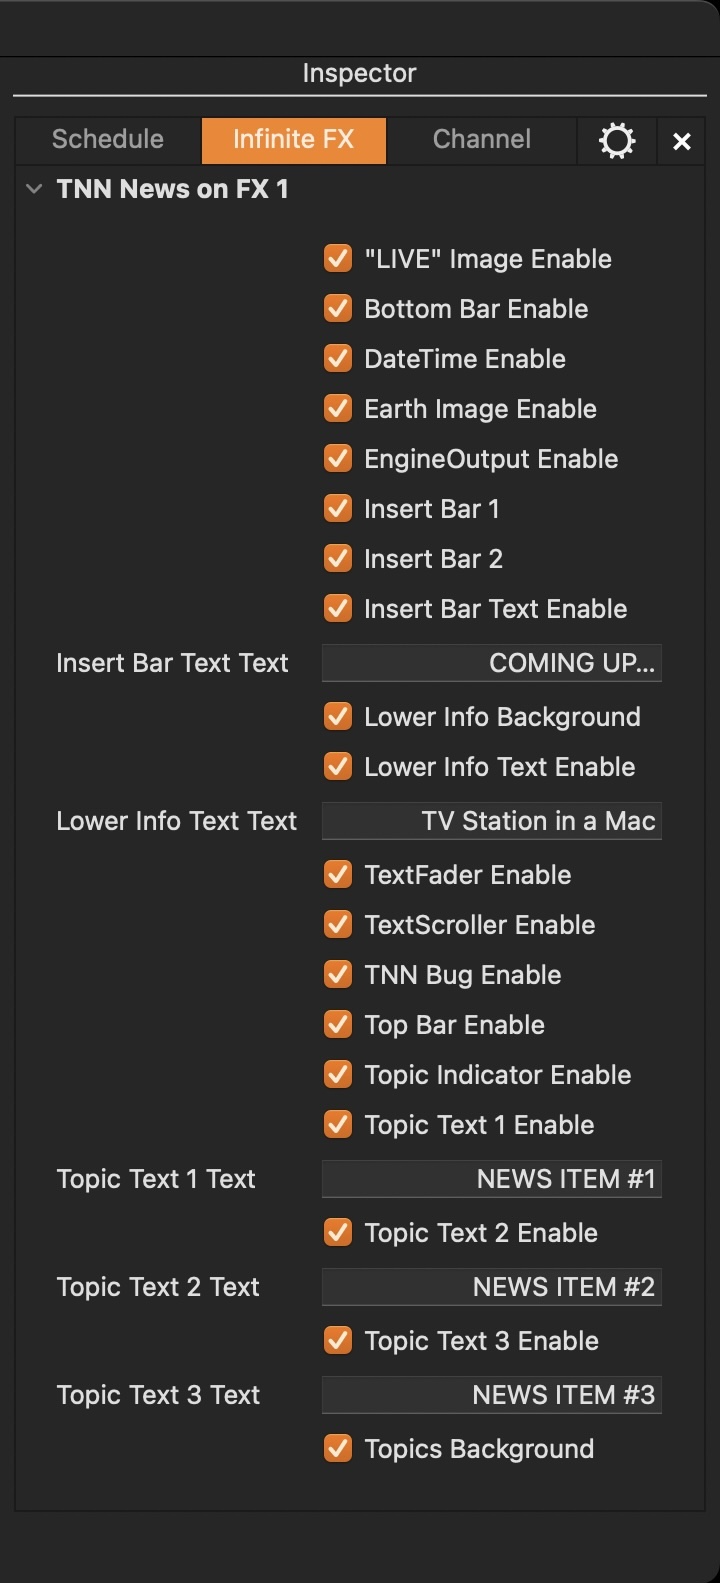
If an Infinite GFX is defined, it shows the name of the template as well as the name of the Layer. Below are the Published Input Ports which you can change while on air. Depending on the Graphic template, you will see more or less attributes here, or even no options at all. Using a html based graphics as Infinite Graphics, the Inspector will remain empty and all control has to be done in the dedicated html based user interface. Please contact your system administrator if you have questions about the Infinite Layer configuration.
Untitled.png

Infinite FX:

The Infinite FX tab will only be shown in case a supported graphics element/stream has been assigned to the available FX Layer FX1.

Once done click here on the tab, or in the timeline click on the Layer which is used by the Composition Builder/QTZ or html based Infinite GFX, to show the name of the template and all its attributes here in the Inspector.

Below are the Published Input Ports. Depending on the Graphic template, you will see alternate attributes here, or even no options at all.

The template seen in this figure was made with Composition Builder and has been defined as Infinite FX in the Channel tab of the Inspector.

Here in the user interface, you can turn the Graphics on and off or change its (published) attributes like described in the chapter “Realtime Graphic Specific Attributes” above.

Using a html based graphics as Infinite Graphics, the Inspector will remain empty and all control has to be done in the dedicated html based user interface.

Please contact your system administrator if you have questions about the Infinite Layer configuration.

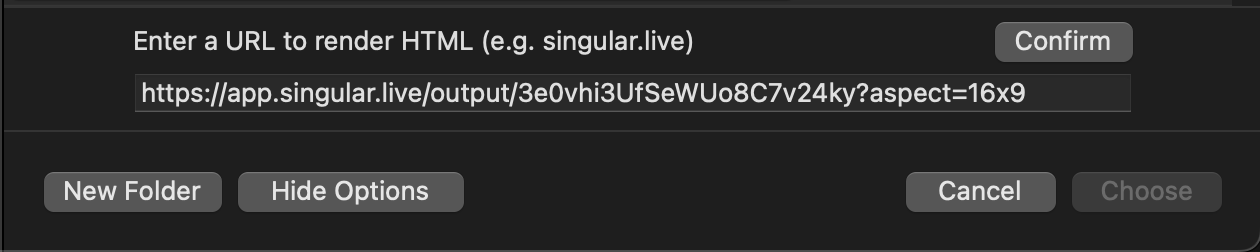
When using HTML Graphics originating for systems such as singular.live, Viz Flowics or SPX, you need to copy and paste the related Output URL into the URL field to render them in real-time.
PLAY2025_Infinitefxconfirm.png

Channel Tab

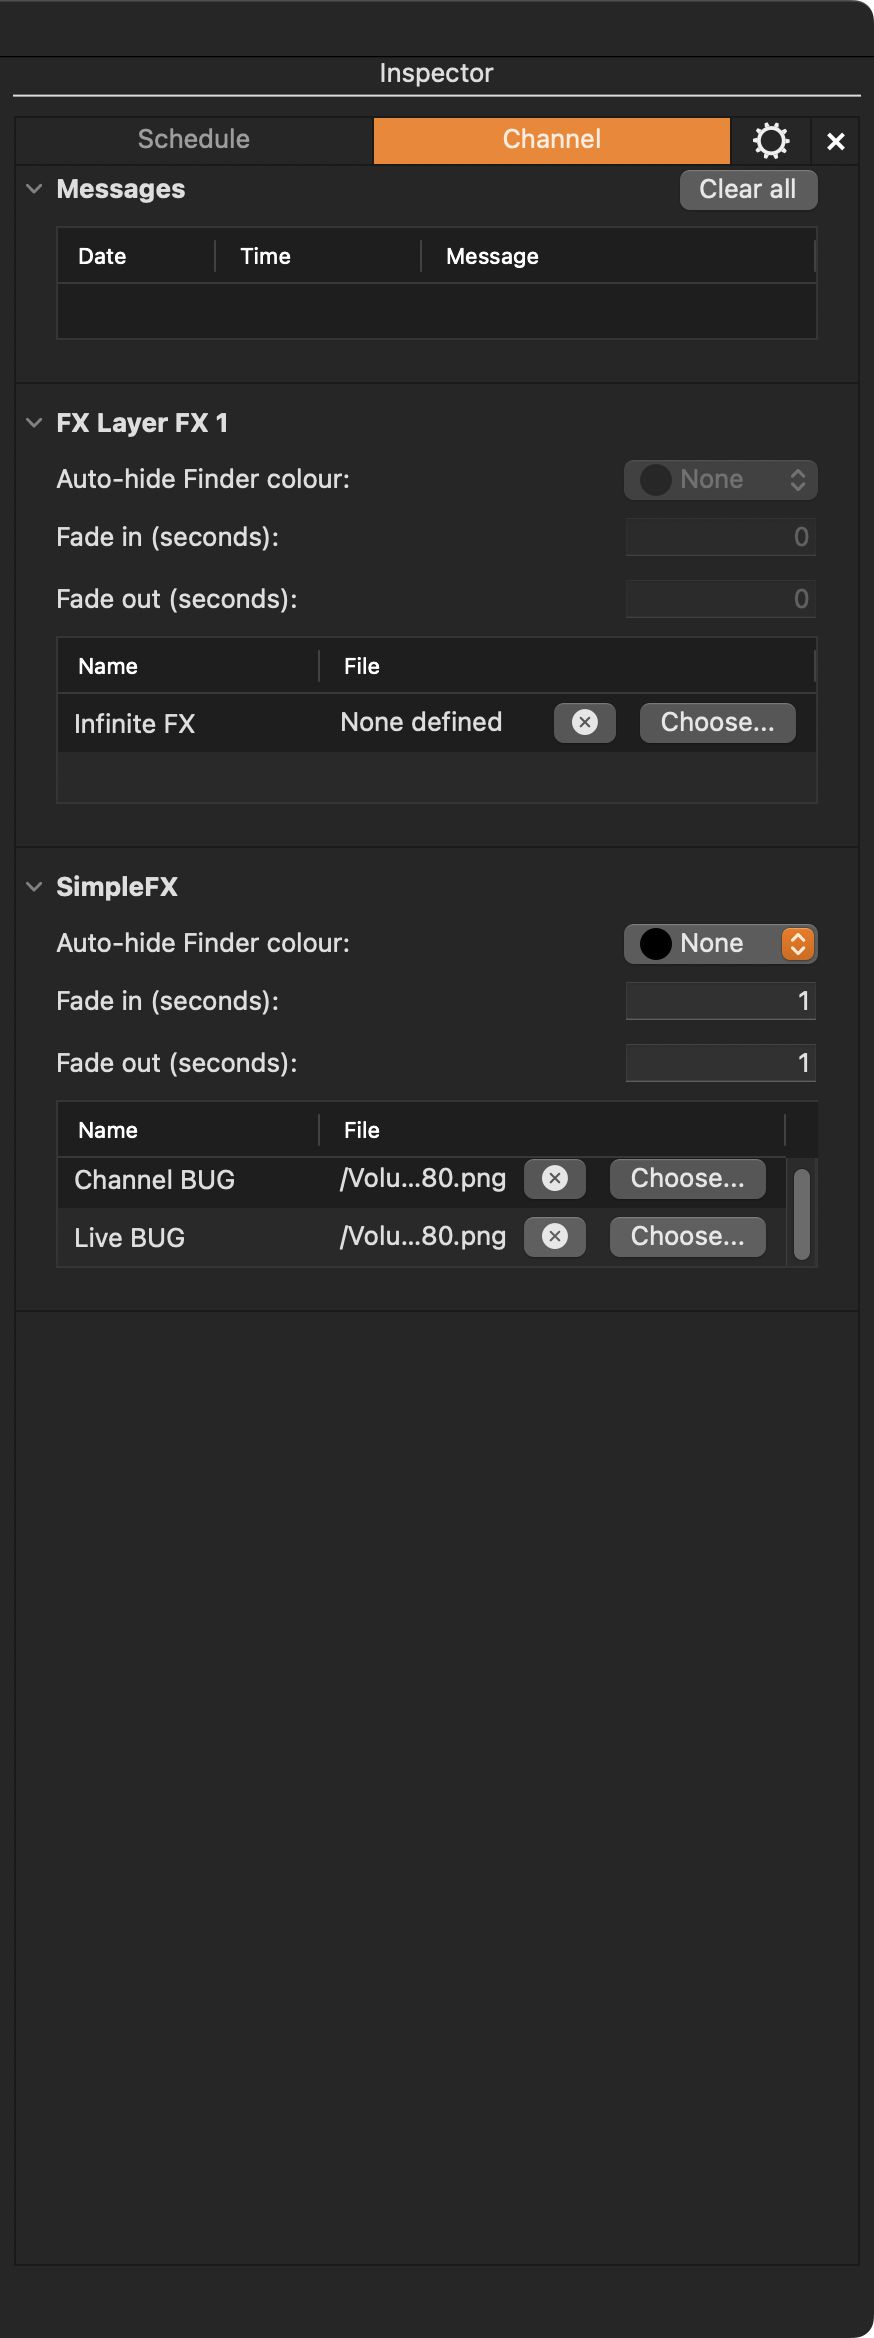
Shows all the channel related features, which can be changed during playout and which do not require a restart of the Just Live Lite NDI application. Please contact your system administrator if you have questions about a Channel related feature.
Untitled 11.png

  1. Messages:

This section displays all error and warning Messages this channel has generated. Click “Clear all” to clear all Messages.

  1. FX Layer FX 1:

  • Allows for showing a still image or a real-time FX Template/html FX stream on the FX Layer.

  • Auto-hide Finder colour: Select the color which will be used to automatically deactivate the playout of the Infinite FX element for the selected Video clip.

  • Fade in/Fade out (seconds): Define the duration, that the Infinite Graphics should be faded In/out each time it goes On/Off air.

  • Choose:

-File based: Click on the “Choose” button and select a still image or a real-time FX Template to load it permanently to the selected FX Layer. Click “X” to remove the still image or real-time FX Template from the selected FX Layer.

- Stream based: Click on the “Choose” button first and then click on the “Show Options” button. This opens the options area where you can paste the URL, which provides the html graphics you would like to show on the selected FX Layer. Click “Confirm” to start receiving the html graphics. Click “X” to remove the Infinite FX from the selected FX Layer.

  1. SimpleFX:

Each Channel comes with one Simple FX Layer, which can be used to show a still image as a Channel Bug and/or a Live Bug.

  • Auto-hide Finder colour: Select the color which will be used to automatically deactivate the playout of the Infinite FX element for the selected Video clip.

  • Fade in/Fade out (seconds): Define the duration, that the Simple Graphics should be faded In/out each time it goes On/Off air.

  • Choose: Click on the “Choose” button and select a still image as the Channel Bug and/or the Live Bug.

  • Remove: Click on the “X” button to remove the still image from the element.

The Channel Bug will be scheduled automatically with every element in the video track, and the Live Bug in case live signal pass-thru is activated for this channel and nothing is playing in the video track.