
An action set defines tasks that the server runs when a recording starts, splits, or stops. An action can run a shell script, call a REST API, or upload the recorded file. Create and organize action sets on the Actions page, then assign them to recording events from the Record Viewer.
Opening the page
In the sidebar, open Configuration and select Actions, or go to /actions. The page header reads "Configure action sets and automation scripts".
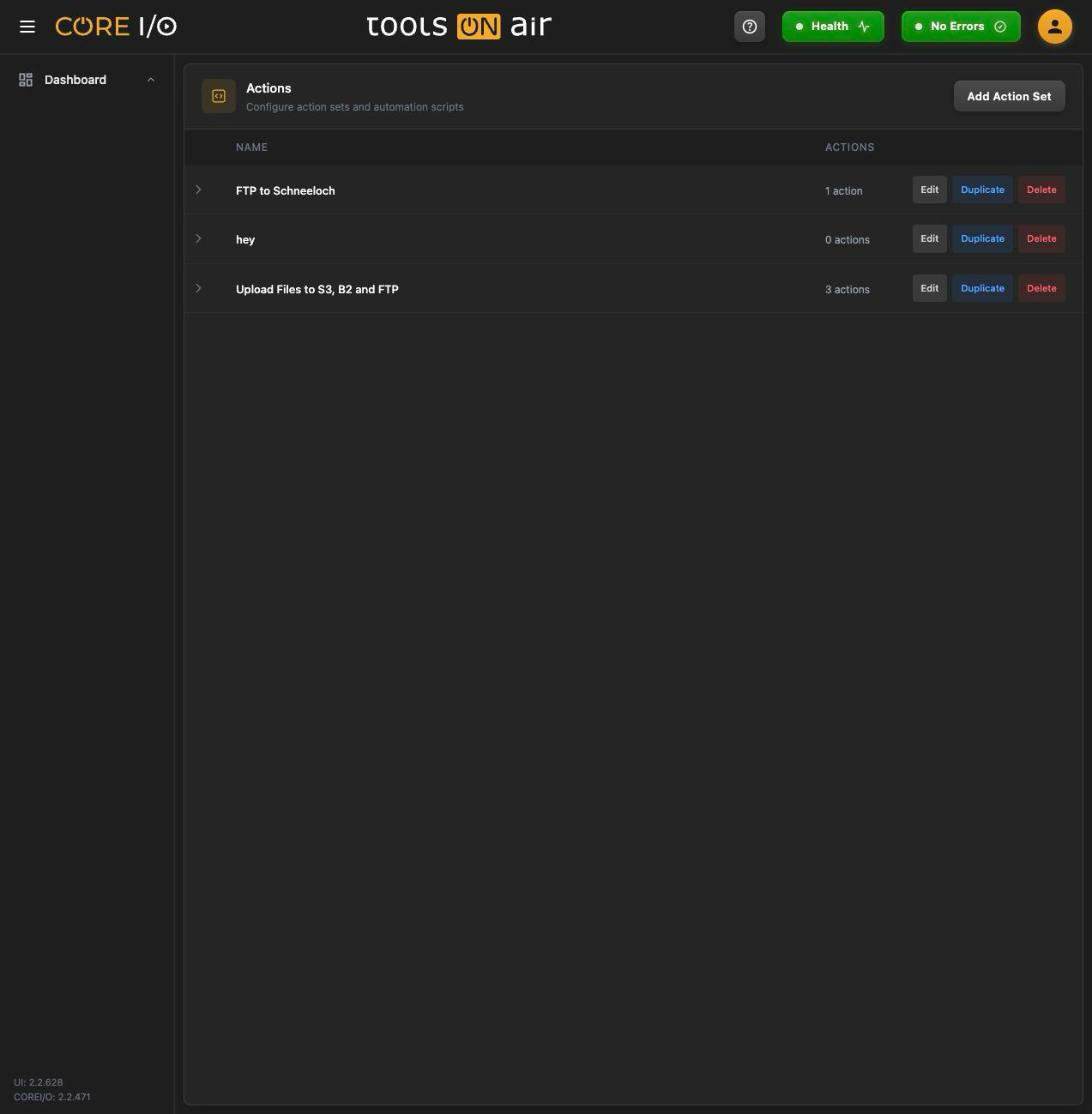
The Actions page lists all configured action sets.
Layout
The table lists every action set with its Name and the number of actions it contains ("3 actions"). Click a row (or its arrow) to expand it and see the actions inside. Each set row has Edit, Duplicate and Delete buttons; each action inside the expanded area has the same three.
With no sets yet the page reads "No action sets defined" and "Click "Add Action Set" to create your first one".
Creating an action set
- Click Add Action Set. A row with an input ("Enter action set name...") appears at the top.
- Enter a name, then click Save or press Enter. Press Escape or click Cancel to discard it.
- The new set is expanded right away so you can add actions.
An empty name displays "Name is required." A name already used by another set, regardless of capitalization, displays "Name must be unique." A toast confirms "Action set added."
Renaming, duplicating and deleting a set
Edit turns the name into an input; Save or Enter stores it, Cancel or Escape reverts. The same two validation messages apply.
Duplicate creates and expands a copy named <name>_copy. Further copies use _copy1, _copy2, and so on. The new set contains copies of all actions.
Delete changes the buttons to Confirm and Cancel. Confirming removes the set and all its actions. A toast reads "Action set deleted."
Adding an action
- Expand the set and click + Add Action. An inline form opens.
- Enter a Name and choose a Type. The remaining fields depend on the type (see below).
- Click Save. Cancel closes the form without saving.
The type badge on each saved action is green for Bash Script, blue for REST API Call and amber for File Upload.
Bash Script
| Field | What it does |
|---|---|
| Script | The shell script to run. Start it with #!/bin/bash. |
| Variable... / Insert | Pick a recording variable from the dropdown and click Insert to paste it at the cursor position. |
REST API Call
Configure the request with Scheme, Method, Host, Port, Path, Content-Type, and Body. Insert recording variables into the Body where required.
| Field | What it does |
|---|---|
| Scheme | http or https. |
| Method | GET, POST, PUT, PATCH or DELETE. |
| Host | Host name or IP address of the API, for example api.example.com. |
| Port | Port number, for example 443. |
| Path | The request path, for example /api/v1/resource. |
| Content-Type | application/json or application/xml. |
| Body | The request body. Use Variable... and Insert to paste recording variables. |
File Upload
Select an enabled Upload Preset and the Capture ID to upload. Configure upload presets under Storage integrations.
| Field | What it does |
|---|---|
| Upload Preset | One of the enabled upload presets, shown as <name> - <FTP, SFTP, S3, or Backblaze>. Configure upload presets under Storage integrations. |
| Capture ID | Which of the flow's capture outputs to upload. The list comes from the server; if it is unavailable the field is disabled and reads "Capture IDs unavailable from action type schema". |
Variables
The Variable... dropdown offers these values; the server fills them in when the action runs:
| Name | Variable |
|---|---|
| Filename without Extension | $coreio_no_extension_clipname |
| Filename | $coreio_clipname |
| Full Path | $coreio_full_clipname |
| Timecode Source | $coreio_timecode_source |
| Channel Name | $coreio_channel_name |
| Container | $coreio_container |
| Framerate | $coreio_framerate |
| Framerate Is Drop | $coreio_framerate_is_drop |
| Aspect Ratio | $coreio_aspect_ratio |
| Capture Codec | $coreio_capture_codec |
| Audio Channels | $coreio_audio_channels |
| Capture Resolution | $coreio_capture_resolution |
| Capture Width | $coreio_capture_width |
| Capture Height | $coreio_capture_height |
| Duration | $coreio_capture_duration |
| In-Point | $coreio_capture_inpoint |
| Out-Point | $coreio_capture_outpoint |
| Bitrate | $coreio_bitrate |
| Custom Date | $coreio_custom_date |
| Chunk Start Timecode | $coreio_chunk_start_timecode |
| Chunk End Timecode | $coreio_chunk_end_timecode |
Validation messages
The following messages explain why an action cannot be saved.
| Message | When |
|---|---|
| Name is required. | The action name is empty. |
| Type is required. | No type was chosen (new actions only). |
| Upload preset is required. | File Upload without an upload preset. |
| Capture ID is required. | File Upload without a capture ID. |
| Capture ID must match the action type schema. | The chosen capture ID is not in the server's list. |
Editing, duplicating and deleting an action
Edit opens the same inline form with the current values. The Type cannot be changed while editing; duplicate the action or create a new one instead. Saving replaces the action ("Action updated.").
Duplicate adds a copy named <name>_copy to the same set. Further copies use _copy1 and so on.
Delete displays Confirm and Cancel. Confirming the deletion displays the toast "Action deleted."
Where action sets are used
Open a Record Viewer's settings menu and choose Actions. The Update Action for flow "<flow name>" dialog has three dropdowns: Select Action for Start Recording, Select Action for Split Recording, and Select Action for Stop Recording. Each accepts one action set. The actions in that set run when the corresponding event occurs. With several Record Viewers selected, the dialog updates all of them and shows "Mixed" where their current choices differ. See Record Viewer.
Good to know
Only enabled upload presets are offered in a File Upload action.
Scripts and API calls run on the server, not in your browser.
The variable list is also available under Var in the export template of a metadata set, with a % prefix instead of $ (see Metadata Views).