
Use the Record Timeline to schedule recordings. Each Record flow has its own row, with the live preview on the left and a time grid on the right. Scheduled and manual recordings appear as blocks on the grid and change color as their status changes. You can create, move, and resize scheduled recordings directly on the timeline.
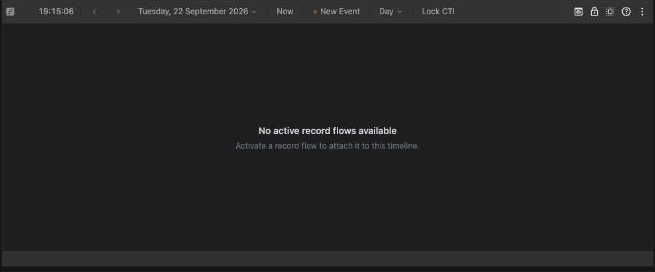
The Record Timeline toolbar in Day view
Adding flows
A new timeline opens a flow picker and prompts you to select one or more active Record flows. Select the required flows, or use the checkbox in the header to select all, then click Assign Selected (n). A flow already assigned to another timeline on the same dashboard is labeled Used in this dashboard and cannot be selected. If no active Record flow is available, the widget prompts you to activate one before assigning it.
To change the assigned flows later, open the ⋮ menu and choose Manage Flow(s). The dialog lists all flows with a Record configuration, sorted by host. A green or gray dot indicates whether a flow is active, followed by the host, flow name, and type. Select a flow to add it, or clear it to remove it. A flow running a configuration other than Record is rejected with Wrong Flow Type. Manage flow configurations on the Flows page.
Layout
Toolbar
The view, the selected date, the zoom, the resource column width and the row order are saved with the widget.
| Control | What it does |
|---|---|
| Clock | The current time in the app's timezone, updated every second. |
| < and > | Move one day back or forward (one week in Week view). |
| Date button | Shows the visible day or week; click it for a calendar to jump to a date. |
| Now | Jump to today. |
| + New Event | Opens the event editor for a new recording at the next available time on the first flow. Unavailable while the timeline is locked. |
| View dropdown | Day, Week or Agenda. |
| Lock CTI | Keep the current time indicator in view, see Following the current time. |
| Preview toggle | Hide or show the video previews in the flow rows (tooltip "Hide Preview" / "Show Preview"). |
| Lock | Lock the timeline: no creating, moving, resizing, editing or deleting of events, and the flow rows' record controls are locked too. |
| Select all | Select every flow row at once, so that the record controls in the rows act on all of them. Click again to clear. |
| ? | Open this chapter. |
| ⋮ | The settings menu: Manage Flow(s), Timeline Settings, Remove widget. |
Resource column
The left column holds one row per flow. Each row is a compact Record Viewer with the flow name, live picture when previews are enabled, recording controls, audio monitor, and notifications. Drag the divider between the resource column and time grid to change the row height and column width, from about 115 to 500 px. When the timeline contains two or more flows, drag the handle below a row to reorder it.
Time grid
The ruler spacing adjusts to the current zoom. In Week view, day names appear along the top and vertical lines separate the days. A red line and label indicate the current time. Each event block shows its start and end times, status, and a thumbnail when one is available. A small icon identifies a recording that was started manually instead of by schedule.
The custom scrollbar at the bottom represents the visible part of the day or week. Drag the center of the thumb to pan, drag either handle to zoom, or click the track to jump. A red marker indicates the current time.
Navigating time
Choose Day to show one day, Week to show seven days beginning with the configured first day of the week, or Agenda to list the selected day's events.
Use <, >, the calendar, or Now to change the date. When the current time is within the selected period, the timeline scrolls to center it.
Use Cmd/Ctrl + mouse wheel over the grid to zoom from 1x to 100x around the pointer, or drag the scrollbar handles. To pan, use Shift + wheel, drag the scrollbar thumb, or use the wheel over the resource column. Hold Shift there to pan horizontally.
Following the current time
Click Lock CTI to keep the current time at one quarter of the visible width. A red triangle appears in the ruler, and the timeline scrolls continuously. While CTI lock is active, date navigation and Now are hidden, and the scrollbar thumb and Shift + wheel are disabled. Zooming remains available and centers on the current time. If the current time moves outside the visible day or week, the timeline returns to today automatically. Click Lock CTI again to release it.
Creating a scheduled recording
Create a scheduled recording in any of these ways:
- Drag left or right across an empty area of a flow row. The selection snaps to the grid. When you release the pointer, the editor opens with the flow, start, and end values already entered. You cannot drag in the past.
- Right-click an empty position in a row and choose + New Event. The event starts at the selected time.
- Click + New Event in the toolbar.
In the New Event editor, enter an Event title, choose a flow, and set the Start and End values. Each time value has a date button and a time field. The time format is HH:mm:ss, or hh:mm:ss with an AM/PM selector, depending on your locale.
Click Create or press Enter to save the event. Press Esc, click Cancel, or click outside the editor to close it without saving. The following messages explain why an event cannot be saved:
| Message | Cause |
|---|---|
| "Start time must be before end time." | End is not after start (shown live, the button is disabled). |
| "Please enter a name for the event." | The title is empty. |
| "Please select a flow." | No flow is chosen. |
| "Calendar events can not be longer than 12 hours. Please make the recording event shorter." | The event is longer than 12 hours. |
| "You cannot schedule an event in the past. Please select a valid start time." | Start or end lies in the past. |
| "Events cannot be scheduled during the chosen time as it overlaps with another event." | Another event of the same flow covers part of the time. |
Editing, moving and resizing
Click a scheduled white event to open the Edit Event editor. Running and completed events open the quick-info popup; choose Edit there to open the editor.
- Drag an event to move it in time or assign it to another flow row. It moves in grid increments.
- Hold Cmd while dragging to create a copy at the new position.
- Drag the left or right edge to change the start or end time.
- Right-click an event to edit or delete it.
Moves and resizes use the same validation rules as the editor. If a drop overlaps another event, the timeline displays Events cannot be scheduled during the chosen time as it overlaps with another event. Other invalid changes return to their previous values. Completed events cannot be changed. For a recording in progress, the title, start, and flow are fixed. You can extend only the end time, and it must remain in the future.
The editor offers no recurrence controls; every event is a single recording.
Deleting
Choose Delete from the editor, quick-info popup, or context menu, then confirm the deletion. Hold Shift while choosing Delete in the editor or context menu to skip the confirmation. A running recording cannot be deleted.
The quick info popup
Click a running or finished event to open a popup containing:
- The status, date, and time range.
- The flow name.
- The path of each recorded file, with a Copy to clipboard button.
- Delete and Edit controls. Delete is unavailable while recording, and both controls are hidden for past events or when the timeline is locked.
Event colors
The left border of an event block, the border in Agenda view, and the status badge in the quick-info popup use these colors:
| Color | Status |
|---|---|
| White | Scheduled: waiting to start |
| Red | Recording: running now |
| Green | Done, Recorded, Success: finished |
| Yellow | Error: the recording failed |
An extra indicator from the server can follow the status text on the block (for example a note about the recorded files).
Agenda view
Agenda lists the day's events sorted by start time with the time range, the flow name and the status.
Click an entry to open it. When the day is empty, the list displays No events scheduled for this day.
Timeline settings
Open the ⋮ menu and choose Timeline Settings. Select the First Day of Week, then click SAVE. This setting determines where Week view begins and is saved with the widget.
Timezone
All times on the timeline (the clock, the ruler, the events and the editor) use the timezone chosen in your profile. Without a choice the app uses UTC.
Good to know
The timeline refreshes itself when the server reports changes to scheduled events, so events created elsewhere (another dashboard, another user) appear without a reload.
Locking the timeline also locks the record controls in the flow rows and hides the context menu.
The < and > buttons move by one day in Day and Agenda views, and by seven days in Week view.