
The Record Viewer controls one Record flow. It displays the live input and lets you start, split, and stop recordings. It also provides direct access to the settings that determine the resulting files, including naming, capture and destination presets, metadata, actions, and the stream endpoint.
Add a Record Viewer to a dashboard (see Dashboards), then assign a Record flow. The widget connects to the preview stream and displays the flow's current recording state.
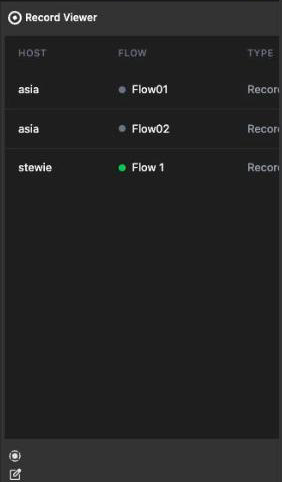
A Record Viewer with its flow picker, before a flow is assigned
Layout
Header
From left to right the header shows:
- The record icon and flow name.
- A closed captions badge when the stream reports captions. Its tooltip reads Closed captions available.
- The iconik logo when the iconik integration is configured. Click it to enable or disable iconik for this flow. When iconik is enabled and recording configurations are available, use the Select… menu to choose one. These controls are unavailable while recording.
- An orange Proxy Automation enabled badge when proxy automation is active.
- A stream endpoint icon when the flow uses an SRT, UDP, or HLS endpoint. Click it to view the endpoint name and, where applicable, Connection Mode, Host, Port, and Stream ID.
- An actions icon when a start, split, or stop action set is assigned. Click it to open the Actions dialog. The icon is disabled while recording.
- The lock button. A locked viewer displays a lock in place of the record button and ignores recording controls and hotkeys. When several viewers are selected, the button locks or unlocks all of them.
- The select all button. Click it to select every Record Viewer on the dashboard; click it again to clear the selection.
- The speaker button, which opens the Audio Monitor.
- The notifications icon. It changes to an error icon when the flow has errors or warnings.
- The flow nodes icon, which lists the flow's inputs and outputs.
- The ⋮ settings menu.
Picture
The middle area shows the flow's preview. When no signal arrives, the area reads No Signal. The frame color indicates the current state:
| Frame color | Meaning |
|---|---|
| Gray | Idle, not selected |
| Red | The flow is recording (the whole widget turns red) |
| Orange | The viewer is selected |
Click anywhere in the picture to select or deselect the viewer. Selection is what makes group operations and hotkeys work, see Working with several viewers.
Footer
The footer summarizes the current configuration in two rows:
The capture icon opens a tooltip with details for every capture ID. It shows the capture preset values for Container, Resolution, Aspect Ratio, Codec, and Audio Channels, followed by the destination preset paths and their Container, Type, and Path. When a flow has more than one capture ID, the summary next to the icon displays Multiple.
On the right, the name of the current metadata view and the metadata icon, which opens the Metadata Views dialog (not while recording).
The second row shows the naming icon and the file name for the next recording. Click the icon to open Update Naming; it is unavailable while recording.
Recording
The center of the picture shows the record controls. Users with the Viewer role do not see these controls.
| What you see | State |
|---|---|
| Record button | The flow is ready. Click to start a recording. |
| Split and Stop buttons | The flow is recording. Split closes the current file and continues in a new one, Stop ends the recording. With iconik enabled only Stop is offered. |
| Red text (for example "Missing configuration") | The flow cannot record. The text is the reason reported by the server. Click it to open the Capture IDs dialog and fix the configuration. |
| Lock icon | The viewer is locked. Click the icon to unlock it. |
While a split is in progress the split icon is filled; it returns to normal when the new file name arrives.
Timecode and duration overlay
With the Timecode overlay on (see Overlays), a black box at the top of the picture shows the timecode of the stream. While a recording runs a second box in red appears next to it with the Recording duration. The overlay shrinks when the widget gets small and disappears entirely below about 240 px in either direction.
Audio meter overlay
With the Audio Meter overlay on, two dBFS meters are drawn on the left and right edge of the picture, eight bars each, with marks at 0, -6, -12, -18 and -24 dB. The bars run green, then yellow, then red towards the top. The meters hide when the widget is narrower than about 353 px or lower than 240 px.
Working with several viewers
Select several Record Viewers by clicking each picture or using the select all button in a header. You can then control them as a group:
- Record starts every selected viewer that is idle. Two or more idle, unlocked viewers start as one gang-recording request. If your account cannot access one of the flows, the app displays A channel in the gang is not available to your account. Other failures show the server message or Failed to start gang recording.
- Stop stops every selected viewer that is recording. Split splits every selected viewer that is recording. Locked viewers are skipped.
- The lock, Timecode Source, and Overlays settings apply to all selected viewers.
- The Update Naming, Capture IDs, Actions, Metadata Views, and stream endpoint dialogs open in multi-flow mode. A menu displays Mixed when the selected flows use different values. Choosing a value applies it to all selected flows.
Hotkeys
Hotkeys act on the first selected viewer. They are ignored for Viewer users, on locked viewers and while the flow records (with the exceptions noted).
| Key | Action |
|---|---|
Cmd/Ctrl+A
|
Select this viewer |
| N | Open Update Naming |
| C | Open Capture IDs |
| A | Open Actions (not with iconik enabled) |
Shift+A |
Clear the start, split and stop action sets of all selected flows ("Actions cleared.") |
| M | Open Metadata Views (with iconik enabled: opens the iconik metadata panel, only while recording) |
| E | Open the SRT/UDP endpoint dialog |
Shift+W |
Clear all errors of the selected viewer's flow |
Settings menu
The ⋮ button in the header opens the settings menu. Most entries are unavailable while the flow is recording or the viewer is locked. Users with the Viewer role see only Overlays and Remove Flow.
| Entry | What it does |
|---|---|
| Update Naming | Opens the naming dialog, see Choosing the file name. |
| SRT Endpoint / UDP Endpoint | Only for flows with an SRT or UDP input. Opens the stream endpoint dialog. |
| NDI Source | Only for flows with an NDI input. A submenu lists the discovered NDI sources. The current source is highlighted; select another source to switch the input. |
| HLS Endpoint | Only for flows with an HLS input. A submenu lists the configured HLS endpoints ("No HLS endpoints found"). |
| Timecode Source | Submenu with Computer Time, LTC Over Audio, Capture Card LTC and SDI Embedded. Flows with an SRT, UDP or NDI input only offer Computer Time. |
| Actions | Opens the Actions dialog (hidden with iconik enabled). |
| Metadata Views | Opens the Metadata Views dialog. With iconik enabled the entry only appears while recording and opens the iconik metadata panel instead. |
| Capture IDs | Opens the Capture IDs dialog (hidden with iconik enabled). |
| Overlays | Submenu, see Overlays. |
| Remove Flow | Unlinks the flow from the widget. The widget goes back to its flow picker. |
Overlays
Overlays opens a submenu with Timecode and Audio Meter; each has On and Off. The setting is saved with the widget. When the flow has a graphics (GFX) node a third entry Graphics appears: it lists the graphics sources of the configured integrations and a custom URL entry that opens the Preview Web Overlay URL dialog. The chosen source is drawn over the preview stream.
Choosing the file name
Open Update Naming from the settings menu or the naming icon in the footer. You can also press N. The dialog title includes the flow name.
- Choose a Naming Template (see Naming Presets). The template is applied to the flow immediately.
- Complete the fields provided by the template. Text fields accept letters, numbers, underscores, hyphens, and spaces. Other characters display Special characters are not allowed. Fields with predefined values appear as menus. Metadata tokens are supplied by the flow's metadata view and cannot be edited here.
- Verify the Resulting File Name.
- Click UPDATE or press Enter. Click CANCEL or press Esc to close the dialog without saving the field values.
Capture and destination presets
Open Capture IDs from the settings menu or by clicking the red status text when a flow cannot record. You can also press C. Each capture ID represents a separate encoder that writes its own file.
Capture ID #1, #2, … each have a Select Capture Preset for ID #n and a Select Destination Preset for ID #n dropdown. Changes are sent to the flow as soon as you pick a value.
Click + to add a capture ID. Click - on the second or any later row to remove the last capture ID. At least one capture ID always remains.
Capture presets that do not match the flow's video mode are listed in orange italics, and the dropdown turns orange italic when such a preset is selected.
The rows display Loading… while presets are retrieved and No capture IDs when the flow has none.
Capture ID settings are unavailable while recording. Click UPDATE to close the dialog. See Capture Presets and Destination Presets for configuration details.
Metadata entry
Open Metadata Views from the settings menu or the metadata icon in the footer. You can also press M.
Select Metadata View chooses the view (see Metadata Views).
Write Metadata At decides whether the values are written at the Start of Recording or at the End of Recording.
The View section displays the controls defined by the selected metadata view, including text fields, menus, checkboxes, and divider headings. Required fields are marked with an asterisk (*). Changes are saved immediately. The controls are read-only while recording.
When iconik is enabled, the Iconik Metadata panel opens beside the widget. Until the recording has an asset, it displays No iconik asset is associated with this flow yet. After an asset is available, select a Metadata View and edit its fields. Values are saved as you type; a rejected field displays Save failed.
Actions
Open Actions from the settings menu or the actions icon in the header. You can also press A. Choose an action set for Start Recording, Split Recording, and Stop Recording. Each selection is saved immediately. If an update fails, the app displays Action update failed. See Actions for information about defining action sets.
Stream endpoint
For flows with an SRT or UDP input, choose SRT Endpoint or UDP Endpoint, or press E, to open the endpoint dialog. Select an existing endpoint to apply it immediately. To create and select an endpoint in one operation, click New, enter its settings, then click CREATE AND UPDATE. Click DONE to close the dialog. If the selected viewers use different endpoint types, they cannot be configured together. Manage endpoints on the Stream Endpoints page.
Audio monitor
The speaker button opens the Audio Monitor dialog with switches Ch01 to Ch16. Enabled channels are mixed into the preview audio and unmute the widget; closing the dialog mutes the preview again.
Notifications
Click the notifications icon to open the flow's Errors and Warnings table. It contains Date, Time, Type, and Description columns; hover over a type to view the full text. Click CLEAR to delete all entries for the flow, or CANCEL to close the dialog. An empty list displays No Errors or Warnings. To clear the list without opening the dialog, Shift-click the icon or select the viewer and press Shift+W.
Flow nodes
The flow nodes icon opens a popup with the flow's Input(s) and Output(s). Each node shows its name (or type, such as AJA SDI, SRT, NDI, HLS) and small tags with the SDI port, video mode, encoder preset, streaming endpoint or NDI source where they apply. HLS outputs get an Open link to the playlist.
Graphics nodes connected to an output are listed on that output. "No nodes configured" appears for an empty flow. The nodes themselves are edited on the Flows page.
Good to know
If the assigned flow is running another configuration type, such as Playout, the viewer remains inactive and identifies the required configuration. See Flows.
The Timecode Source and overlay changes apply to every selected viewer, not only the one whose menu you opened.
The widget hides its footer details and shrinks the overlays as it gets smaller; enlarge the widget to get them back.