
A mount point is a folder on the media engine host that CORE I/O indexes for the File Browser widget. Use this page to manage mount points and scan their contents. A scan reads each file and updates its thumbnail and duration. It can also render H.264 proxies for playback in the File Browser and editors.
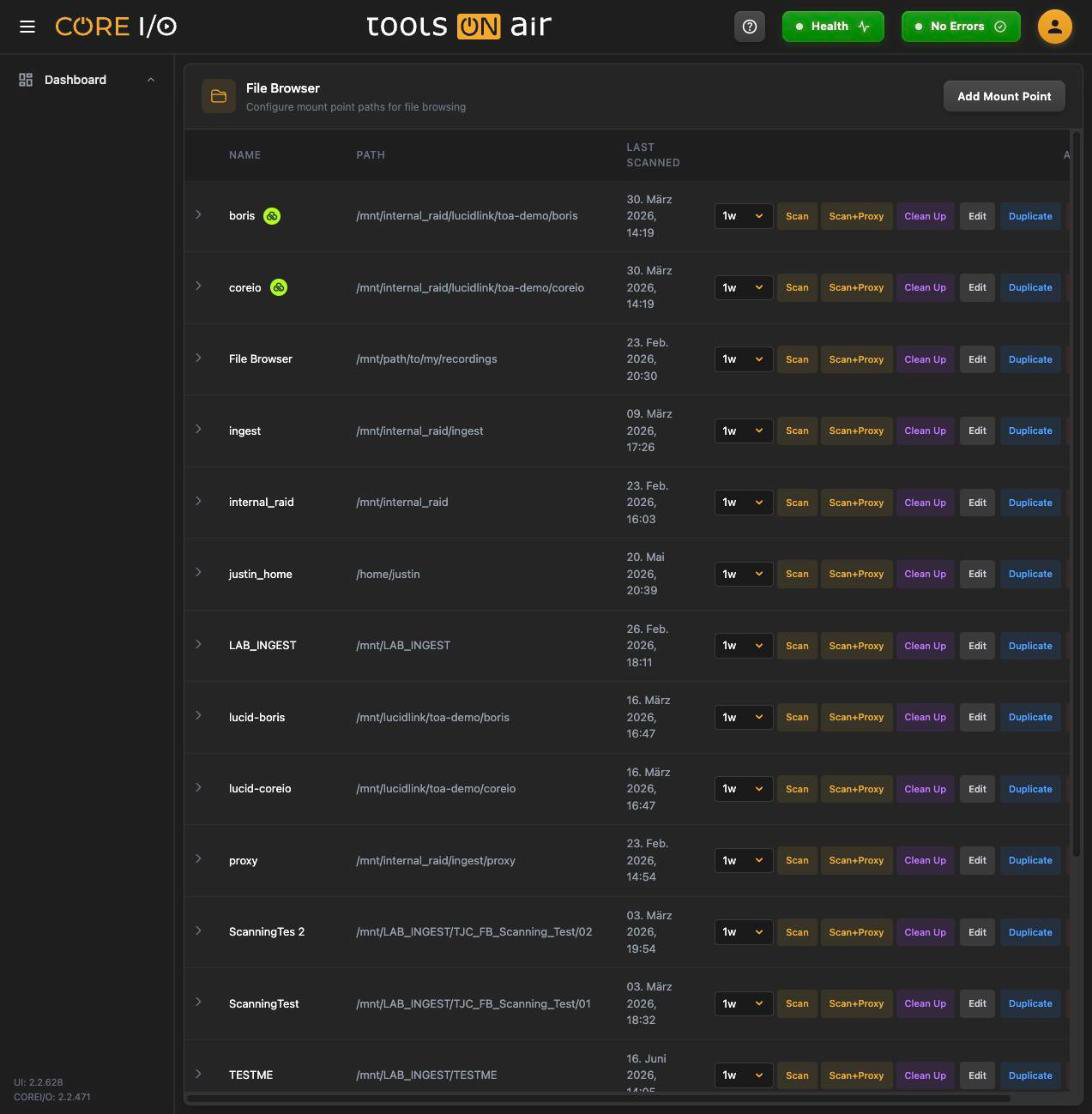
The File Browser configuration page
Opening the page
In the sidebar, open Configuration and select File Browser, or go to /file-browser. The header reads "Configure mount point paths for file browsing".
Mount points with a running scan
Layout
The table lists each mount point with its Name, Path, and Last Scanned value. Last Scanned shows the completion time of the most recent scan, or - if the mount point has not been scanned. A mount point on a LucidLink volume displays the LucidLink mark next to its name. See Storage integrations.
The Actions column holds, per row: a worker count dropdown, Scan, Scan+Proxy, Clean Up, Edit, Duplicate and Delete. Rows that have been scanned at least once get an arrow and expand to their scan history.
With no mount points the page reads "No mount points configured".
Adding a mount point
- Click Add Mount Point. A row opens with Name ("Enter mount point name") and Path ("/path/to/mount") fields.
- Complete both fields, then click Create or press Enter in the Path field. Press Escape or click Cancel to discard the row.
The form displays "Name is required.", "Path is required.", or "A mount point with this name already exists." as needed. Names are not case-sensitive. A toast confirms "Mount point created."
Editing, duplicating and deleting
Edit turns name and path into inputs. Save stores them ("Mount point updated."), Cancel reverts. A duplicate name warns "A mount point with this name already exists.".
Duplicate creates <name>_copy with the same path. Further copies use <name>_copy(2), <name>_copy(3), and so on.
Delete switches to Confirm / Cancel. Confirming removes the mount point ("Mount point deleted.") and closes its scan history if it was open. Files on disk are not touched.
Scanning
- Select the number of parallel workers (1w to 32w). More workers can improve scan speed on fast storage.
- Click Scan to index the folder. To index the folder and render an H.264 proxy for every video file, click Scan+Proxy. Its tooltip reads "Scan and generate H.264 proxies for every video file found".
- During the scan, the Last Scanned cell displays a progress bar with the processed count and percentage. When the scan finishes, a toast identifies the mount point or explains the failure. The cell then returns to the scan completion time.
Only one scan or clean-up can run at a time on the server, so every Scan, Scan+Proxy and Clean Up button is disabled while one is running, even one started by someone else. Starting a scan while another runs shows "A scan is already running."; an unusable path shows "Invalid mount path."; anything else shows "Failed to start scan.". A running scan is picked up again when you reload the page.
Clean Up
Clean Up, with the tooltip "Prune proxies whose source was deleted and backfill missing proxies", asks "Prune orphaned & backfill missing proxies?" Choose Confirm or Cancel. While the process runs, the row shows a pulsing bar with the pruned and backfilled counts and the file currently being processed. At the end, a toast displays the mount point and counts, or the reason for a failure. Starting it while another scan or clean-up is active displays "A scan or clean-up is already running."
Scan history
Click a scanned row or its arrow to expand the scan history, with the newest run first. Each card shows:
- A status badge: green for completed, yellow for running, or red for an error.
- The Started and Finished times.
- The Files, Updated, Skipped, and Errors counts. The Errors count is red when greater than zero.
- The Workers, Stale removed, and Thumbnails removed values. Stale removed counts index entries whose source file no longer exists.
- The error message, if the run failed.
- Files with Errors (). Click this entry to load the paths that could not be indexed.
- Delete Run, followed by Confirm or Cancel. A successful deletion displays "Scan run deleted."
With more than one run a Delete All Runs button (then Confirm Delete All) clears the history ("All scan runs deleted."). "No scan runs found" appears when the history is empty.
A mount point expanded to show its scan history

Where mount points are used
The File Browser widget lists every mount point as a source.
The Rough Cut Editor and the Loop Segment Exporter pick a mount point as the export target.
The Destination Presets page shows In File Browser on recording paths that are mount points.
Good to know
Files recorded into a folder that is not a mount point are not visible in the File Browser until you add the folder here and scan it.
Deleting a mount point removes it from the File Browser only; nothing is deleted on disk.
The scan buttons stay disabled while a scan or clean-up started by another user is running; the page picks up the running job when you open it.