
The Integrations page connects CORE I/O to third-party services. Storage and transfer integrations include Amazon Web Services (S3), Backblaze B2, LucidLink, and (S)FTP file transfer. Upload presets created here appear as remote sources in the File Browser and as targets for the FILE_UPLOAD action type. You can follow their transfers in the Transfer Monitor.
For NDI, iconik, Octopus, AP ENPS newsroom integration through MOS 2.8.5, MXMZ, singular.live, and Suite, see Integrations: Production. For Slack, SNMP, Active Directory, and SAML, see Integrations: Notifications and Sign-in.
The Integrations overview
Open Integrations in the sidebar's Configuration section (admins only). The page header reads "Connect with third-party services and storage providers" and the body is a grid of 150 px tiles, one per vendor, sorted alphabetically.
The overview contains two types of tiles:
- Active Directory, Amazon Web Services, Backblaze, (S)FTP File Transfer, iconik, LucidLink, MXMZ, NDI, Octopus Newsroom, SAML SSO, singular.live, Slack, SNMP, and Suite open configuration pages inside CORE I/O.
- AP ENPS, Archiware, Aveco Automation, Avid, Cantemo, Grass Valley AMPP, Mimir, MoovIT Helmut, Saga, SPX, and Viz Flowics open the vendor's website in a new browser tab. These integrations have no settings in CORE I/O.
Every configuration page has a Back link that returns to the grid. The former overview address redirects to the grid, and /integrations/suits redirects to the Suite page.
Upload presets in general
AWS, Backblaze, and (S)FTP use upload presets: named remote destinations with an Active toggle. The following controls work the same way on all three pages:

- Use the Active toggle to enable or disable a preset. Only enabled presets appear in the Upload Preset list on the Actions page.
- Click Test to connect to the destination. A successful test displays "Connection successful." For SFTP, the message also includes the trusted host fingerprint. A failed test displays the backend message or "Connection test failed."
- Edit and Delete are available only while a preset is disabled. Switch off an active preset before changing or removing it.
- Delete displays Confirm and Cancel before removing the preset.
- Create or edit a preset in the inline table form. Name is required; an empty field displays "Name is required." The submit button reads Create Preset or Save and changes to "Creating..." or "Saving..." while the request runs.
- Upload Rate Limit (MBit/s) caps outgoing bandwidth. Leave it empty for Unlimited. Decimal values are accepted, and a comma is converted to a period.
(S)FTP File Transfer
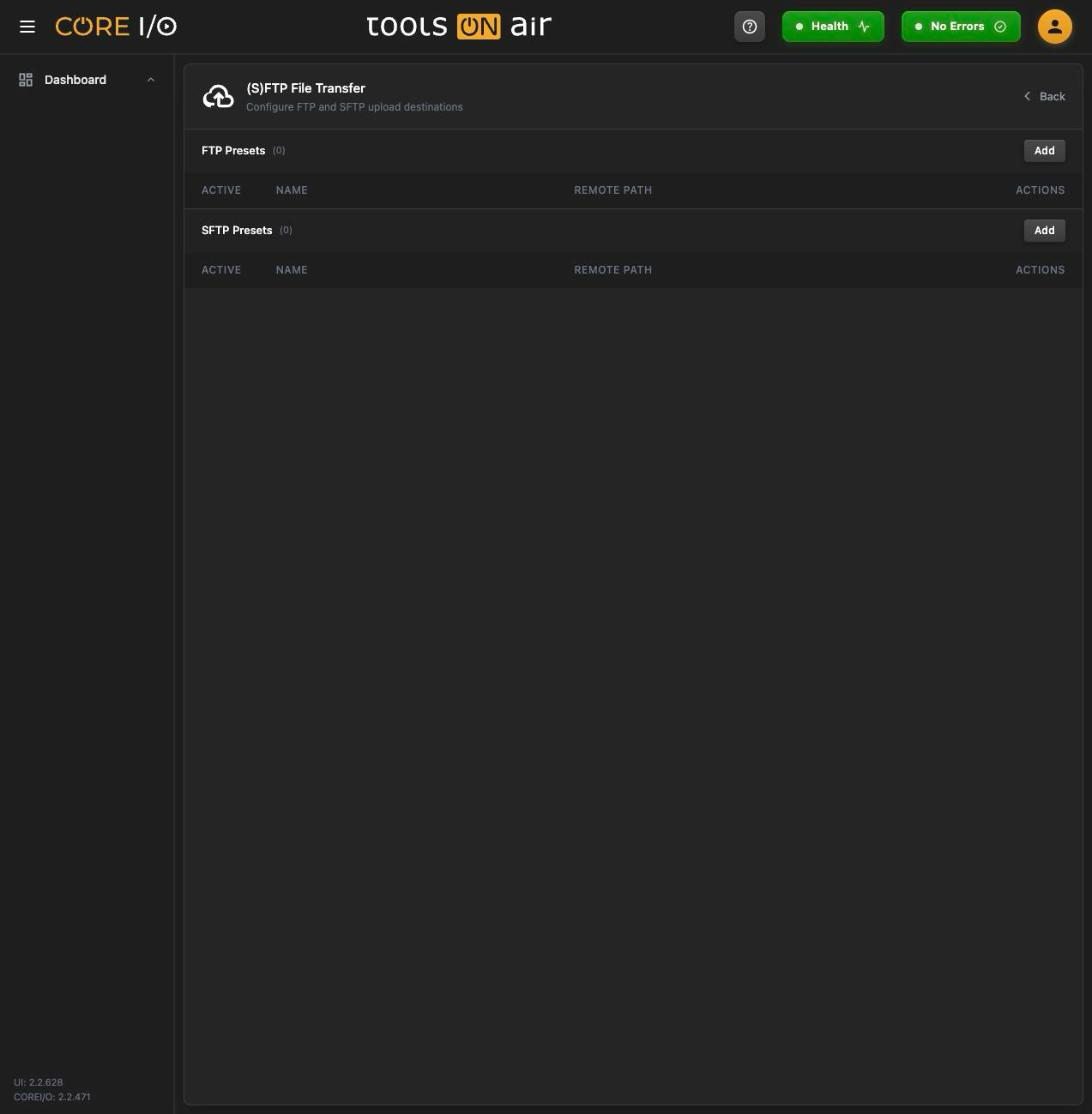
Open /integrations/file-transfer to configure FTP and SFTP upload destinations. The page contains separate FTP Presets and SFTP Presets sections, each with a count and an Add button. An empty section displays "No FTP presets" or "No SFTP presets" with the hint "Add a preset to get started".
Each table lists Active, Name, Remote Path, and Actions (Test, Edit, and Delete). The inline form contains the following fields:
| Field | What it does |
|---|---|
| Enabled | Whether the preset is active right after saving. On by default. |
| Name | Display name of the destination. Required. |
| Host | Server hostname or IP address. |
| Port | Defaults to 21 for FTP and 22 for SFTP. Digits only. |
| Username | Login user on the server. |
| Password | Login password. When editing a preset that already has credentials the field shows dots and the note "Leave blank to keep existing": an empty field keeps the stored password. |
| Remote Path | The destination folder on the server. The default is /. |
| Upload Rate Limit (MBit/s) | Bandwidth cap, empty means Unlimited. |
| Passive Mode (FTP only) | Passive FTP data connections. On by default. |
| Trust on First Use (SFTP only) | Accept the server's host key on the first connection and pin it. On by default. The fingerprint that was trusted is reported by Test. |
Amazon Web Services
Open /integrations/aws to manage AWS credentials and S3 upload destinations. Setup has two stages.
Connecting an AWS account
Until credentials are stored, the Connect AWS Account card displays "Enter your AWS credentials to browse S3 buckets and create upload presets". Enter the Access Key ID and Secret Access Key, then click Connect. Pressing Enter in the Secret Access Key field also submits the form. Both fields are required; otherwise, the page displays "Both Access Key ID and Secret Access Key are required". After a successful connection, a toast reads "AWS credentials saved" and the fields are cleared.
Once connected, a Disconnect button appears in the header. It removes the stored credentials and empties the bucket list; presets are not deleted. A user without the right permissions gets "Insufficient permissions".
Buckets and Presets tabs
After connecting, the page shows two tabs.
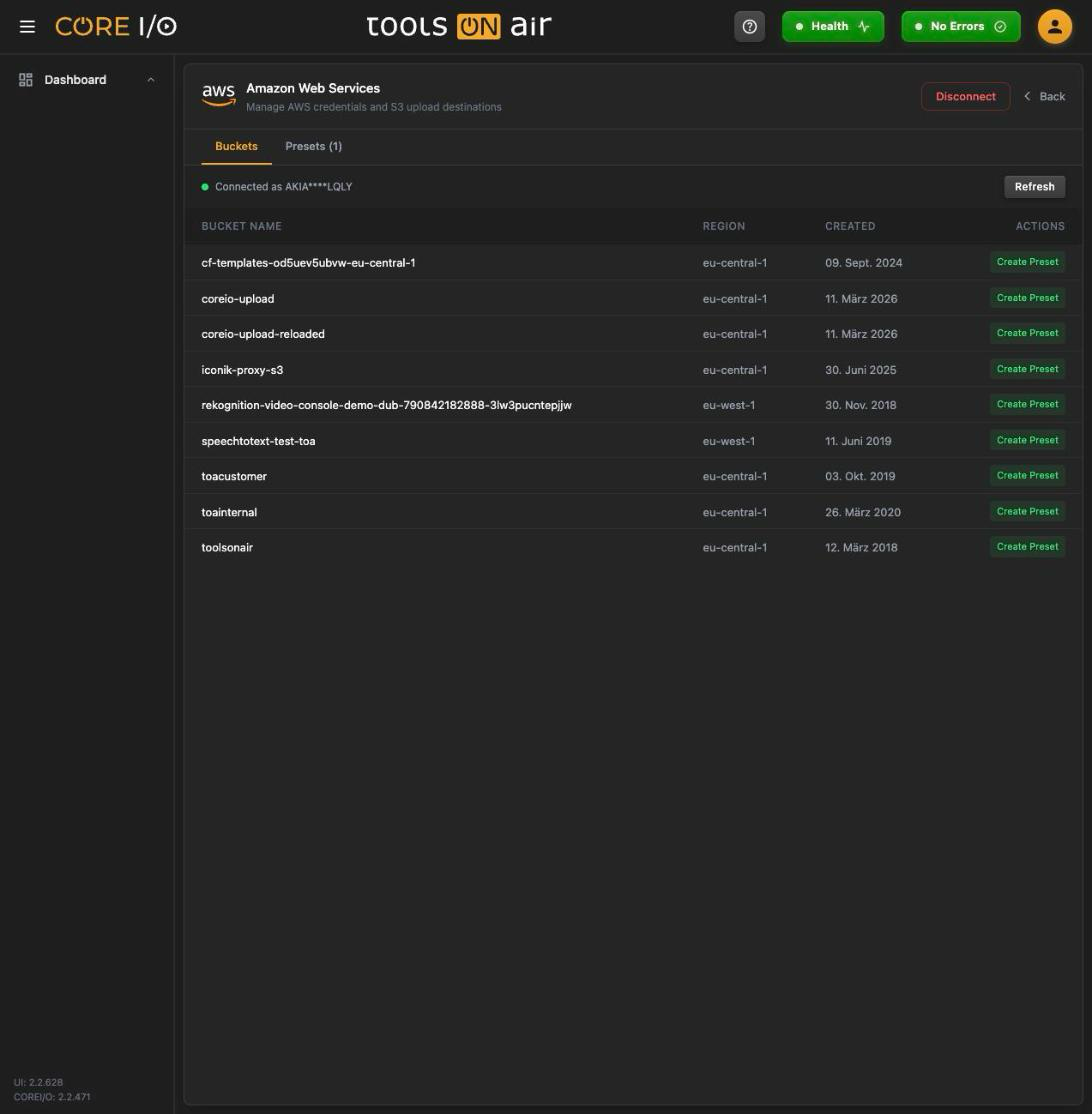
The Buckets tab starts with a status bar. Valid credentials show a green dot and the connected account after "Connected as"; invalid credentials show a yellow dot. Use Refresh to reload the list. The table shows Bucket Name, Region, and Created for each accessible S3 bucket. If the account has no buckets, the page displays "No S3 buckets found" and "Create a bucket in the AWS console first". If the backend cannot list buckets, the page explains "Bucket listing is currently unavailable (backend error). You can still manage S3 presets manually in the Presets tab." and provides Retry.
Each bucket row has Create Preset, which opens a Quick Create S3 Preset form under the row:
| Field | What it does |
|---|---|
| Preset Name | Prefilled with the bucket name. Required ("Preset name is required"). |
| Key Prefix | Optional path prefix inside the bucket, for example deliveries/2026. |
| Upload Rate Limit (bytes/s) | Bandwidth cap in bytes per second in this quick form. The full preset form uses MBit/s. Enter digits only, or leave the field empty for Unlimited. |
| Enabled | Activates the preset after saving. Enabled by default in the quick form. |
Presets (n) shows the S3 Presets table with Active, Name, Key Prefix, Rate Limit and Actions. Add opens the full form: Enabled, Preset Name, Bucket Name (a select of the buckets found in the Buckets tab, or a free text field if no bucket could be listed), Key Prefix and Upload Rate Limit (MBit/s).
The Buckets tab of a connected AWS account
Backblaze B2
Open /integrations/backblaze to manage Backblaze credentials and B2 upload destinations. The workflow follows the AWS page but uses Backblaze terminology.
The connect card Connect Backblaze B2 asks for Application Key ID and Application Key; both are required. Errors returned by Backblaze are shown verbatim in the toast.
The Buckets tab lists Bucket Name, Region, Bucket Type, and S3 API URL. Its status line identifies the connected account.
Quick Create B2 Preset has the same fields as the AWS quick form plus a B2 Live Read toggle.
The Presets (n) tab shows the B2 Presets table with two extra columns, Bucket ID and Live Read ("Enabled" or "Off"), and the full form has the B2 Live Read toggle. The empty state reads "Create a Backblaze preset to get started".
LucidLink
Open /integrations/lucidlink to connect a service account and mount filespaces by workspace.
LucidLink filespaces are mounted on the CORE I/O hosts and then appear as mount points.
Connecting LucidLink
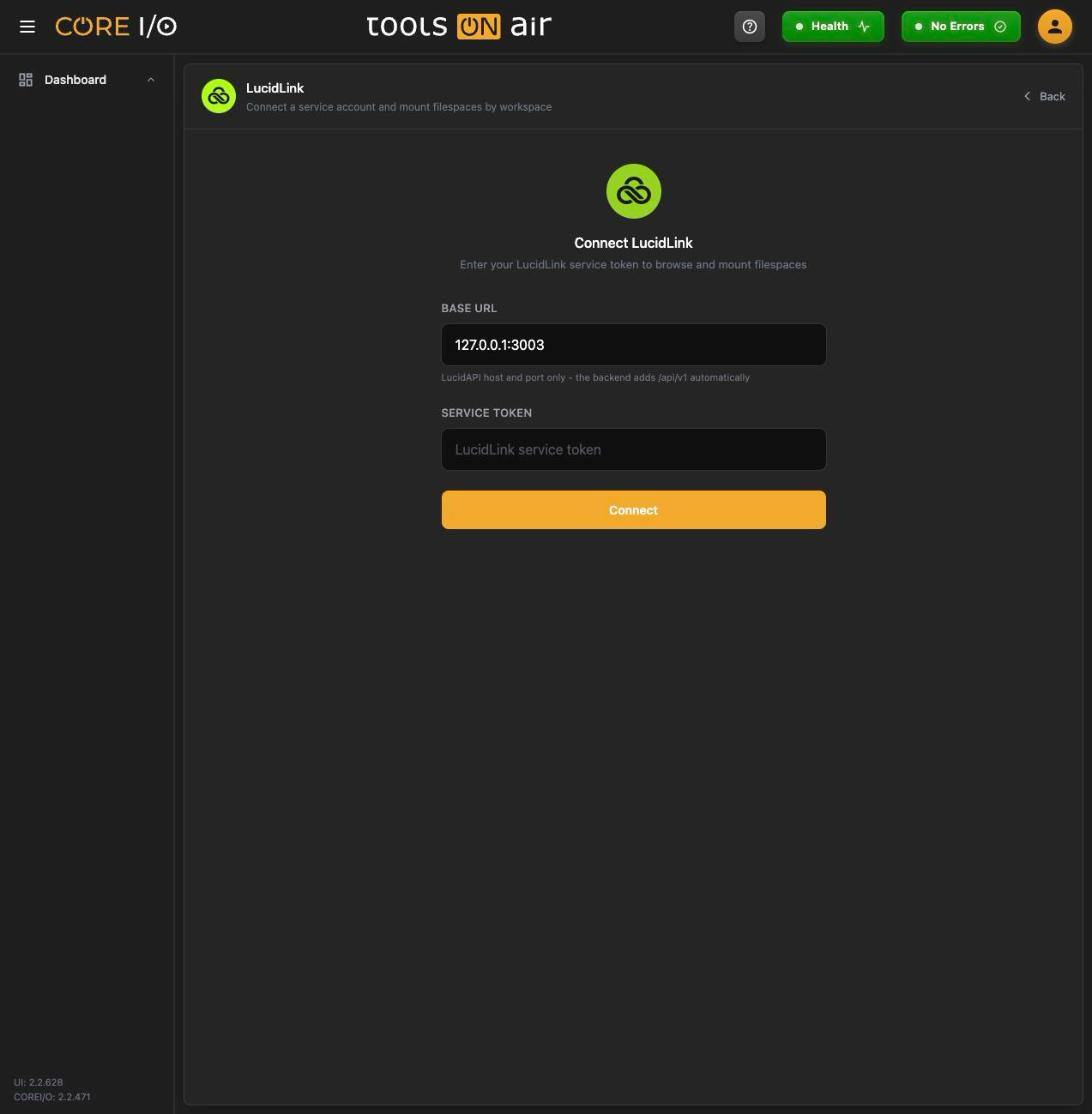
The Connect LucidLink card has two fields:
| Field | What it does |
|---|---|
| Base URL | Host and port of the LucidAPI. The default is 127.0.0.1:3003. The hint reads "LucidAPI host and port only - the backend adds /api/v1 automatically". |
| Service Token | The LucidLink service account token. Required ("LucidLink service token is required"). |
Connect saves the credentials ("LucidLink credentials saved") and loads the filespaces. Disconnect in the header removes the credentials and clears the lists.
The LucidLink connect card
Filespaces by workspace
When connected the status bar shows a green dot (yellow while the backend reports the token as invalid) with "Connected to LucidLink" and a Refresh button. Filespaces are grouped into one card per workspace, sorted by name, with the columns Filespace, Status, Mount Point, Hosts and Actions.
Status shows a green Mounted badge for mounted filespaces, otherwise the status reported by LucidLink (for example "Available").
Mount Point is the local path of the mount, Hosts reads "n hosts assigned" or "No host assignments".
Mount mounts the filespace on the hosts; the button turns into Unmount once mounted. Both show "Working..." while busy. If a host fails, the toast lists the host and its error.
Refresh on a mounted row re-syncs that mount on the hosts.
Create Destination Preset creates a destination preset named after the filespace that writes to the mount point (file container, 4 MB buffer, 02:00:00:00 chunks). Once any destination preset points into the mount, the button is replaced by a Destination Preset badge.
If the service account has no filespaces, the page says "No filespaces found".
Where these integrations show up
File Browser: the source picker lists mounted LucidLink filespaces under a LucidLink heading, and the enabled upload presets under AWS S3 Buckets, Backblaze B2 Buckets and FTP / SFTP.
Browsing a remote preset shows its contents. Dragging local files from another File Browser onto a remote source opens an "Upload… to:" bar with an Upload button. Dragging remote files onto a local folder opens a "Download… to:" bar with Download. Hold Shift while dropping to skip the confirmation bar.
Transfer Monitor: every queued upload or download appears there with its progress.
Actions: the FILE_UPLOAD action type has an Upload Preset select that lists enabled presets as "name - FTP", "name - SFTP", "name - S3" or "name - Backblaze".
Good to know
Enabled presets cannot be edited or deleted; the toggle in the Active column is the only control that works on them.
Disconnecting an AWS or Backblaze account does not delete its presets. Uploads to those presets fail until an account is connected again.
The bucket select in the full S3 form is only a dropdown when the Buckets tab could list buckets; otherwise you type the bucket name.
Connection tests use the stored credentials. After changing a password, save the preset and then test it.