

Option A: Creating a New Channel
When starting Just Control for the first time (or when adding a new Channel) you can use the Channel Wizard to create a Channel.
Make sure to start Just Out and Just Connect from the Dock or the Just Playout folder first.
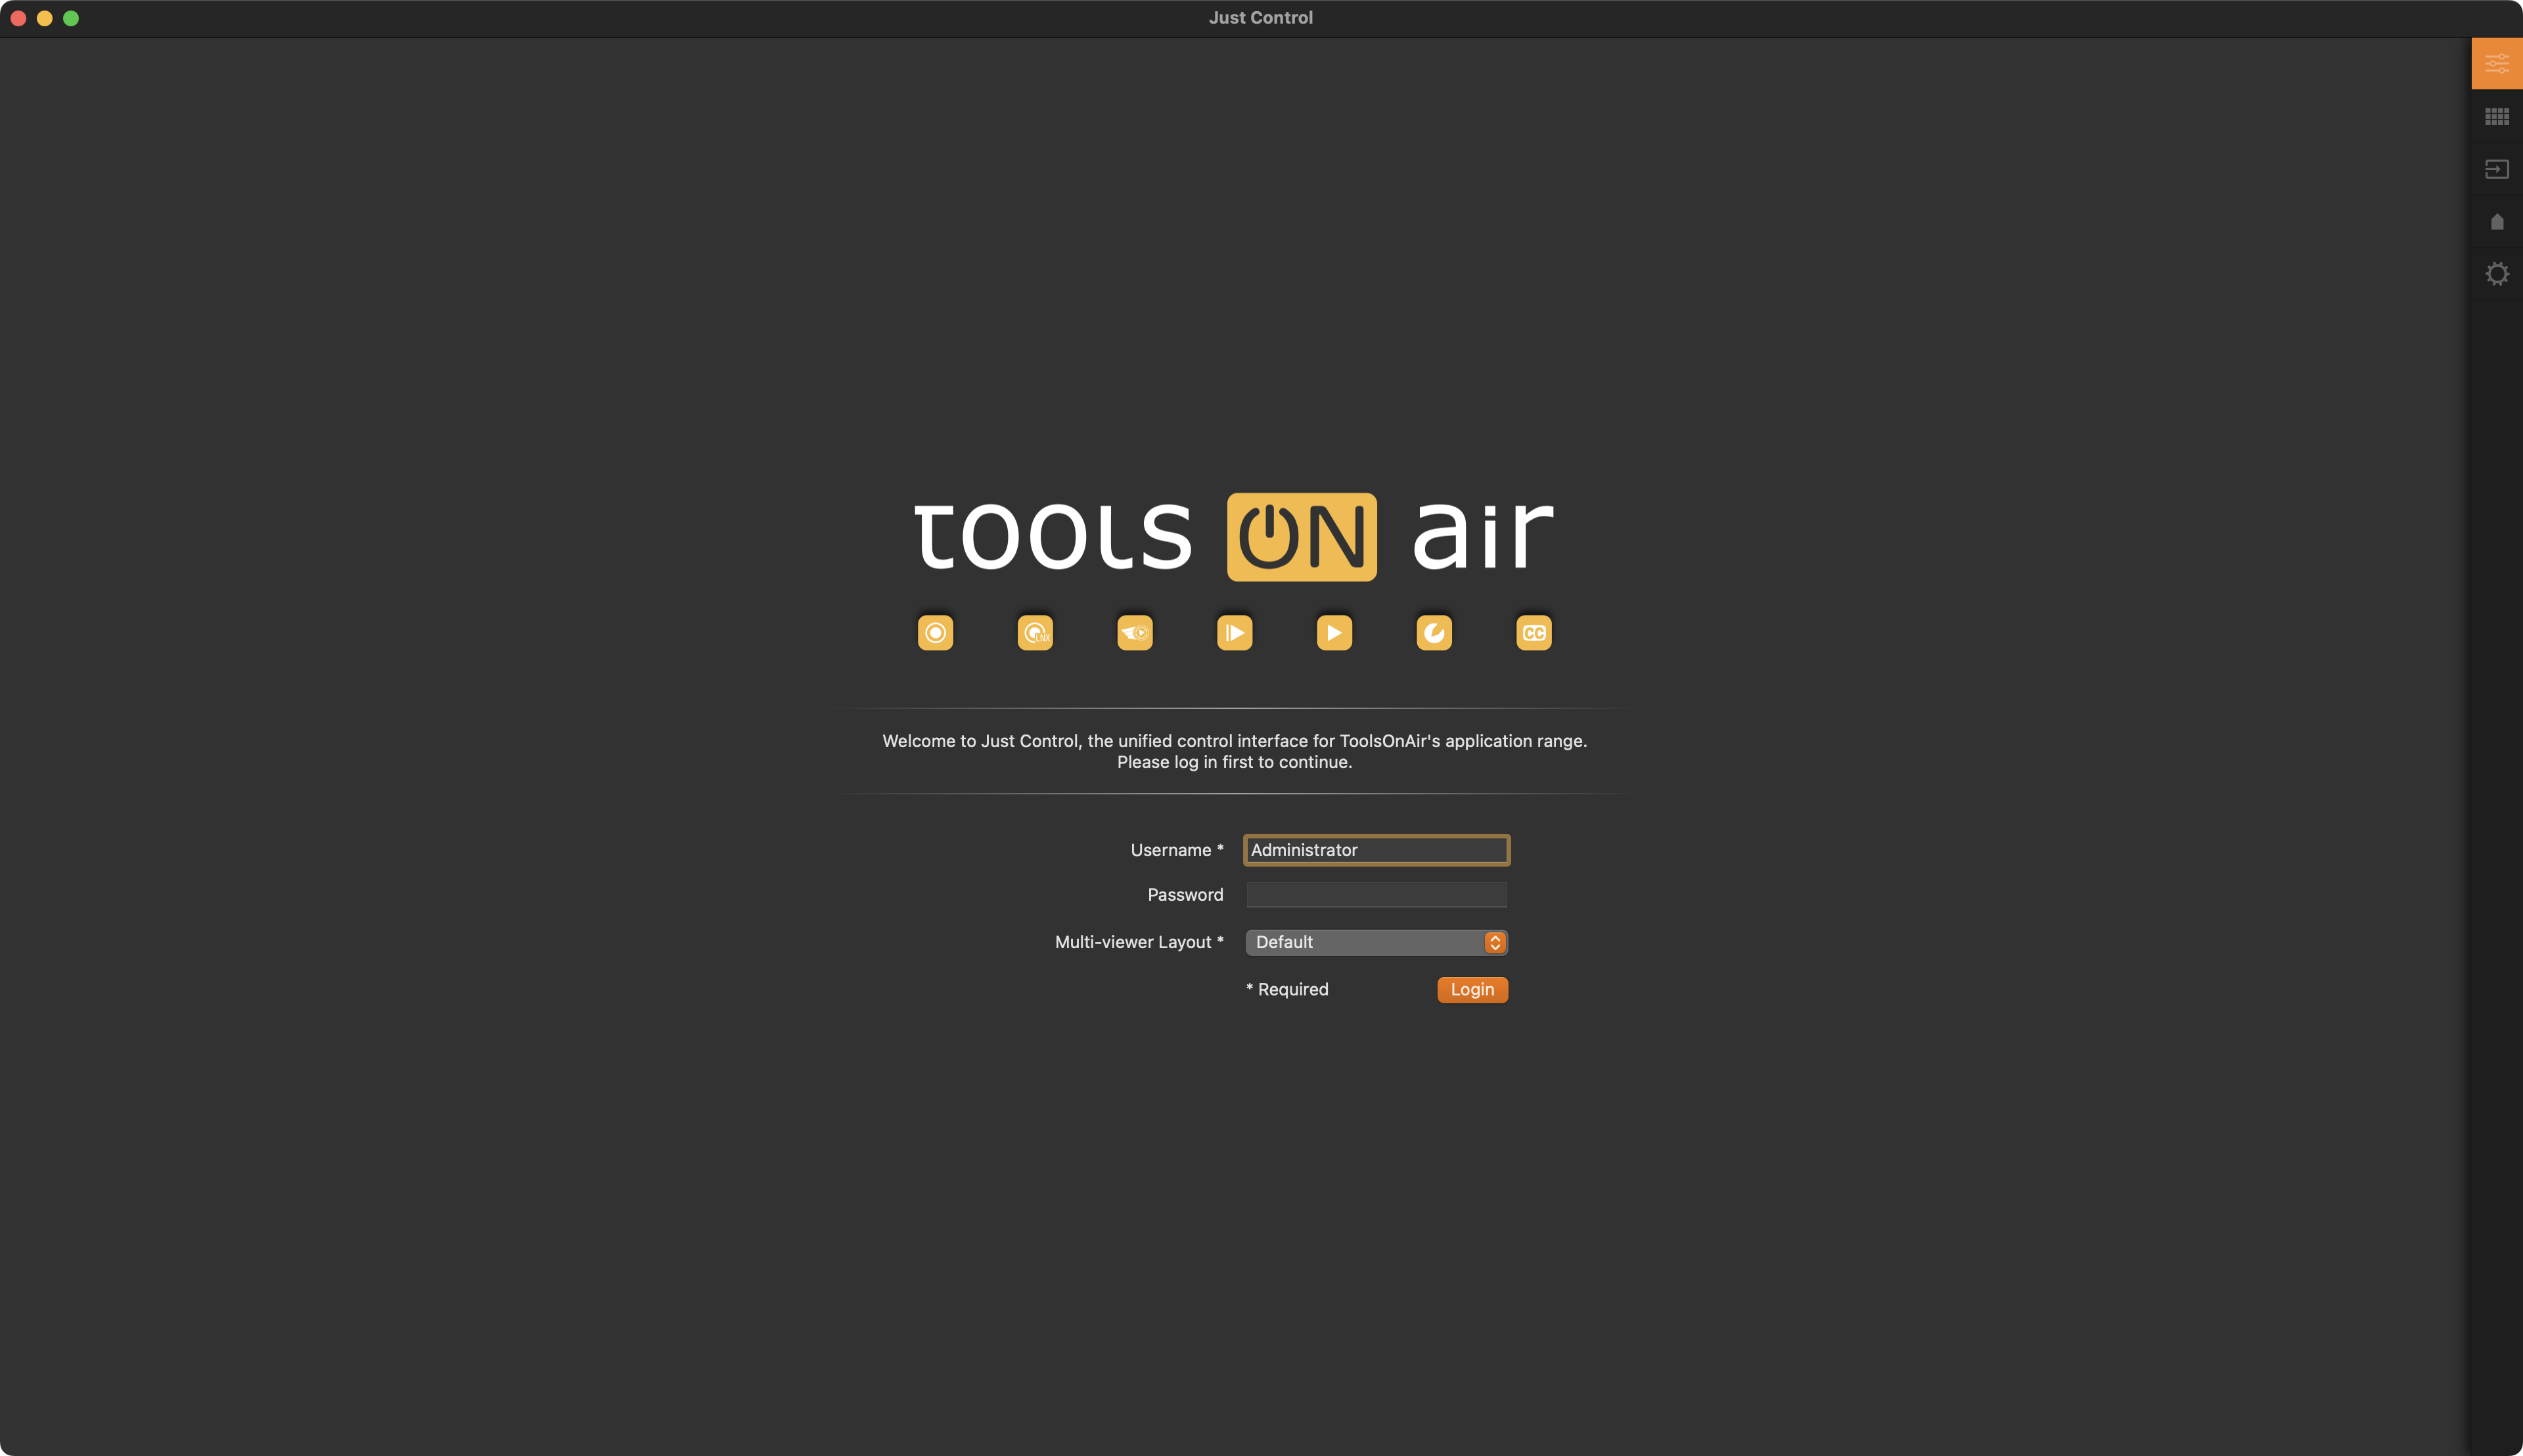
Then start Just Control, which will automatically display the Admin User Wizard. We recommend keeping the defined username for now. Press "Login".
The Device Wizard opens and shows the local IP address and the Port which will be used by the Device. If Just Connect is running on different machines, you can type in the IP address of the other machine in the “IP Address” field. Otherwise, do not change the settings here!
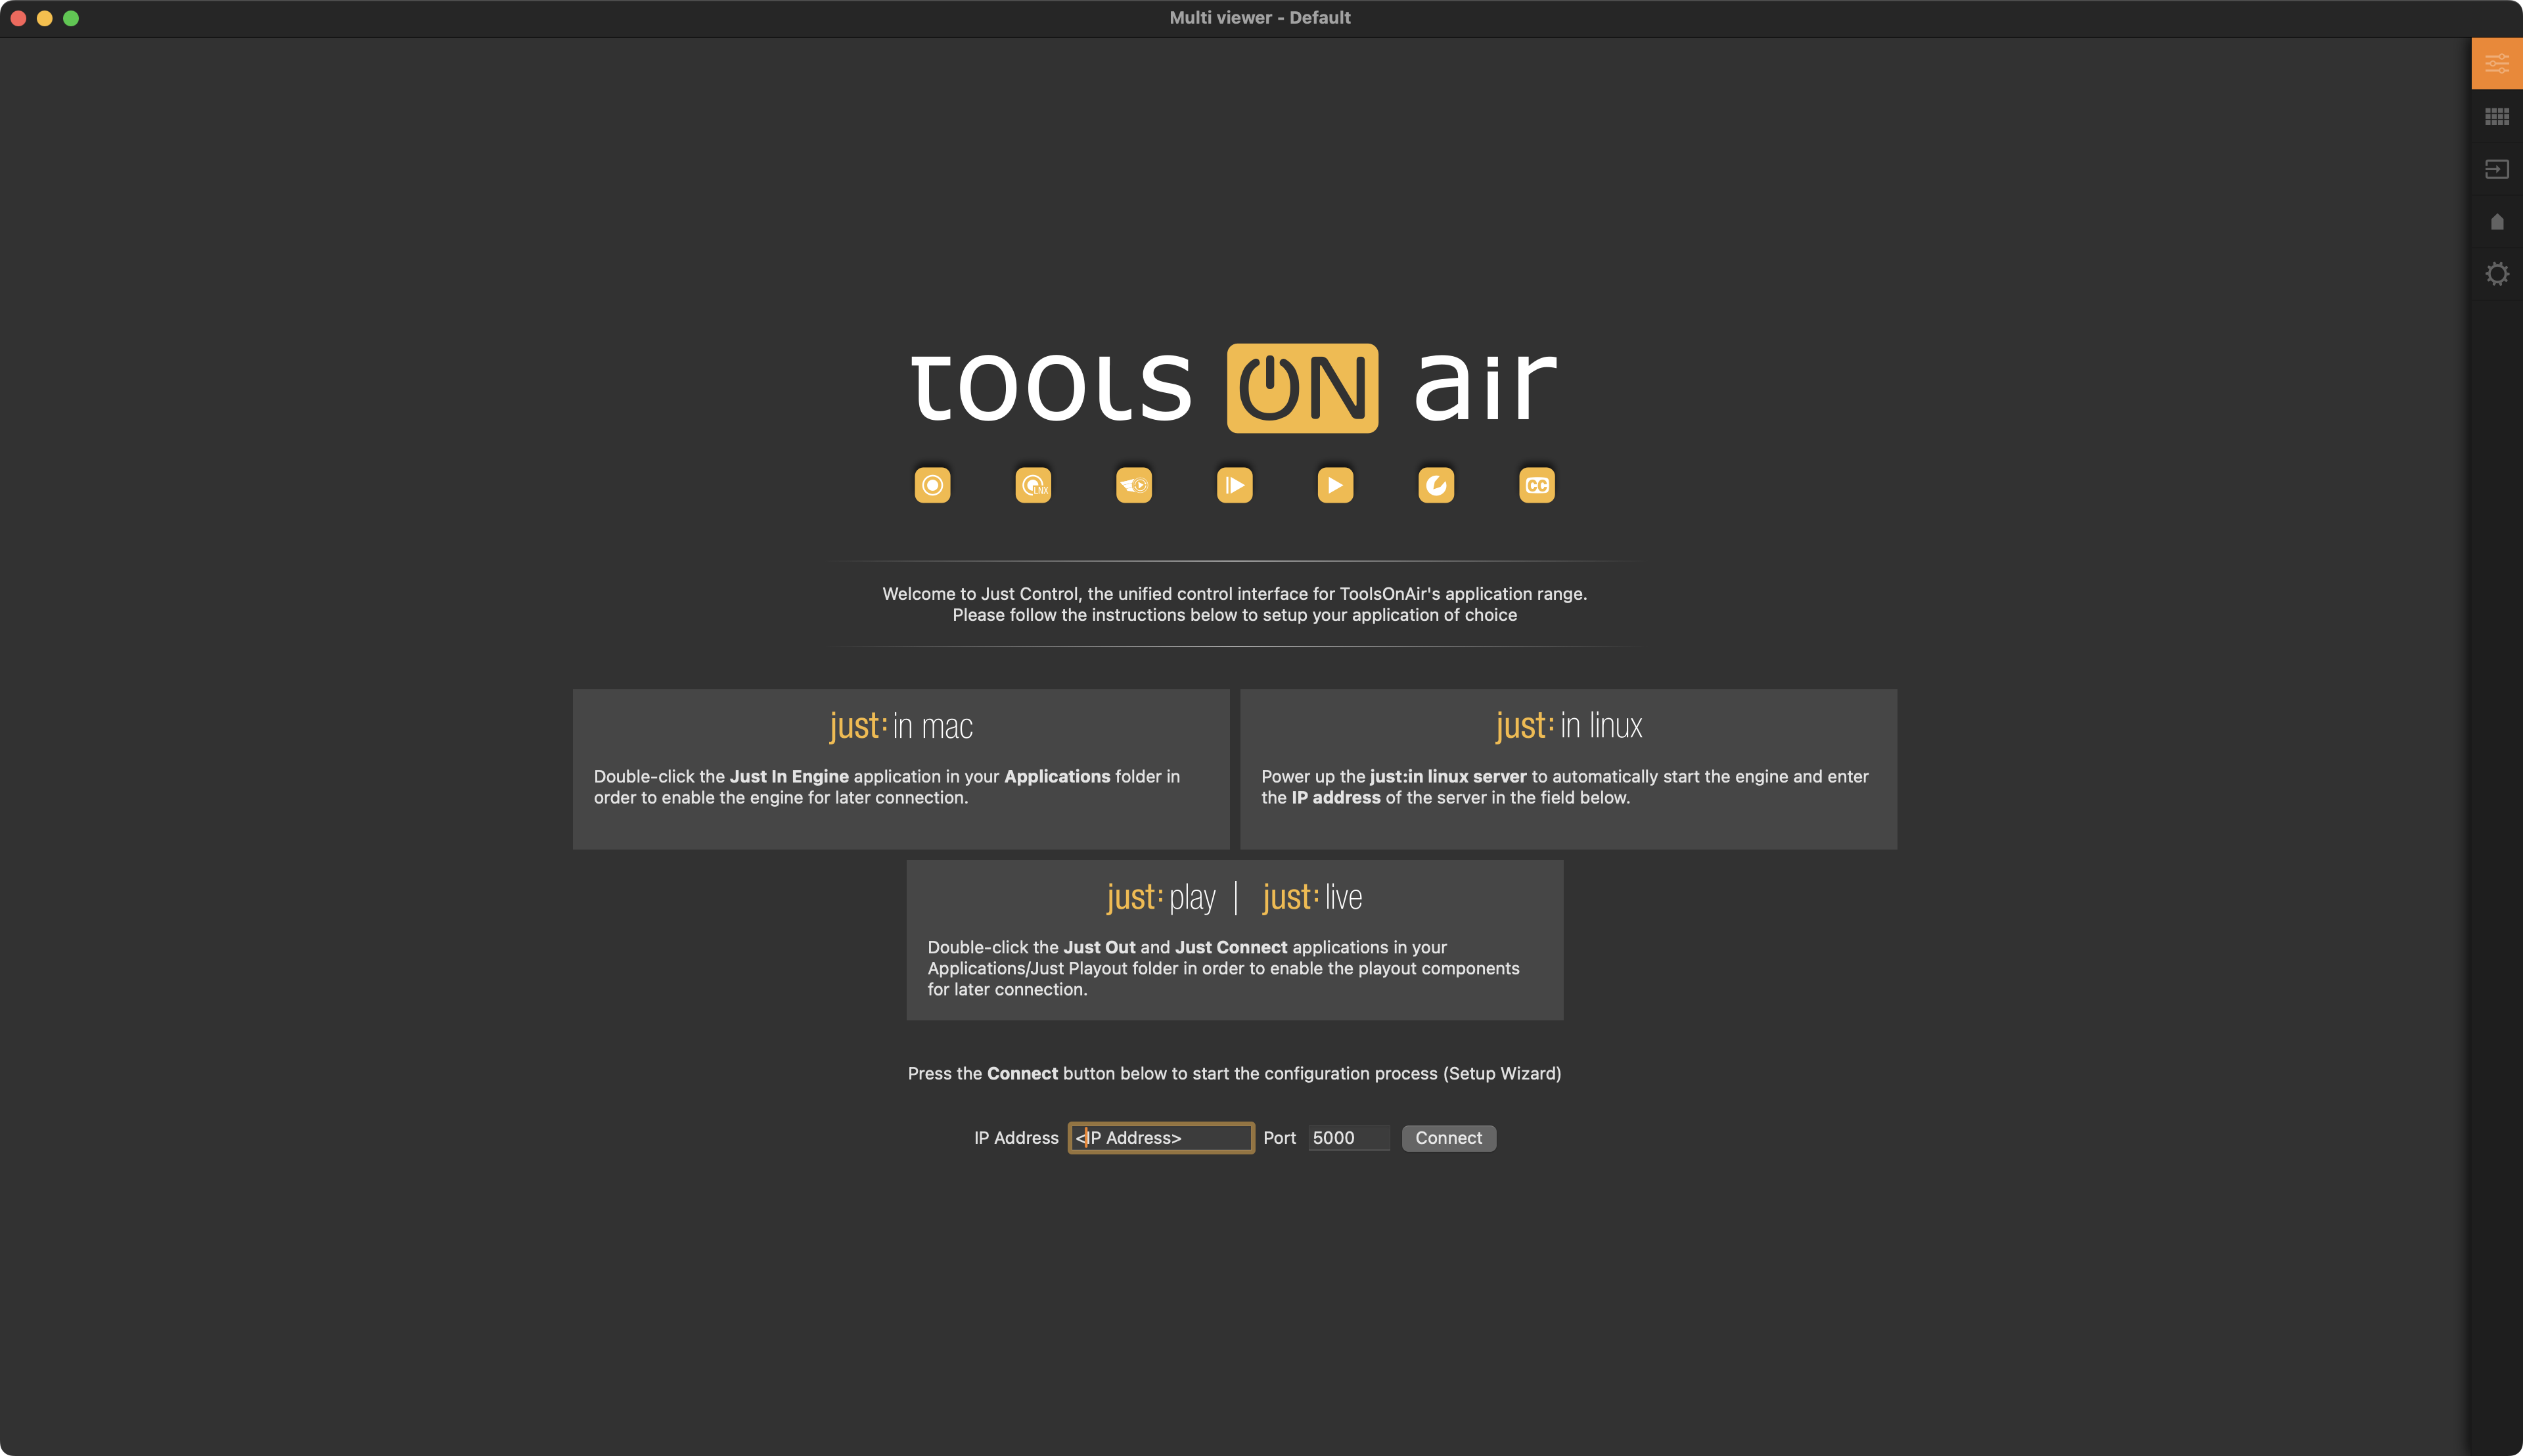
Verify that Just Connect is running on the local (or remote machine) and click on the “Connect” button. Once Just Connect has been recognized, the Playout Channel Wizard will be opened.
The Channel Wizard
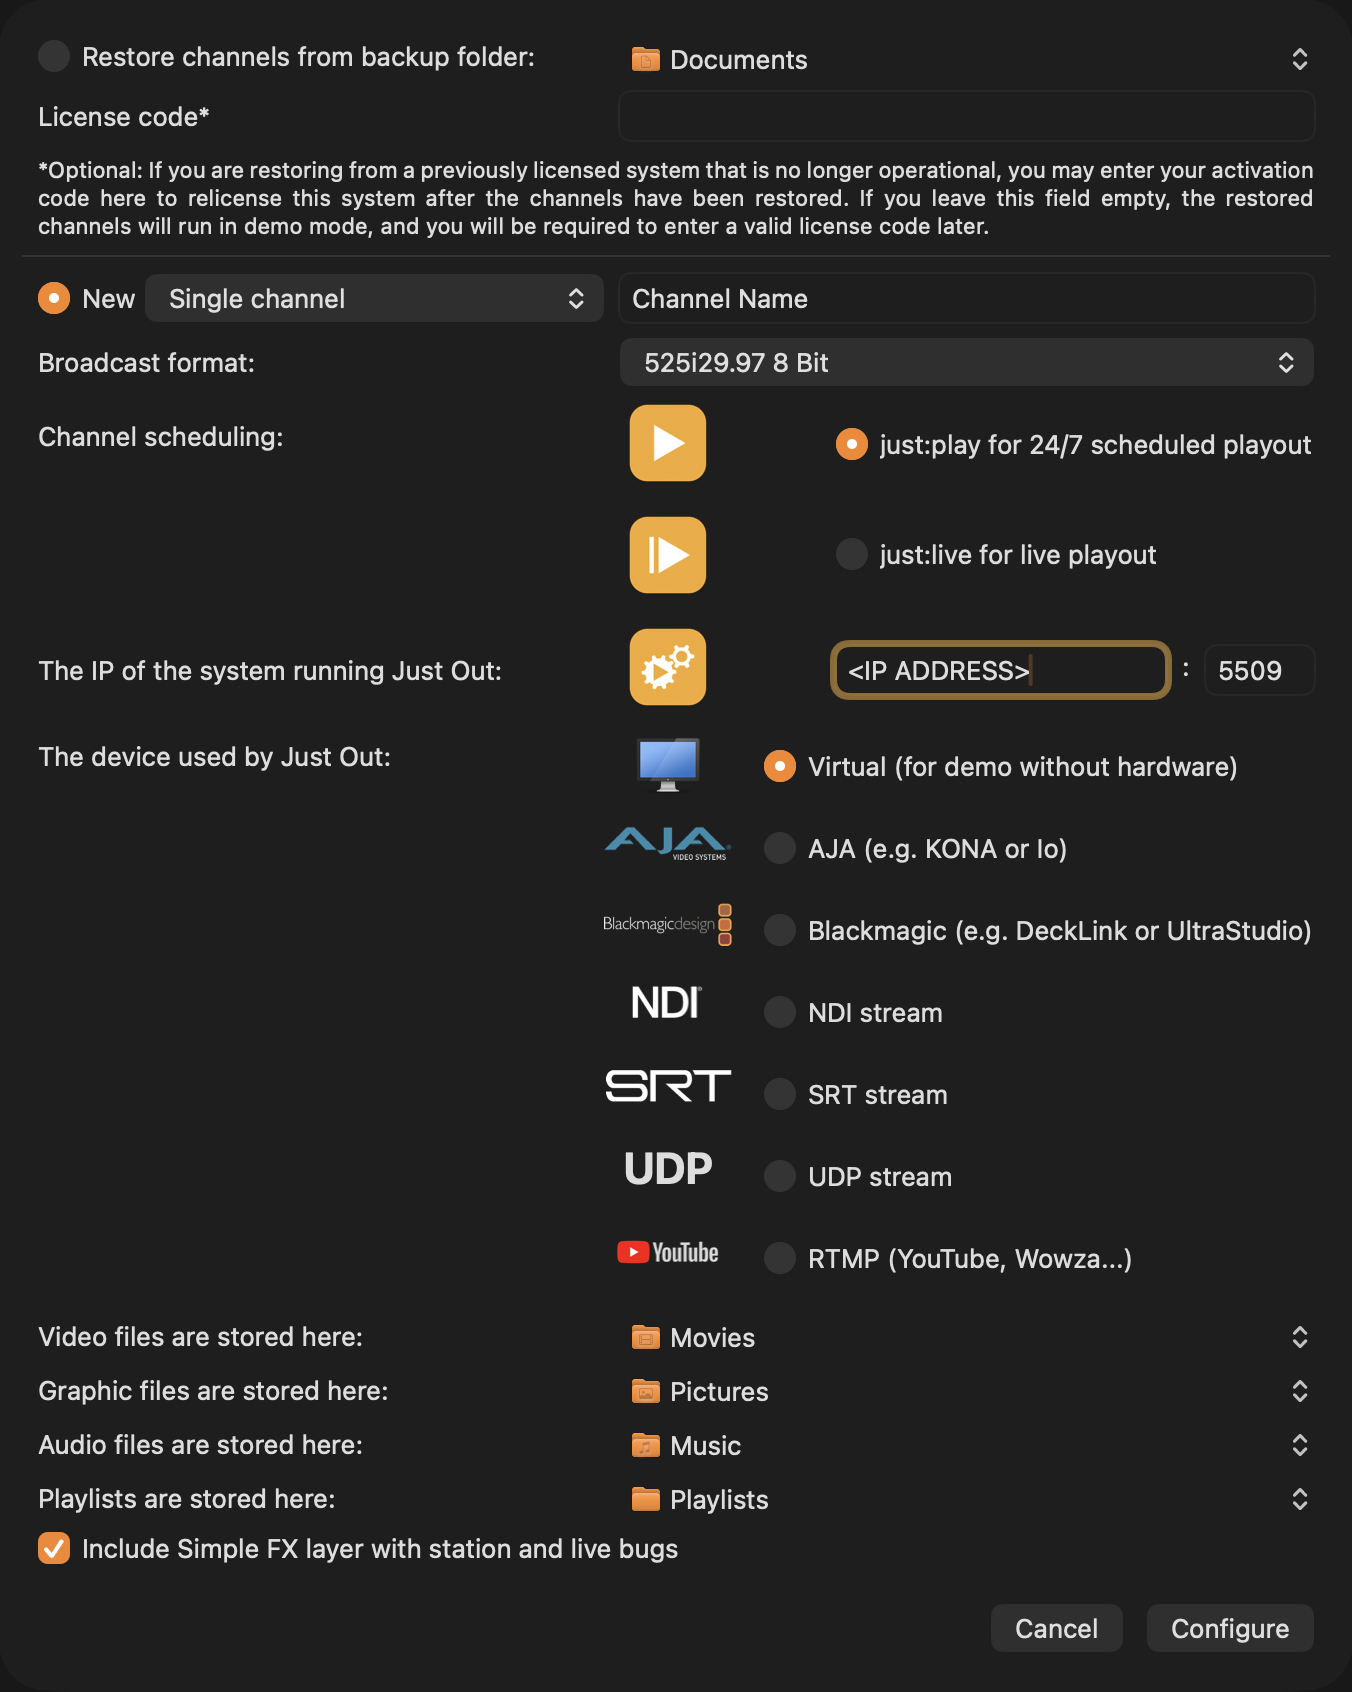
Make sure the option “New Single channel” is selected.
Select the number of channels you would like to administrate using the chosen Just Connect.
Enter the name of your Channel into the “New Channel” name field. All additional channels will have the same name with the appendix 2, 3 and 4.
Select the Format the Channel(s) will use for broadcast (in this example “525i29.97 8 Bit”) and make sure to select a
8bit mode in case the final output is NDI®, SRT, UDP, HLS or RTMP
RGBA mode in case you would like to play out SDI based fill+key.
Select the Type of User Interface you would like to use with this Channel.
Just Play for automated 24/7 Master Control Playout.
Just Live for manually operated Live Production Playout.
Enter the IP address of the machine where the Just Out engine, which you would like to use with this Channel, is running. If you’re planning to run the engine and the user interface on the same machine, you can also use “127.0.0.1”. Usually, there is no need to change the IP address and the Port.
Define what kind of Video hardware or streaming format you would like to use for the live input and the final output:
Virtual: in case there is no Video hardware available for the final output on the machine running Just Out.
AJA: in case you have a supported AJA Video device installed on the machine running Just Out.
Blackmagic: in case you have a supported Blackmagic Design Video device installed on the machine running Just Out.
NDI® Stream: in case you would like to receive your live signal and output your stream over NDI (v.6).
SRT Stream: in case you would like to receive your live signal and output your stream over SRT.
UDP Stream: in case you would like to receive the live signal and output your stream over UDP.
HLS Stream: in case you would like to output your stream using HLS.
RTMP Stream: in case you would like to output your stream using RTMP.
Change the Repository Folders if desired. The default Repositories are:
Video files: /Users/yourUserName/Videos
Graphic files: /Users/yourUserName/Pictures
Audio files: /Users/yourUserName/Music
Playlist files: /Users/yourUserName/Documents/Playlists
Keep “Include Simple FX layer with station and live bugs” activated to load a Tools On Air Station ID bug (and a Live Input bug) by default to your on-air signal. Both still images can be changed once the channel has been generated. Deactivate “Include Simple FX layer with station and live bugs” if you don’t need the Simple FX graphics option for now.
Click on the “Configure” button to complete the process.
Final Steps
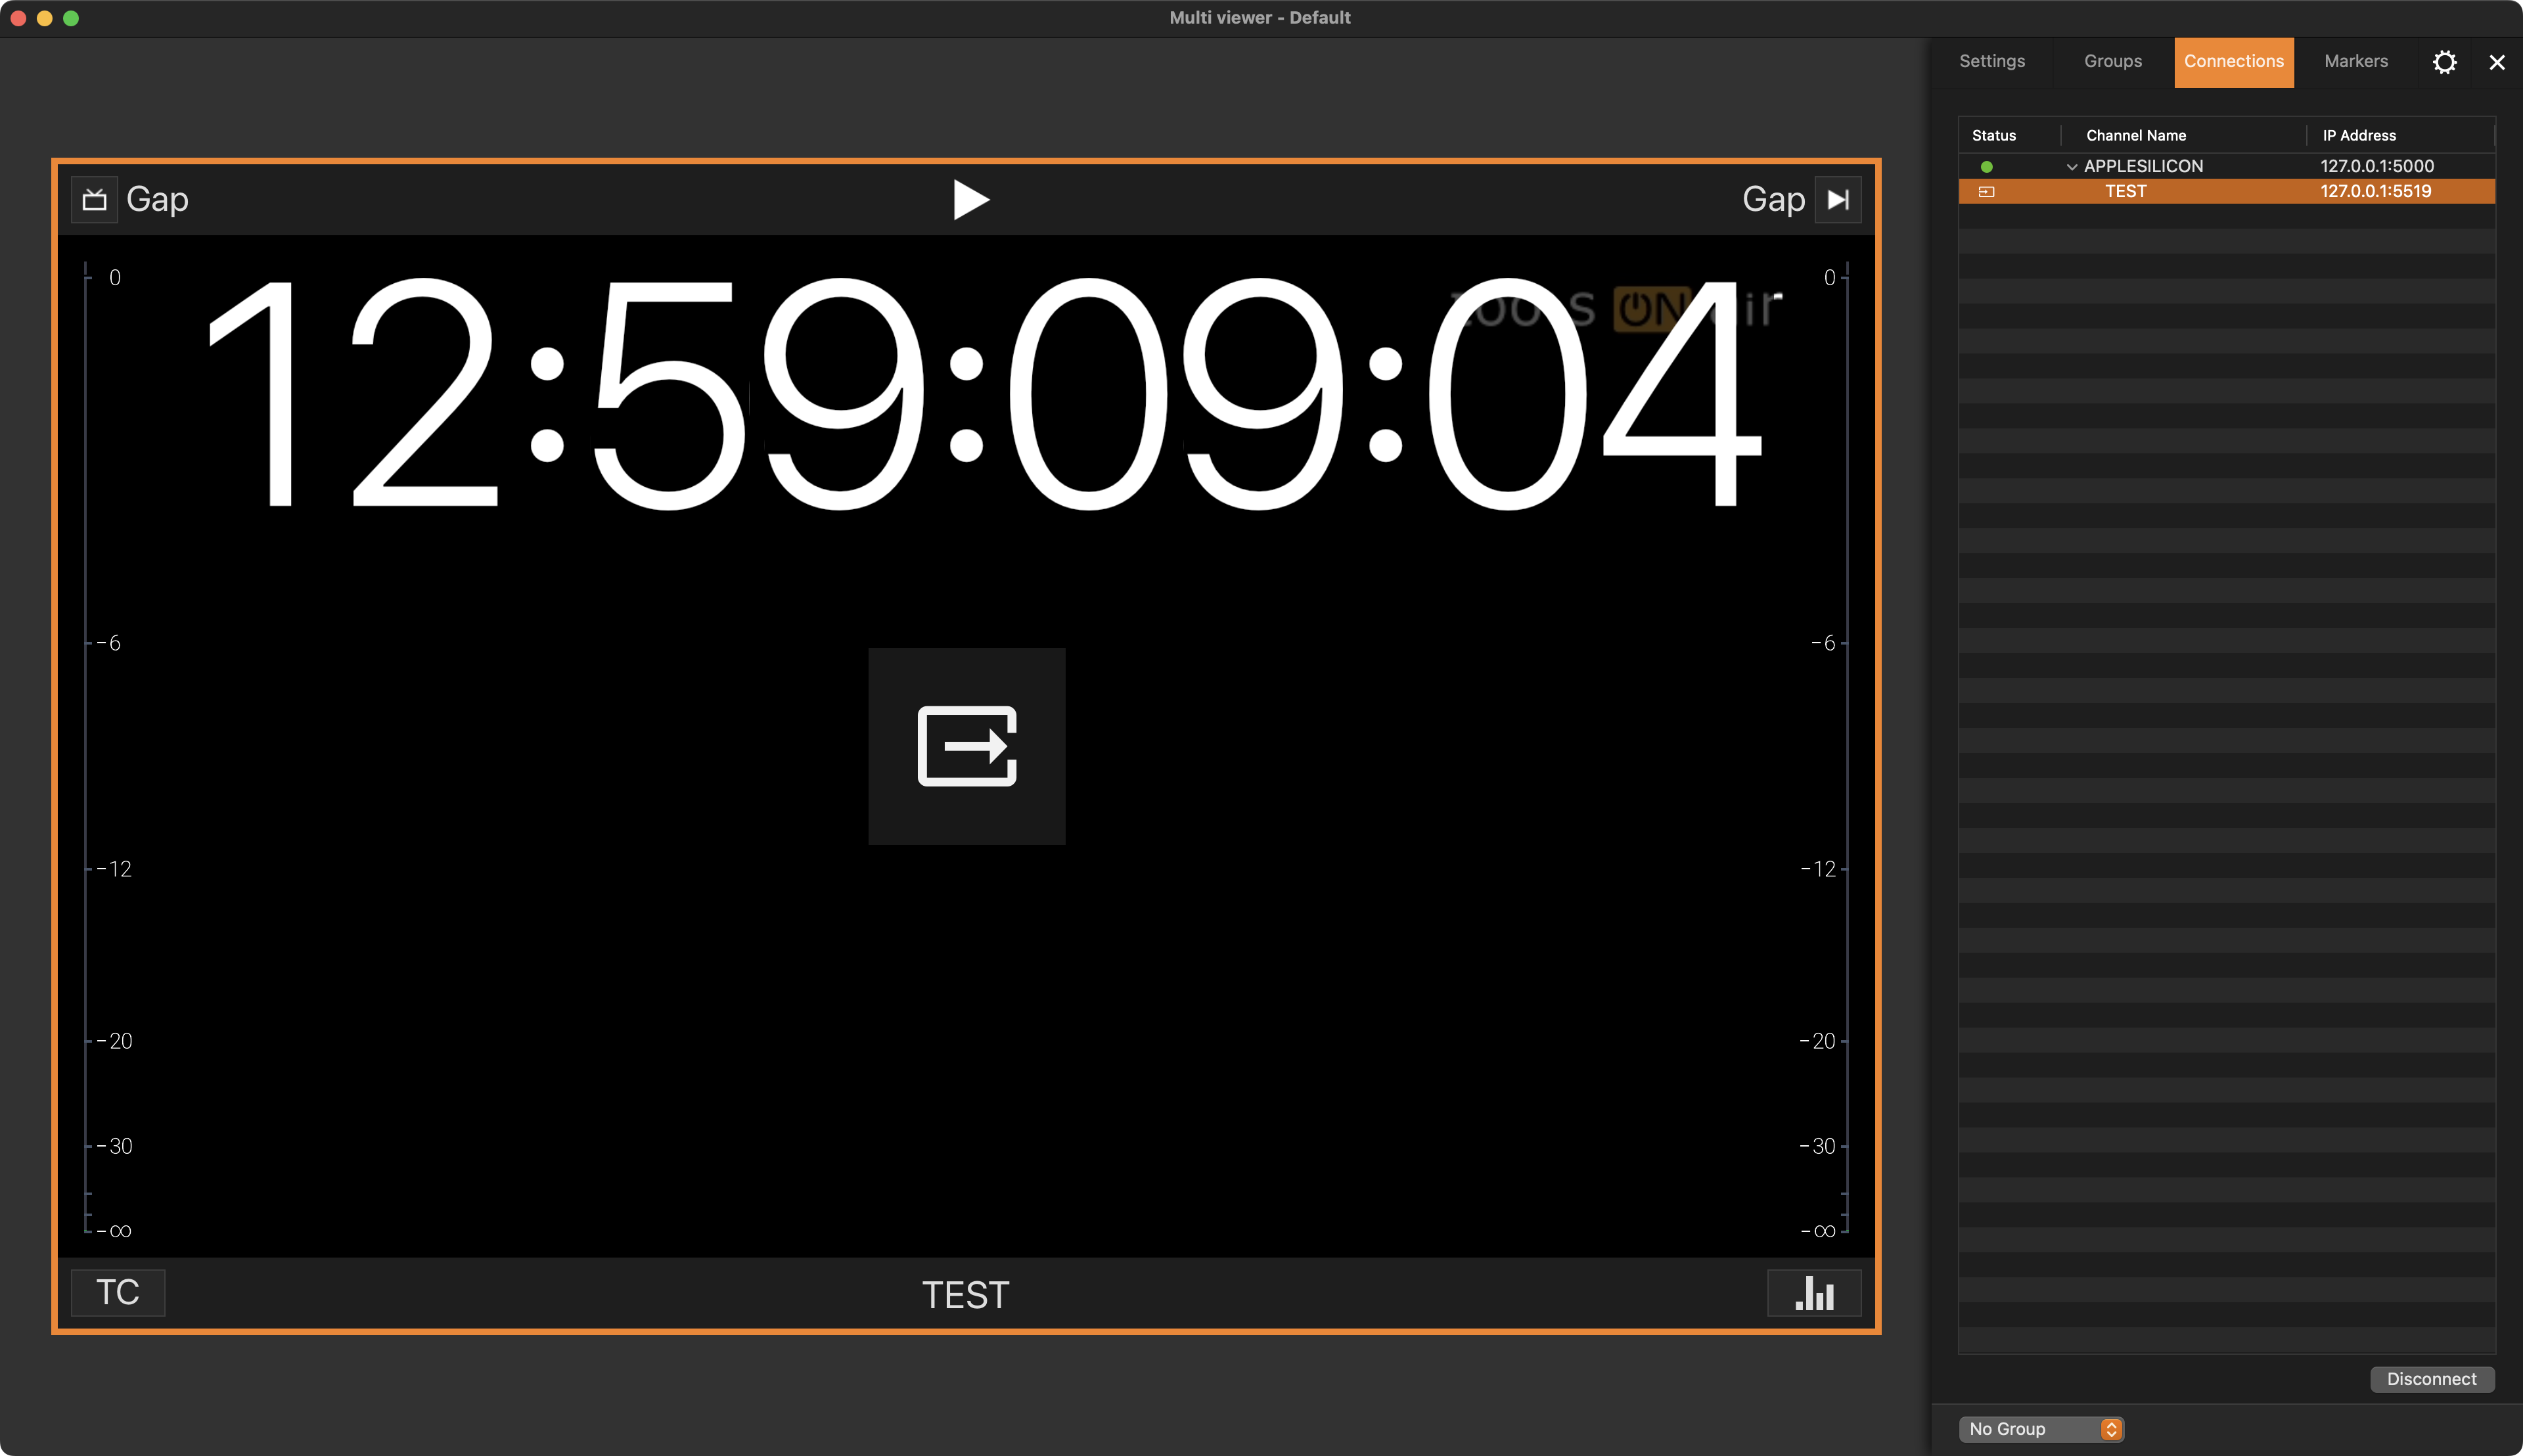
Just Control will now show the Multi Viewer window with one (or several) Viewer(s) opened. Press the button in the middle of the viewer to open the user interface that has been defined for the Channel (either Just Live or Just Play).
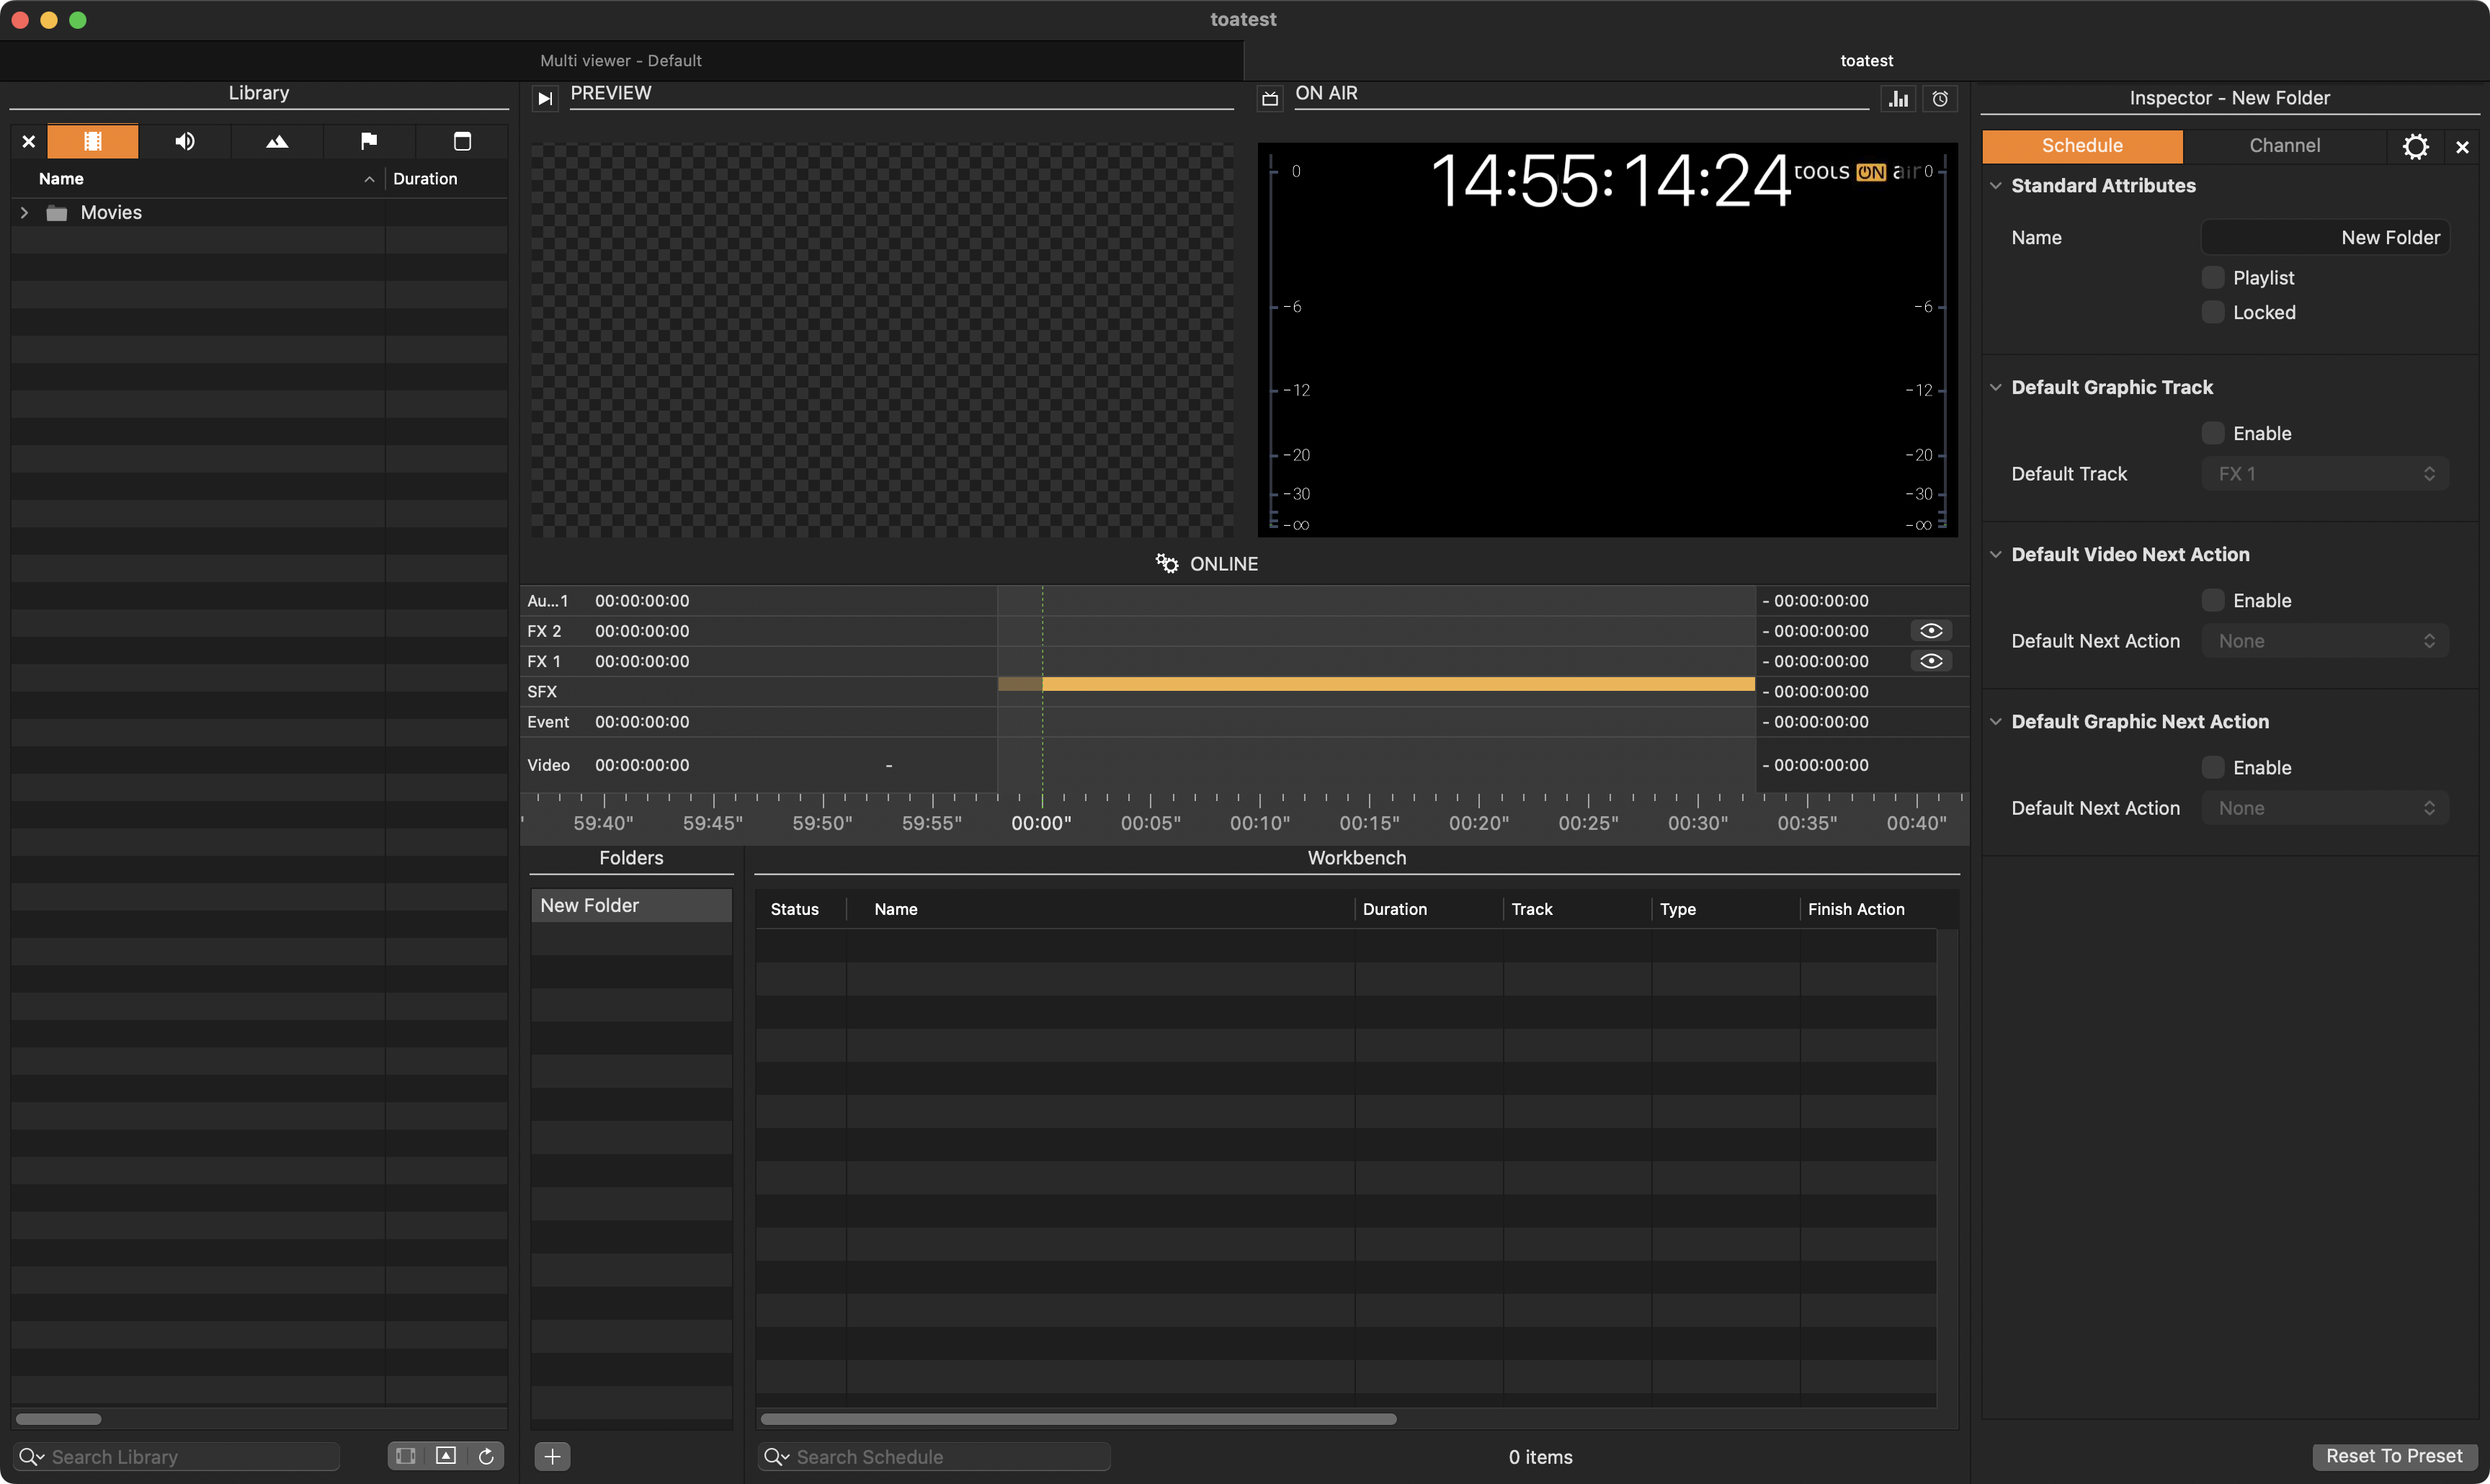
Just Live User Interface
Just Play User Interface
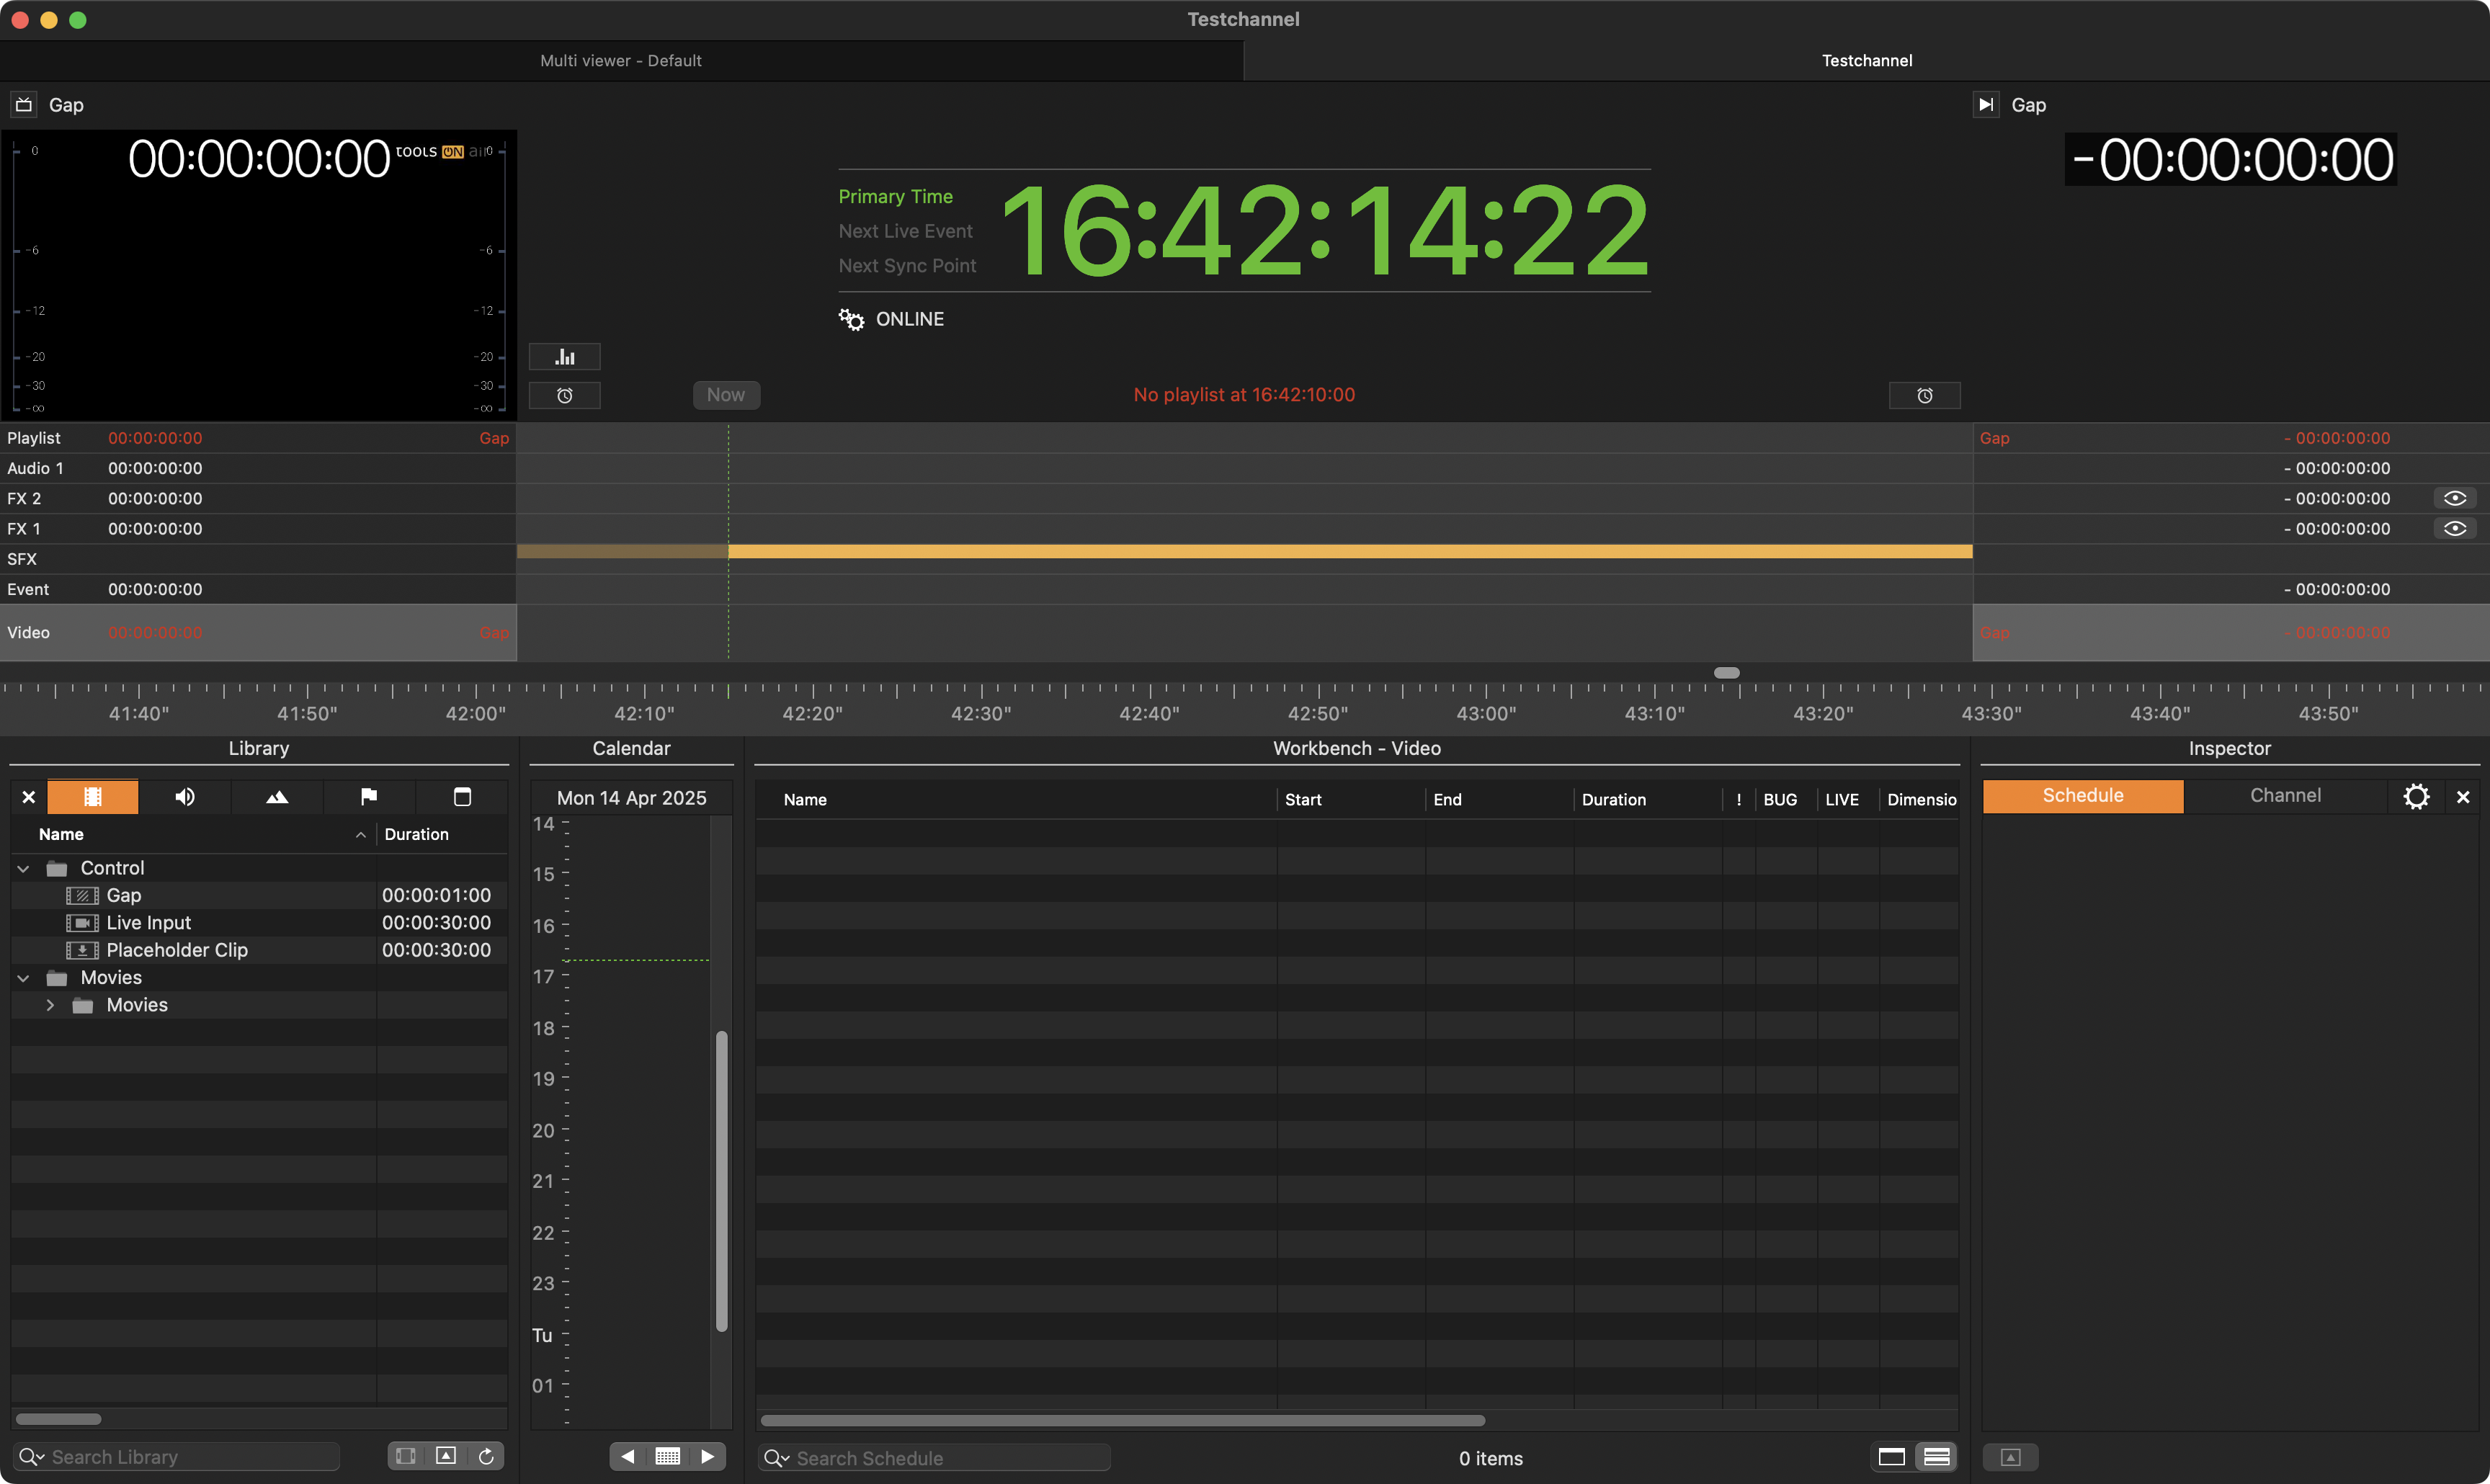
Using the Channel Wizard all new Channels will have one Video Layer, one Event Layer, two FX Layers, one Audio Layer, and if activated, one Simple FX layer – independent of the purchased license.
Once a licensed Activation Key is used to activate the Channel(s), the number of Layers will change depending on the Activation Key.
Once a Channel has been generated, all attributes defined in the Wizard plus additional attributes like the number and order of Layers, additional Repository folder(s), the ability to switch to live and so on, can be changed.
Option B: Restoring a Channel from a Backup
When re-installing Just Connect after a drive failure or if you are using a “cold spare” Just Connect on the redundant machine for the first time, you can use the “Restore Channels from Backup” function to restore the Channel.
You need a Channel Backup first to continue.
Make sure to start Just Out and Just Connect from the Dock or the Just Playout folder first.
Then start Just Control, which will automatically display the Admin User Wizard. We recommend keeping the defined username for now. Press “Login”.
The Device Wizard is opened and shows the local IP address and the Port that will be used by the Device. In case Just Out and Just Connect are running on a different machine, you can type in the IP address of the other machine here.
Verify that Just Out and Just Connect are running on the local (or remote machine) and click on the “Connect” button. Once a Just Out engine has been recognized, the Playout Channel Wizard will be opened.
Click on the “Restore Channels from backup” checkbox at the top.
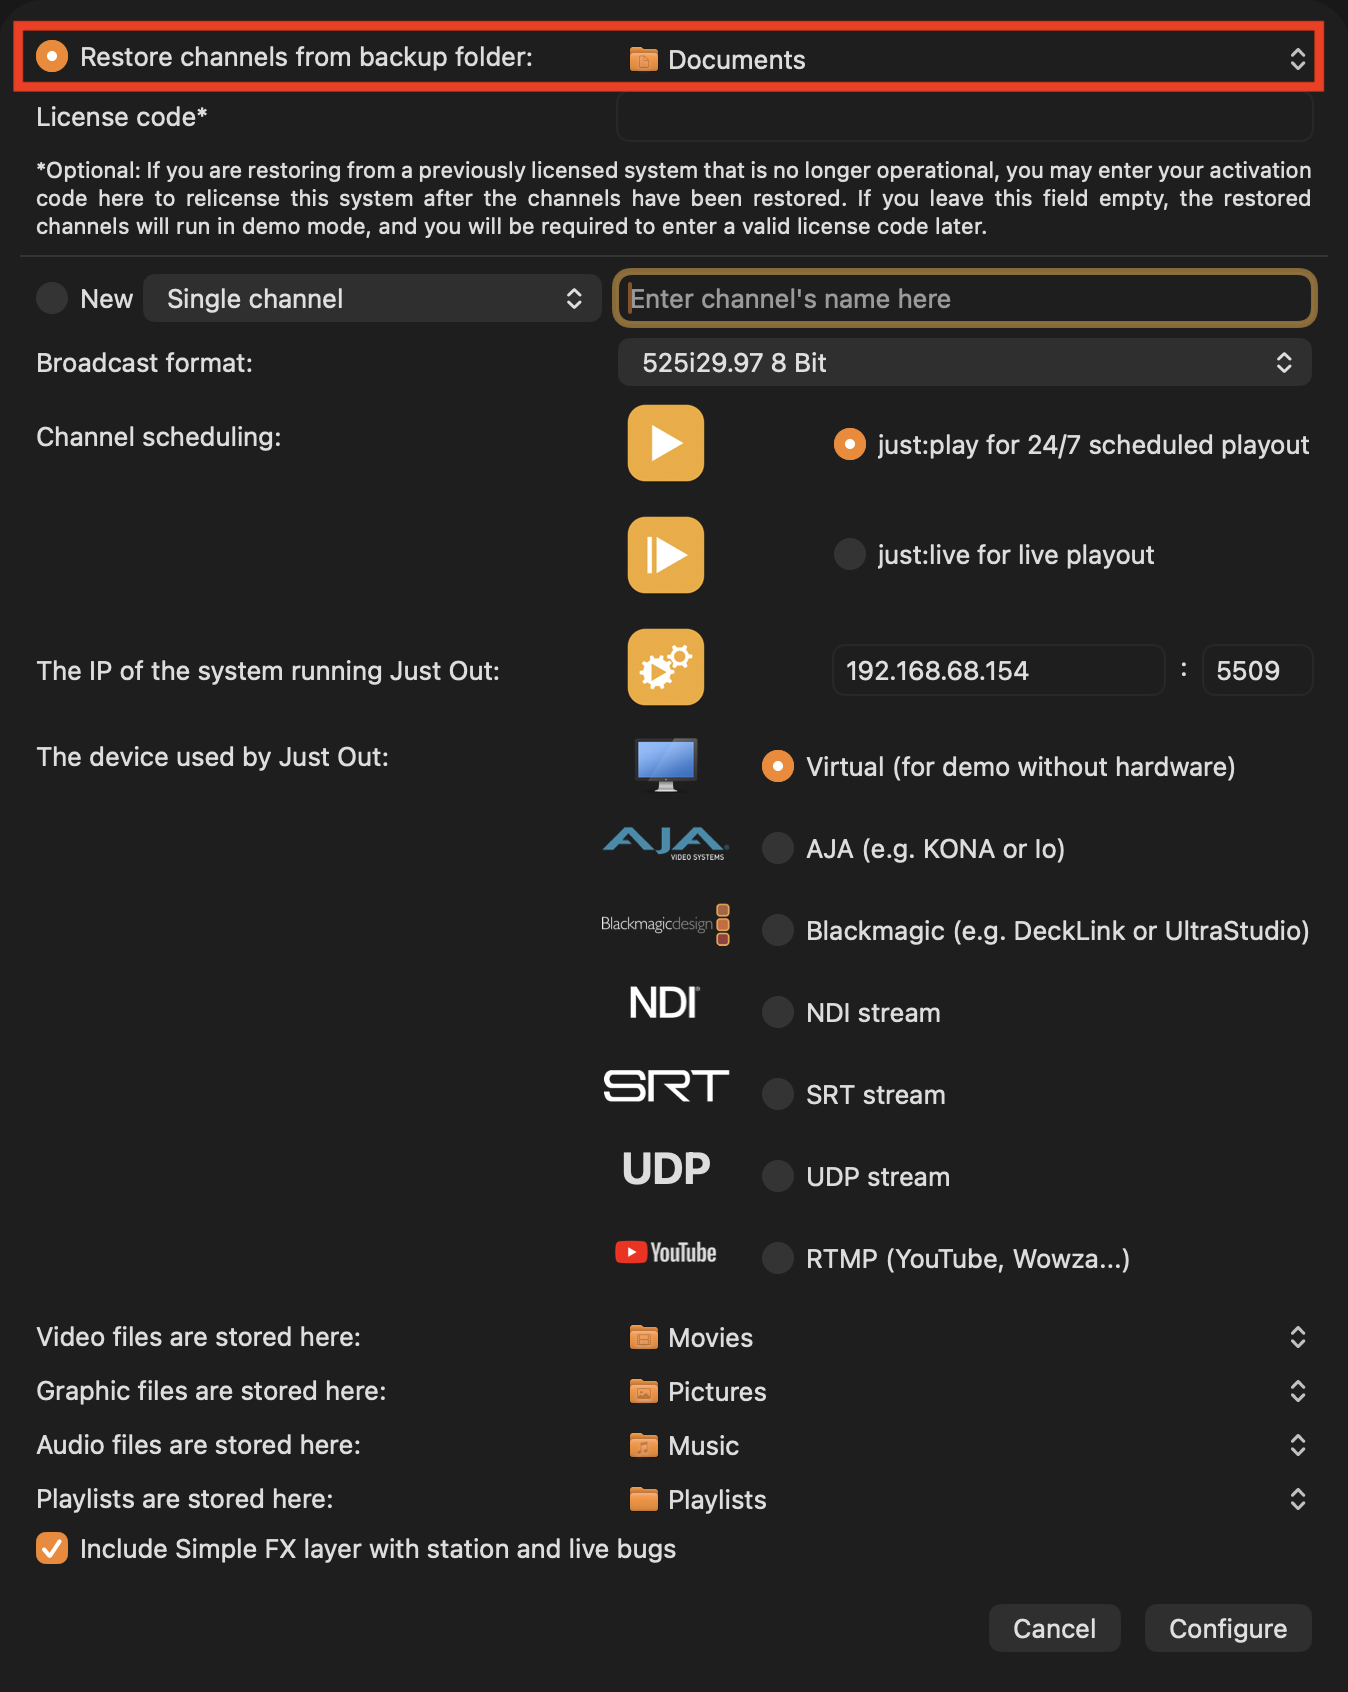
Copy the folder with the Channel Backup to the machine so that you can select the folder with the backup in the Channel Wizard. Do NOT select single Channel Backup files.After selecting your Channel Backup Folder click “Apply” to rebuild the Channel and to start Just Control.
You will need your deactivated original, or a new temporary license to activate Just Connect. Customers with a valid maintenance contract using the latest version of our playout solutions can obtain a temporary activation code by contacting our Sales department at sales@toolsonair.com.