
This chapter explains how a Channel file can be used to restore a channel in the unlikely event that the Mac running the Just Connect application fails and cannot be started anymore.
It does not cover the setup or reconfiguration of other components of a playout channel, such as storage or video devices. Please refer to the relevant chapters in the Administrator Manual for detailed instructions on setting up a playout channel.
Using Just Control’s Configuration window, users can set up, manage, and delete an unlimited number of playout channels, regardless of whether the Just Live or Just Play user interface is used.
This is achieved by connecting to a Just Connect (Device), which can run either on the same Mac or on another Mac within the same network.
Once the connection is established, all existing channels are automatically displayed, and new channels can be created. All channel data is stored on the machine running the Just Connect application (either locally or remotely) under:/Library/Application Support/ToolsOnAir/Just Connect/
Each channel file contains not only the settings defined in the Configuration window, but also the Show (when using the Just Live interface) or the complete Rundown (when using the Just Play interface). The Show/Rundown is automatically updated whenever changes are made in the related user interface.
This design allows a channel to be fully restored from its corresponding file — making it essential to maintain regular backups of all channel files.
Generate a Channel file backup:
To save a backup of the Channel file automatically, please do the following.
Open the Just Control Configuration window and unlock it.
Deactivate the Channel, so you can make changes (this will stop the playout temporarily).
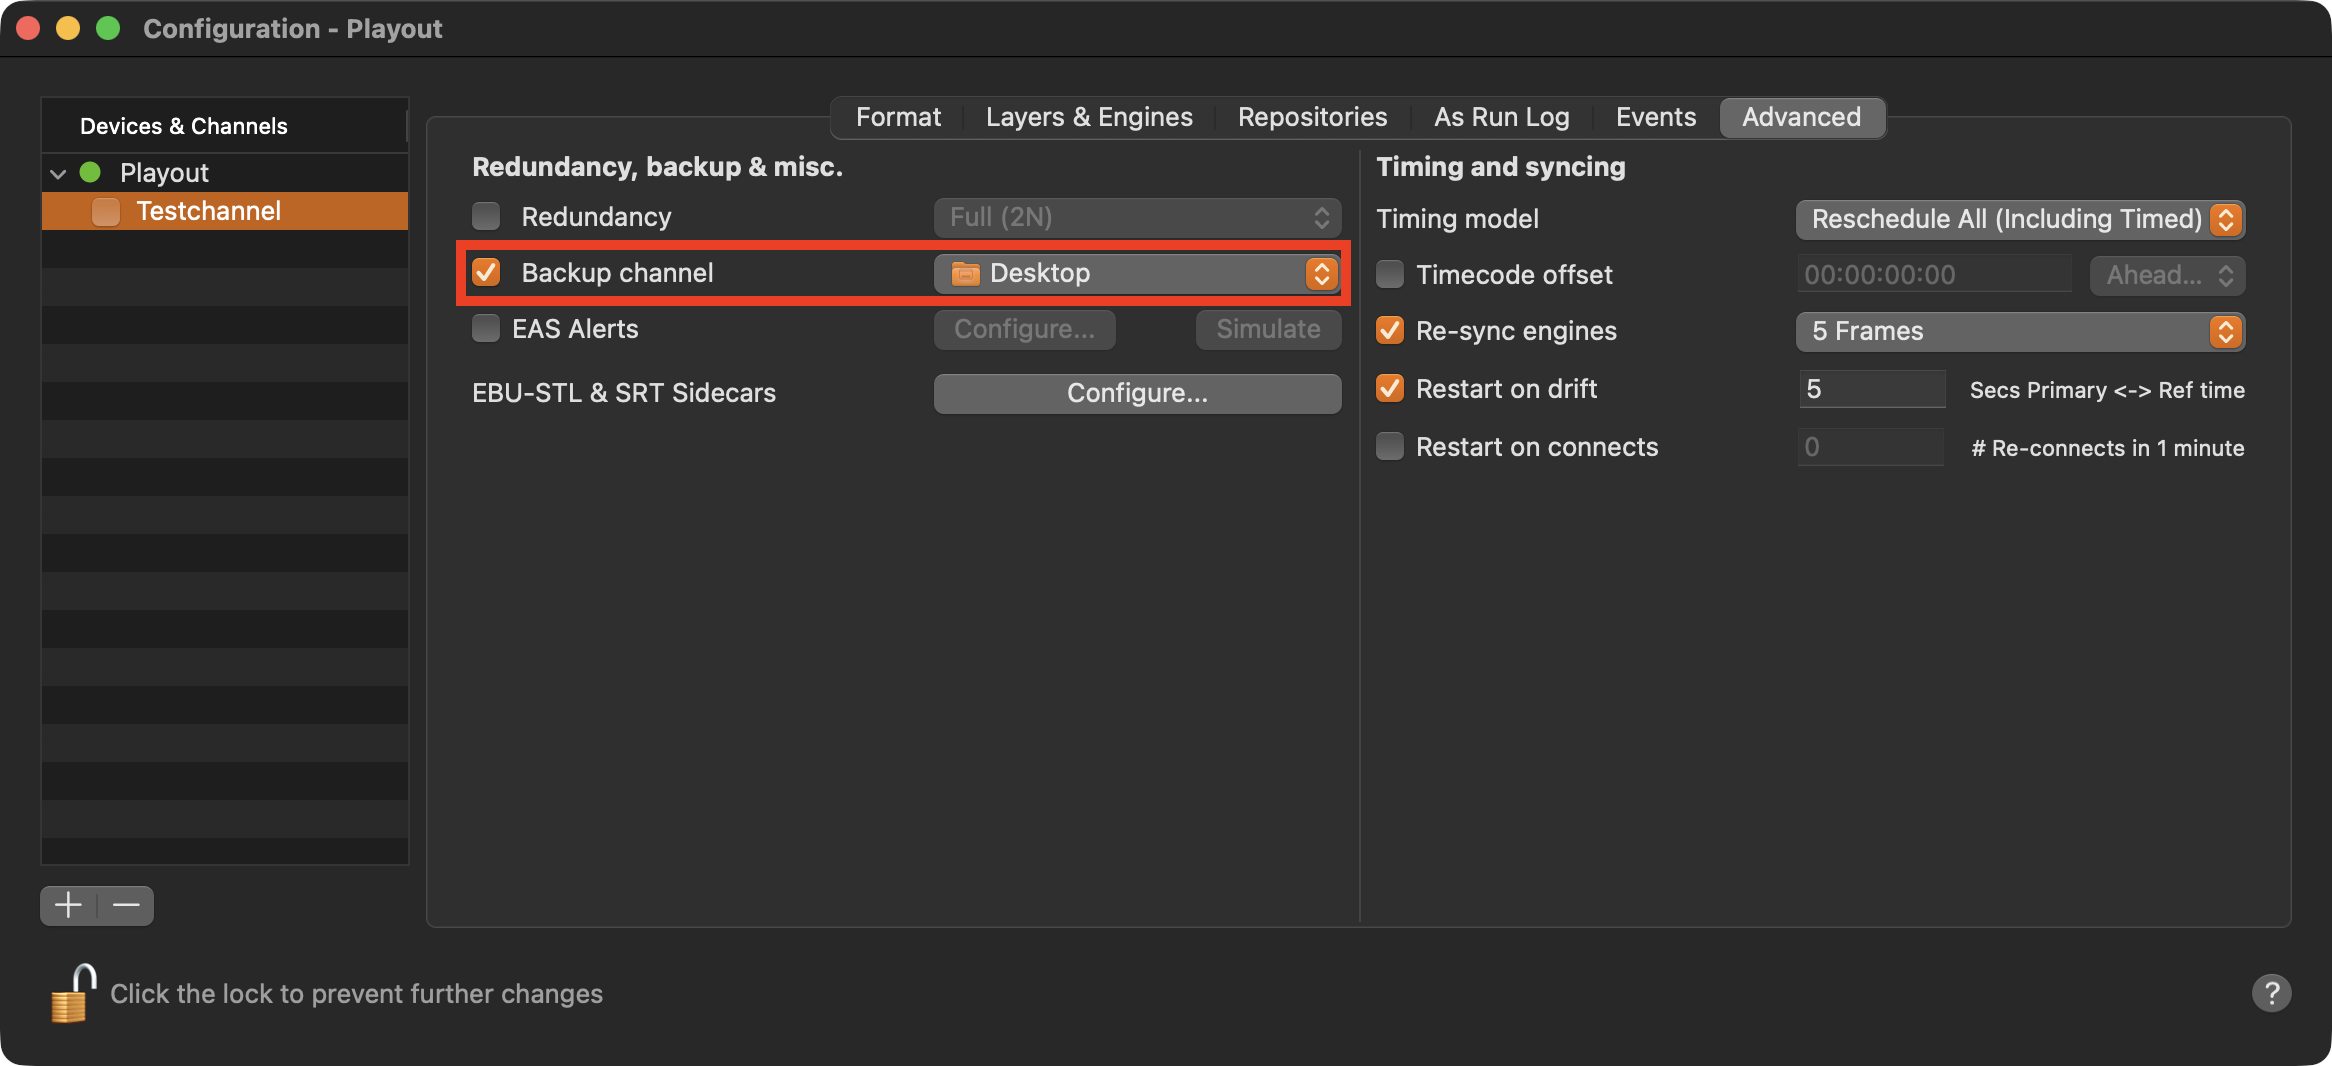
Click on the “Advanced” tab.
Select the “Backup channel” checkbox and a macOS Finder window will open.
Choose a networked storage device (such as NAS, SAN, or SMB share) or an external storage device (e.g., USB stick) from the Finder as the destination. Never use the internal disk as the destination, since it will not be accessible if the Mac fails.
Click on “New Folder” to create and pick this folder as the final backup destination. Click on “Choose” to confirm your selection.
Activate the channel under Devices & Channels and lock the Configuration window.
In the macOS Finder, verify that the Backup Channel file has been successfully written to the selected storage location.
Ensure that you have full access to the storage (file) under all circumstances.
What is needed to restore the channel:
Once this is done, if the Mac running the Just Connect application fails and cannot be restarted, you will need to the following components to restore the Channel.
A Mac (set up with the same macOS version as the one that failed) - this could be the remaining Main or Backup Mac suited for playout.
The Channel Backup file (see above).
The same TOA software version (Just Playout installer “.dmg”) - if not already installed.
Name (and password) of the original TOA Channel user.
The original TOA software license key.
Restore the channel:
Start the Mac that you want to use to restore the channel.
Connect to the network if NAS access is required (optional).
Connect to the network if the channel’s playout engine is running on another Mac within the same network (optional).
Install “TOA Just Playout” from the .dmg file into the Applications folder.
Launch the Just Connect application.
Start the Just Control application and log in using the TOA user credentials of the original Channel.
When the Device Welcome Screen appears, click on “Connect.”
The Channel Wizard will be displayed.
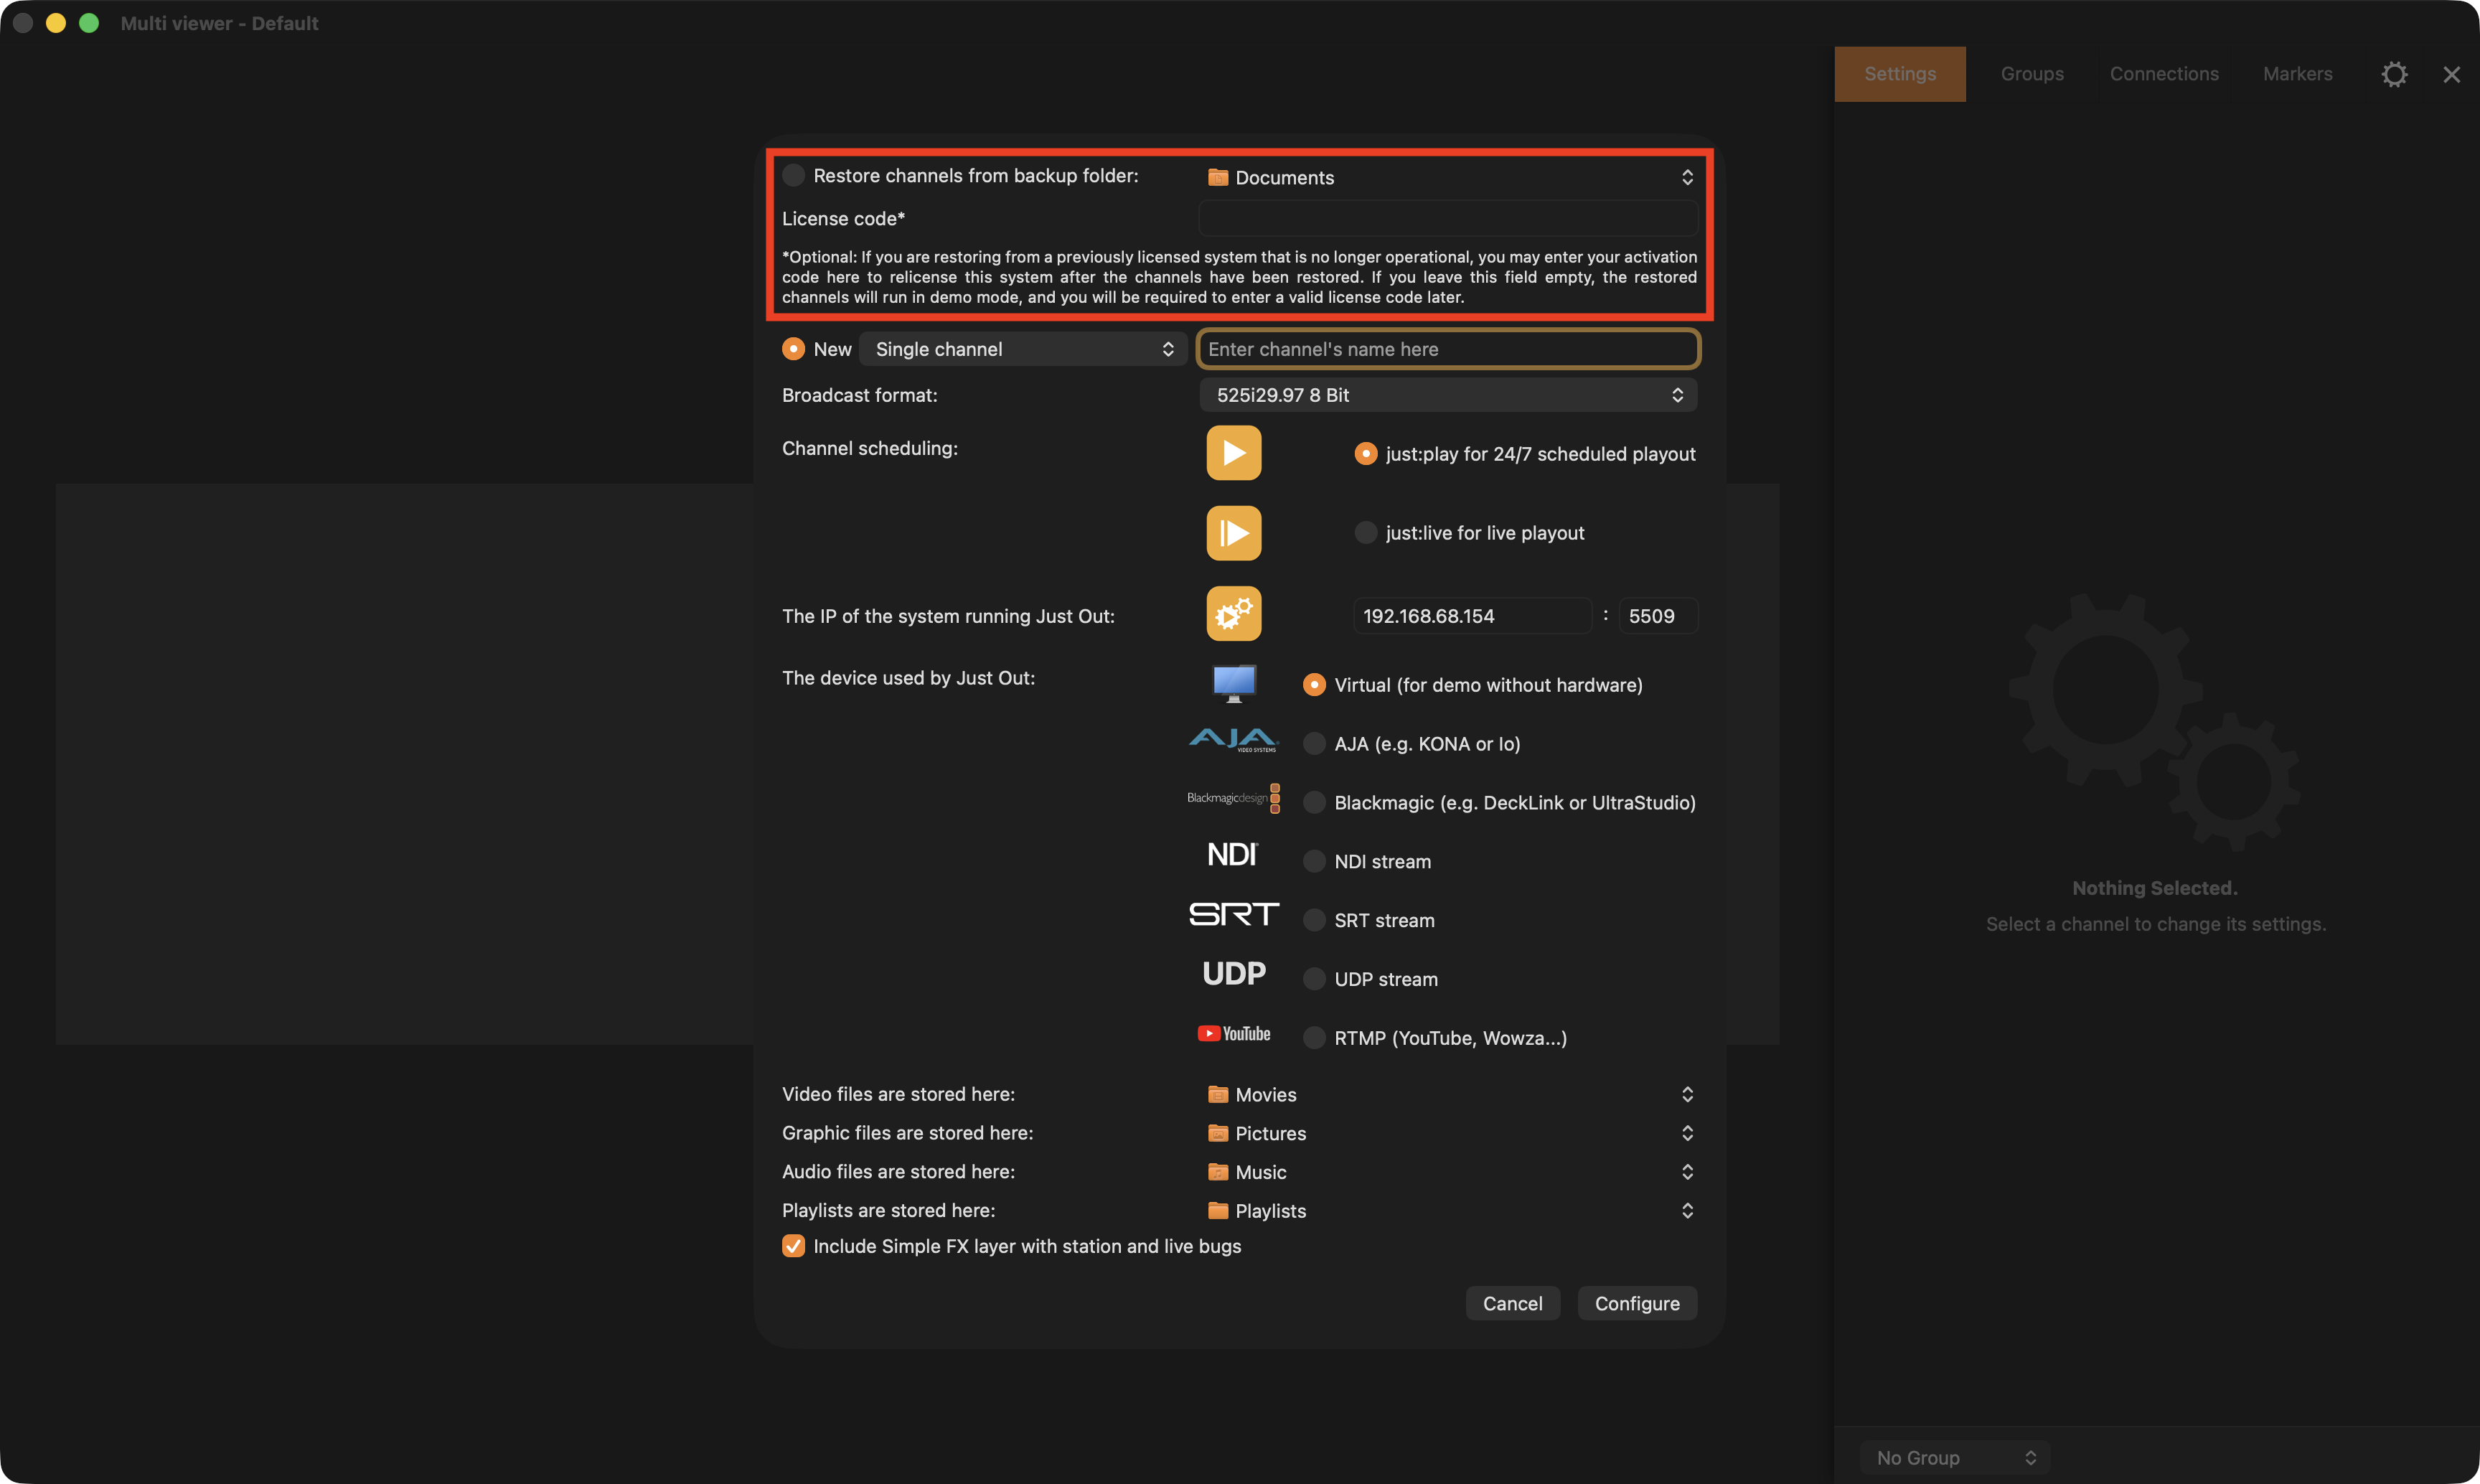
Select the radio button labeled “Restore channels from backup folder.”
Click on “Documents” → “Choose” and navigate to the folder containing the Channel backup file.
Select the backup folder and click “Choose.”
Enter the license code (optional) and click “Configure.”
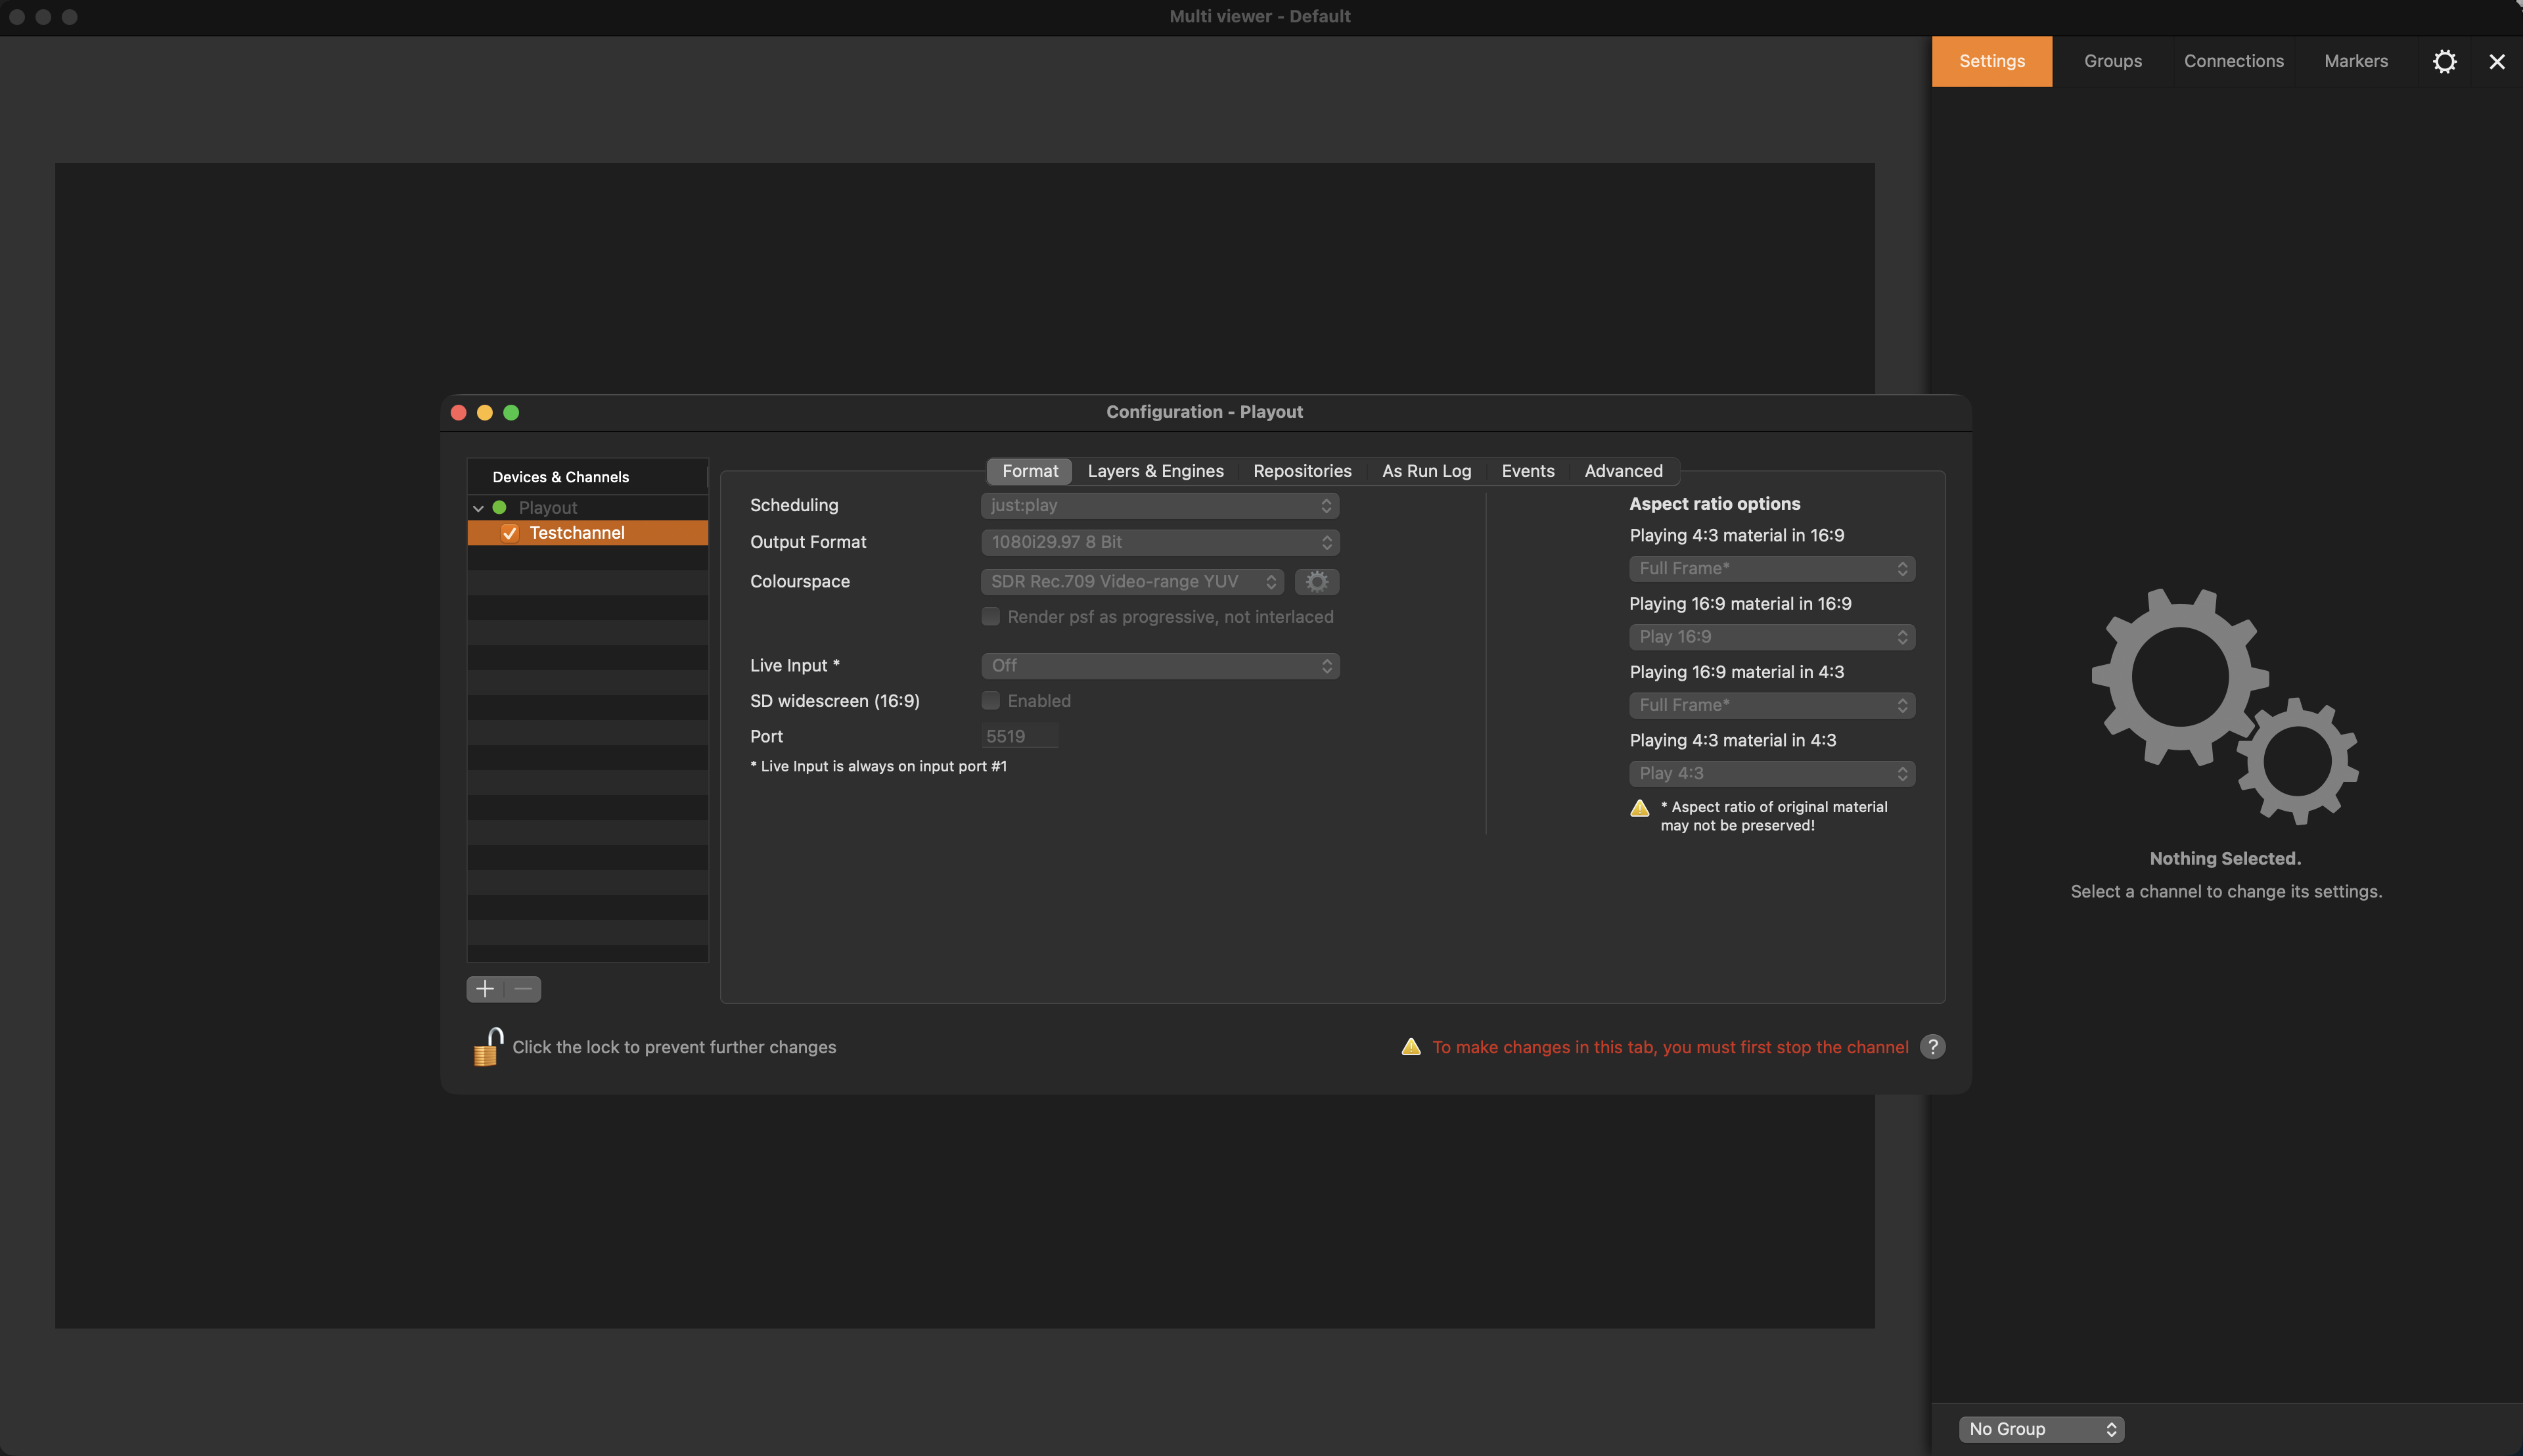
The MultiViewer interface opens, and the channel is restored. You can verify this in the Configuration window.
When the new Mac has a different IP address from the original system, the restored Channel will inherit the new IP address automatically.
Assigning the restored channel to a viewer:
The IP address of the original Mac and the new Mac is the same:
If the new Mac has the same IP address as the original Mac, the Channel will automatically appear in the MultiViewer. If the IP addresses differ, open the Connection tab and add the channel to the MultiViewer as described in this chapter. Additionally, the Channel will remain available, as before, on all other Macs that were connected to the original channel.
The IP address of the original Mac and the new Mac is different:
Even if the new Mac has a different IP address from the original Mac, the Channel should automatically appear in the MultiViewer. If it does not, open the Connection tab and add the Channel to the MultiViewer as described in this chapter. On all other machines where Just Control was connected to the original Channel, the new Channel must be added, following the instructions in Adding a channel which runs on another Mac .
What to do if the “OFFLINE” status is shown:
After restoring a channel, the primary engine will automatically be configured to use the local IP address. If this setup is correct, ensure that the Just Out application is running and that the defined video device is connected.
If a fixed IP address was used for the just:out engine of the original Channel and you wish to use this same Just Out engine again as the primary or redundant engine, open the Configuration window and update the Just Out engine’s IP as described in this chapter.
What to do if the “INVALID LOGIN” message is shown:
If the “INVALID LOGIN” message is displayed, it means that a user other than the original user was used to log in to the restored Channel. For security reasons, access to a restored Channel is initially restricted to the original user. New users can be added once the channel is accessible.
To log in as the original user:
Quit and restart the Just Control application, or log out the current user to open the Just Control login window.
Enter the original username and password, then click Log In.
Click Add to confirm that a new user will be added.