
Version 2026 supports NDI®,SRT, UDP, RTMP and HLS alongside ST-2110 based Playout including the ability to switch to a live source. Please note the following points when configuring a machine for streaming playout:
Although it is possible to run Just Out and Just Control on the same machine, we highly recommend running Just Control on a separate machine.
Realtime graphics are supported, but especially complex templates must be tested thoroughly before using them on air. This also applied to HTML graphics provided by third-party systems.
We do support mixed input/output methods (e.g., SDI In/Stream Out) which is especially useful for RTMP or HLS based channels, which do not support a live input.
Notes
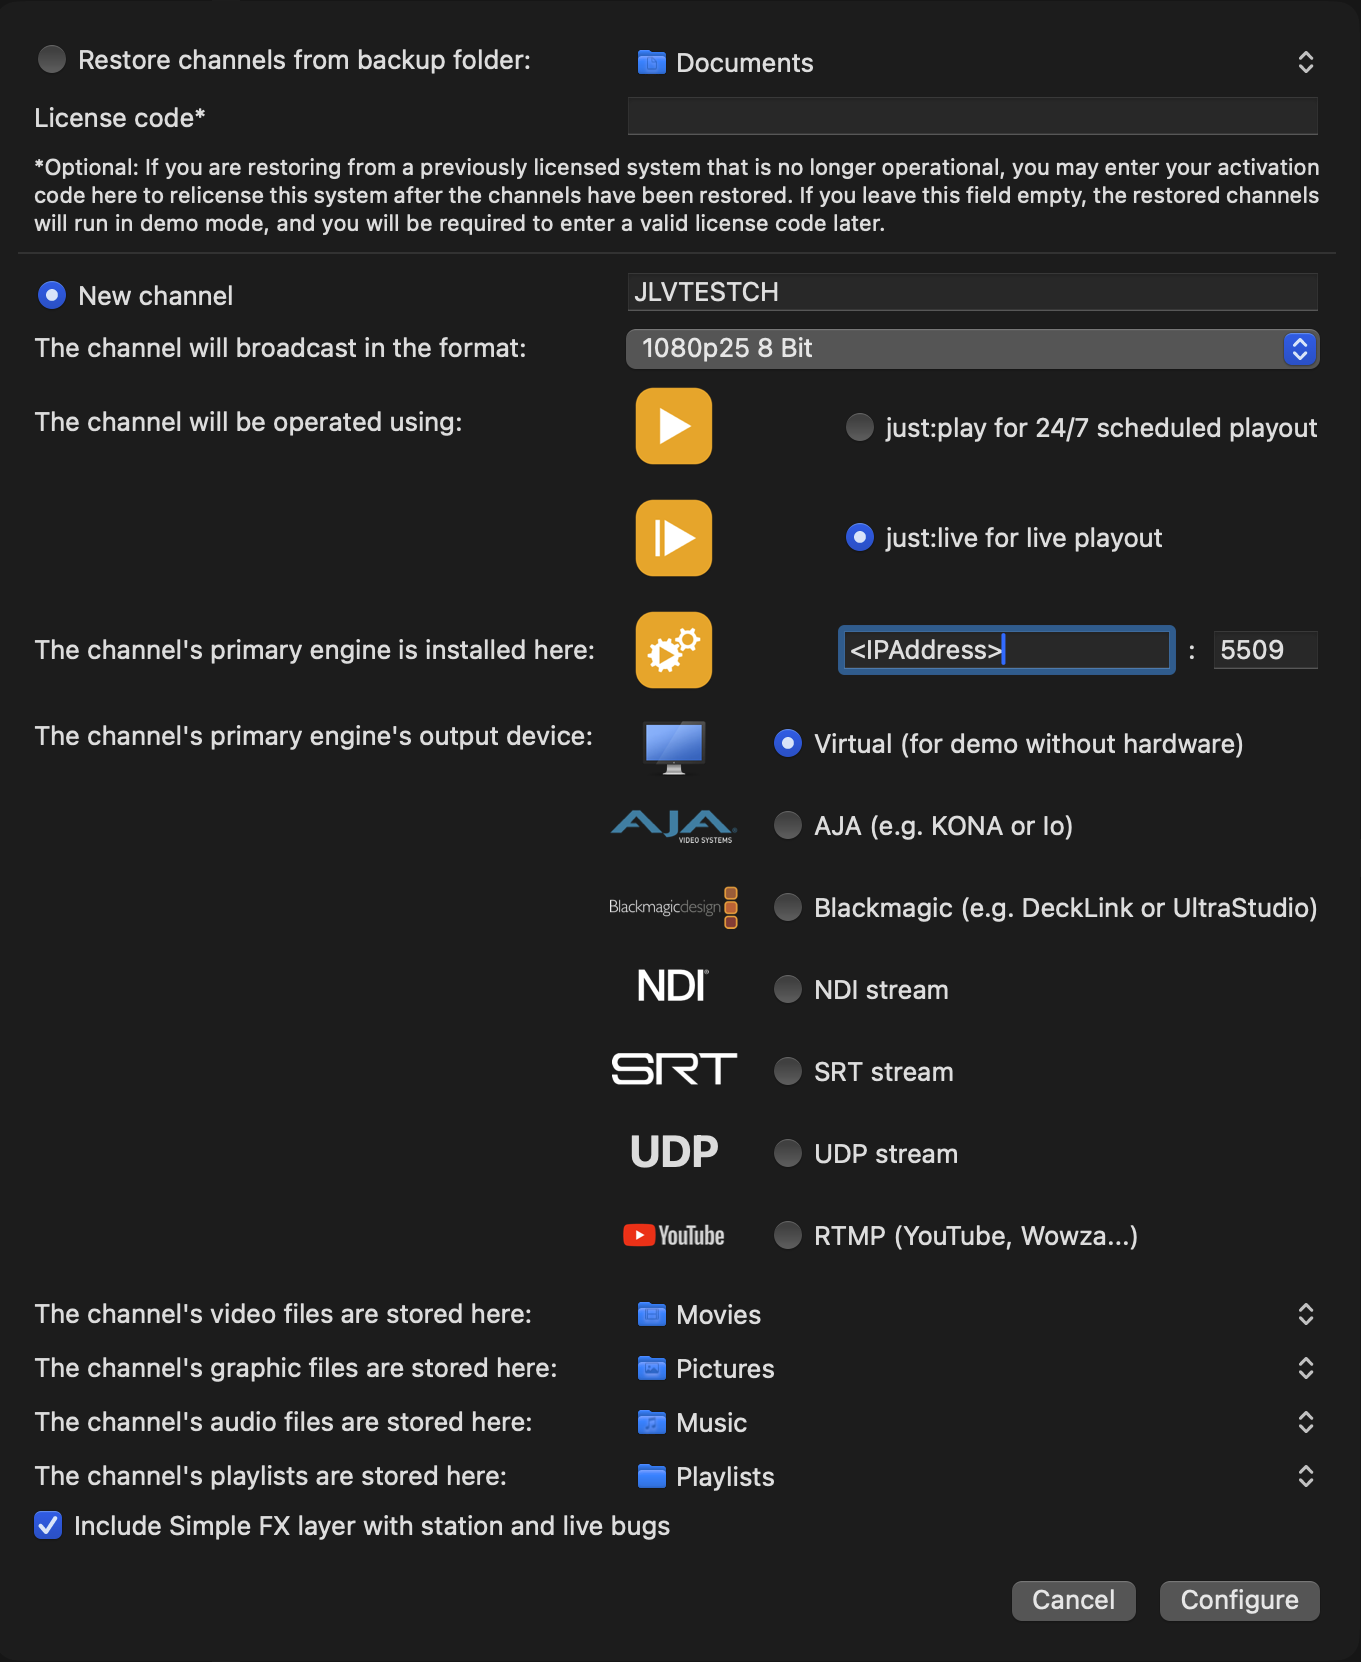
Setting up a Channel for streaming out (except for HLS) is as easy as setting up a Channel using an AJA or Blackmagic Design SDI out, using the Wizard or the Channel setup inside the Just Control Configuration window.
The Configuration panel features distinct Input and Output tabs where you can select your preferred Input source (for Switch-to-Live) and Output formats.
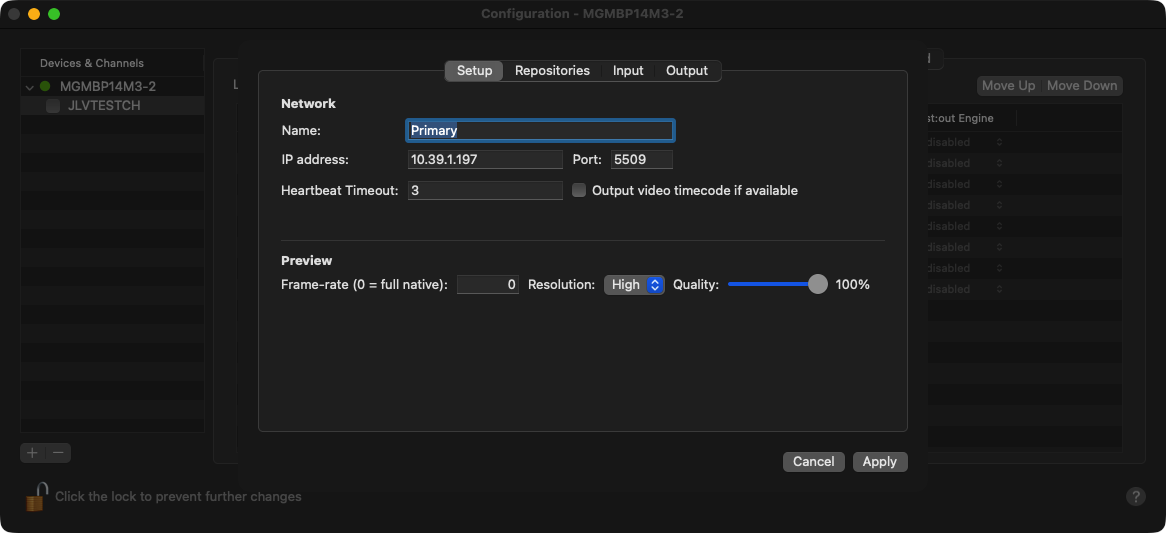
The delay, between the time the signal is generated by the Just Out engine and received by the receiver, depends mainly on the buffer settings defined for the engine and the “application” that receives/requests the stream.
When the “Switch to Live” function is activated, but no live stream is received, the Just Out engine tries to reconnect to the defined stream every few seconds. The interval will depend on the used streaming format (NDI®, SRT or UDP) - and when using SRT, if the Just Out engine is the Caller (~0,5 sec.) or the Listener (~3 sec).
Using NDI, the “Live Input” stream can be changed in the “Settings” tab of the Multi Viewer while the channel is ON AIR. Using SRT or UDP, the Input stream has to be defined in the Streaming settings (“Just Control Configuration → Layers & Engines → Video → Configure Engines → Input”) and therefore cannot be changed while the Channel is running.
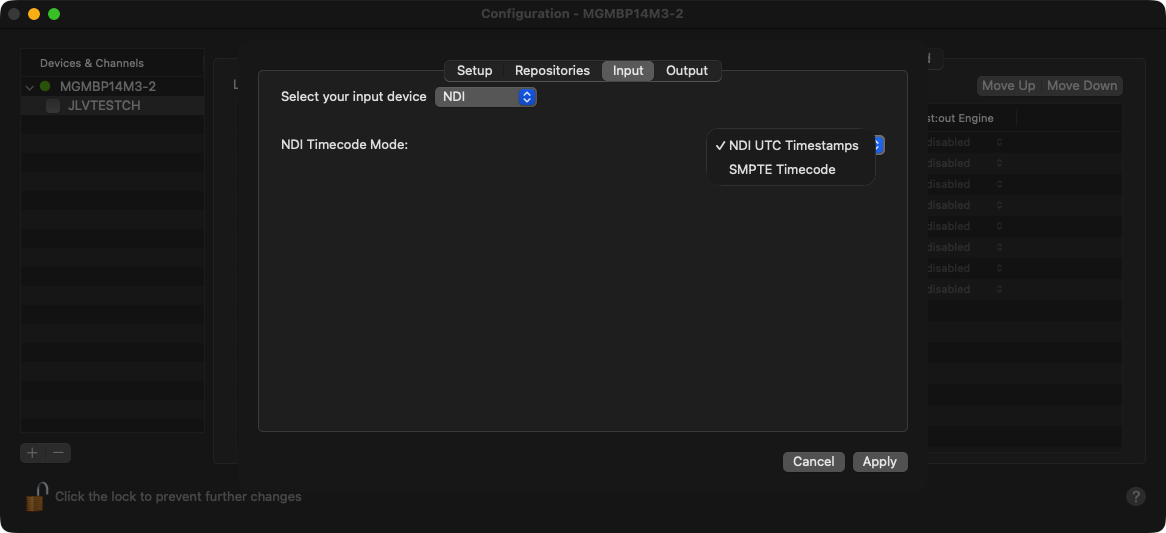
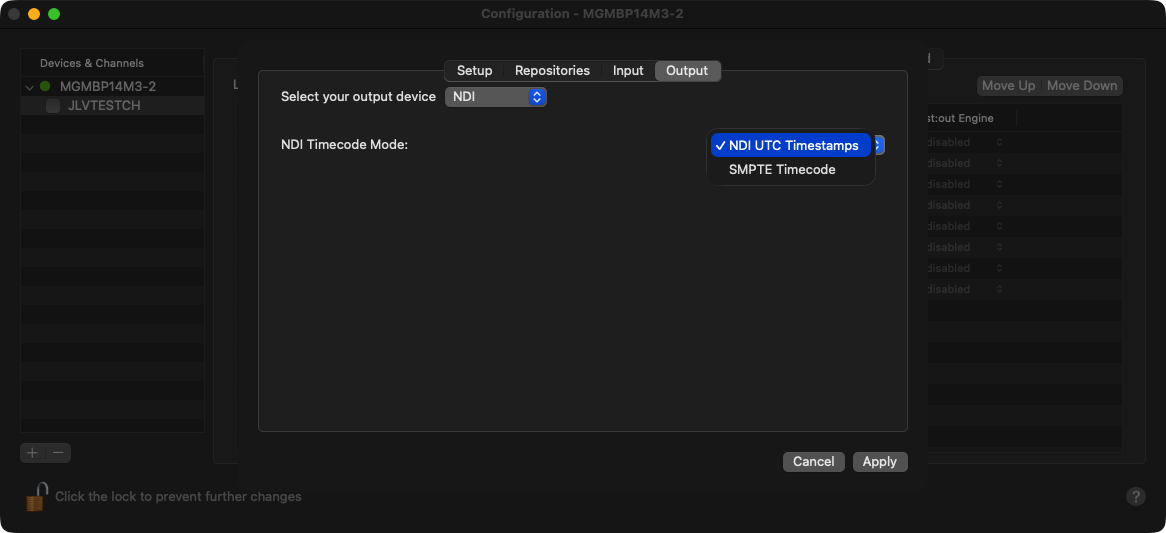
When configuring a channel with NDI live input, there is a “NDI Timecode Mode” setting in the “Input” tab in the engine’s configuration panel with the options “NDI UTC Timestamps” and “SMPTE Timecode”. The former expects frames with standard NDI UTC timestamps, as provided by the majority of NDI devices. The latter expects SMPTE timecode encoded as 100ths of a nanosecond. This may be useful in conjunction with some devices such as the AJA Bridge that take embedded SDI SMPTE timecode and converts it for use with NDI.
Using NDI® we insert metadata following the <vancData version=”1.0”> specifications which includes the ability to insert CEA708 CC and SCTE104 trigger into the outgoing stream.
SRT and UDP streams support the SMPTE 2038 specifications related to the transport of VANC data (e.g., CEA-708, OP-47, SCTE-104) for both the output and the live input.
SRT and UDP streams support ATSC A/53 closed captions in the MPEG transport stream for both the output and the live input. When using a live input, the ATSC A/53 closed captions are disabled if the stream contains SMPTE 2038 information.
SRT and UDP streams support SCTE-35 events in the MPEG transport stream for both the output and the live input. When using a live input, SCTE-35 is disabled if the stream contains SMPTE 2038 information. Any SCTE-104 events scheduled using the “Event” option will be automatically converted to SCTE-35.
SRT and UDP streams support up to 16 audio tracks for the incoming and the outgoing stream.
Supported “live” audio formats. Incoming SRT and UDP streams with MP2 (MPEG-1 Layer II) audio tracks in the MPEG transport stream are supported in addition to AAC encoded audio.
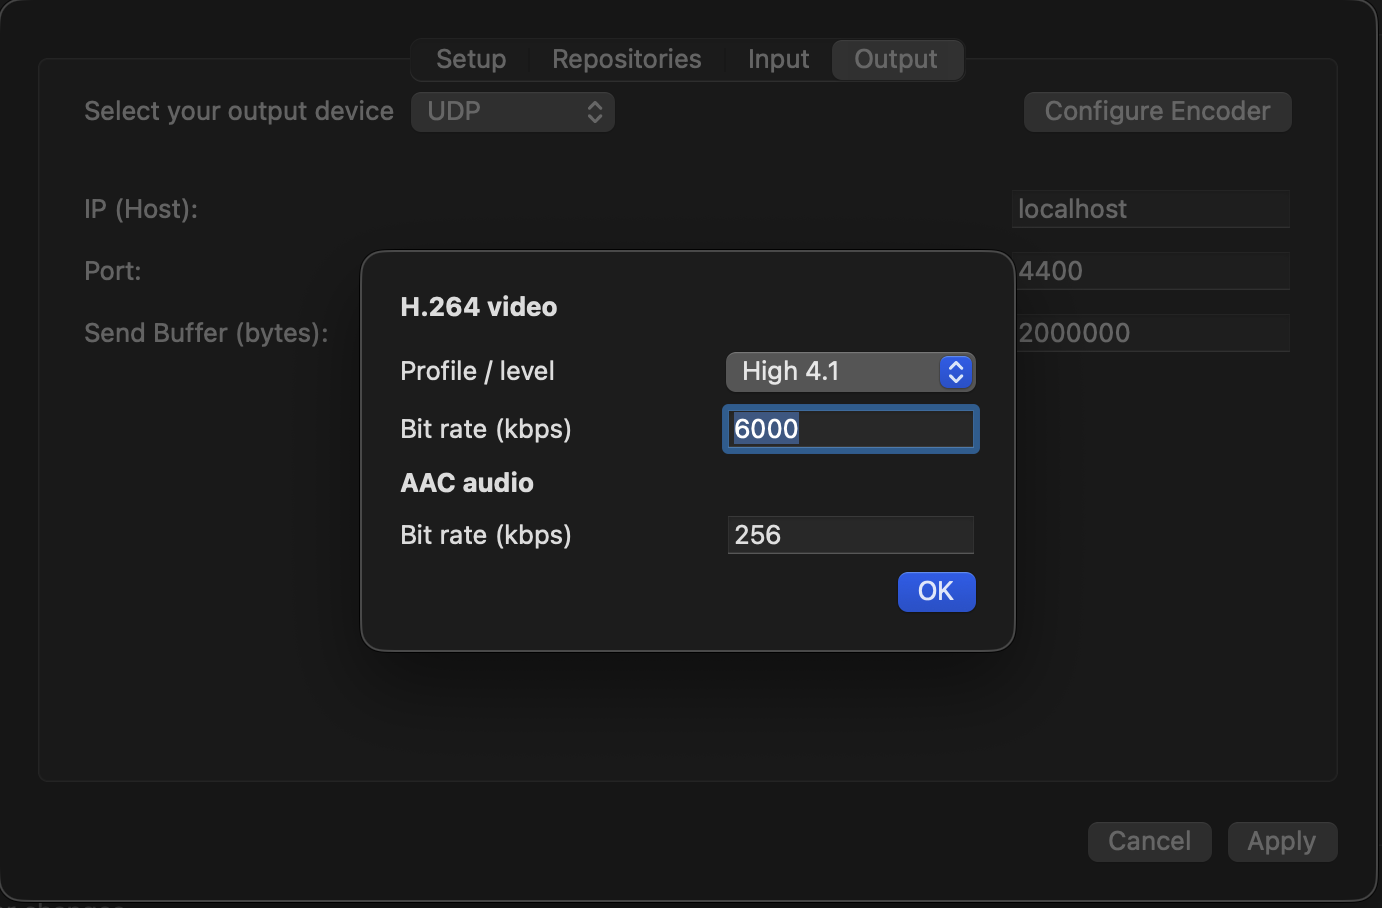
Adjustable encoding parameters. When configuring the engine, there is a “Streaming tab”, which allows defining the IP Address/Port for the outgoing and for the incoming “Live” stream. Additionally, the H.264 profile/bitrate as well as the AAC audio bitrate can be defined for the outgoing H264 based stream.
Input/Output Overview
NDI Input / Output tabs:
SRT Input / Output tabs:
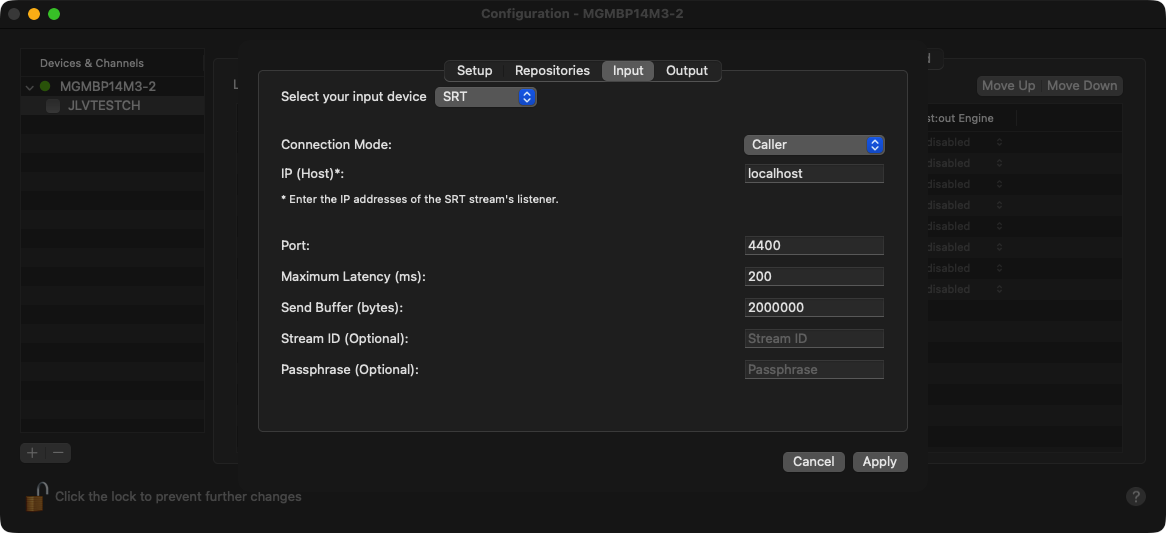
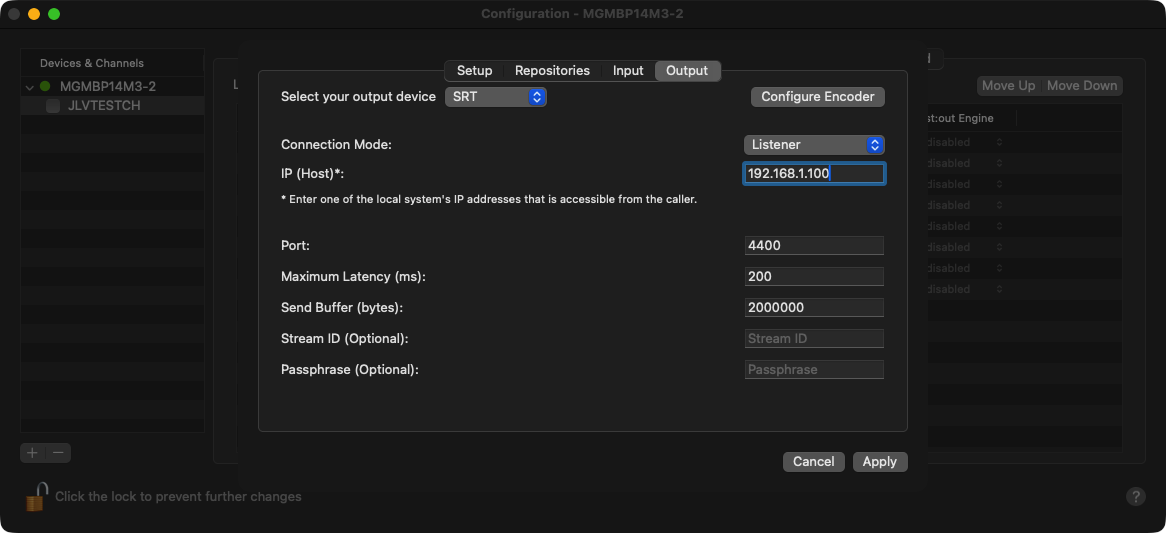
When configuring an SRT input or output, please proceed as follows:
SRT Input: select the Connection Mode “Caller” as well as the “IP [Host]” address and “Port” of the SRT stream source. If you are receiving an SRT stream, then you are referred as the “Caller”.
SRT Output: select the Connection Mode “Listener” as well as your system’s IP address (“IP [Host]”) and “Port”. If you are sending an SRT stream through the output, then you are referred as the “Listener”.
Adjust/Enter the “Maximum Latency (ms)”, “Send Buffer (bytes)”, “Stream ID (Optional)”, “Passphrase (Optional)” values based on your needs.
By clicking the “Configure Encoder” button, you can adjust the H.264 encoding values to your needs.
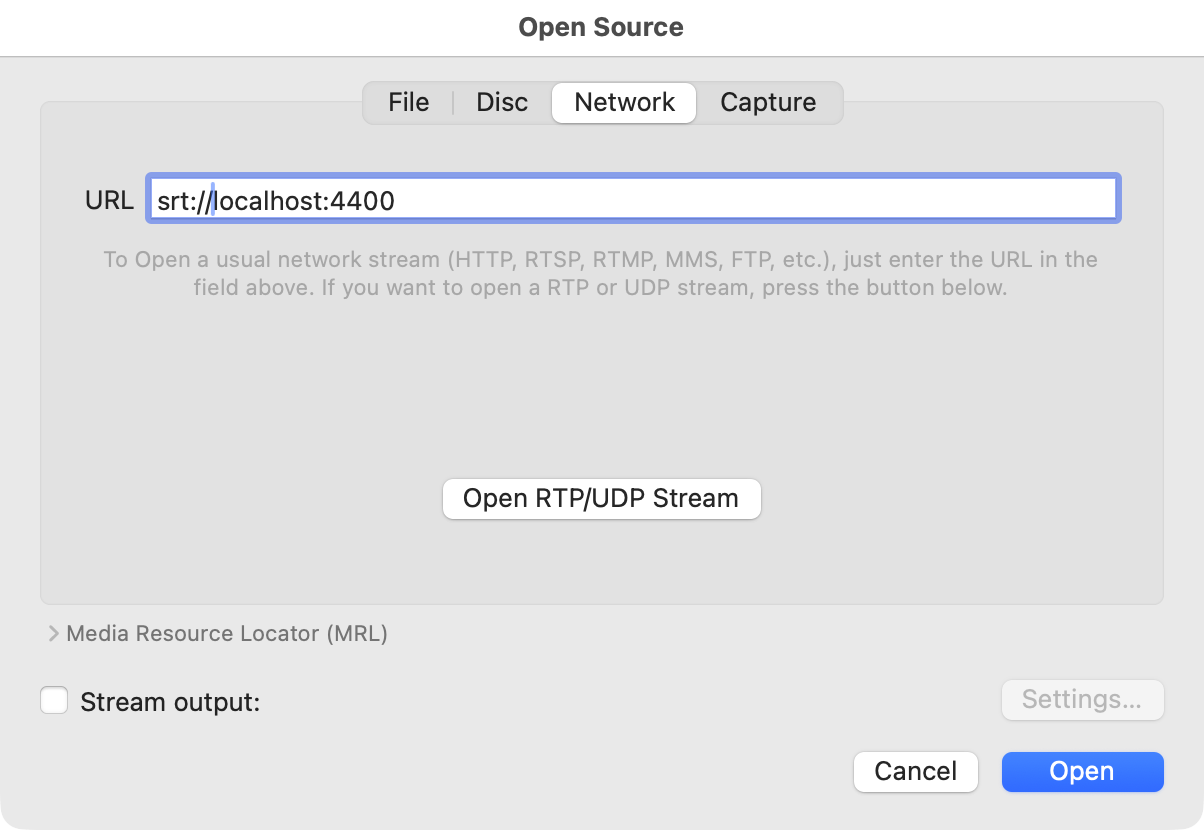
You can test the SRT output with VLC by opening a Network Connection (“Open Network…”) and entering the IP Address and the Port of your system in the URL field and confirming the entry with “Open” (Example: srt://localhost:4400).
UDP Input / Output tabs:
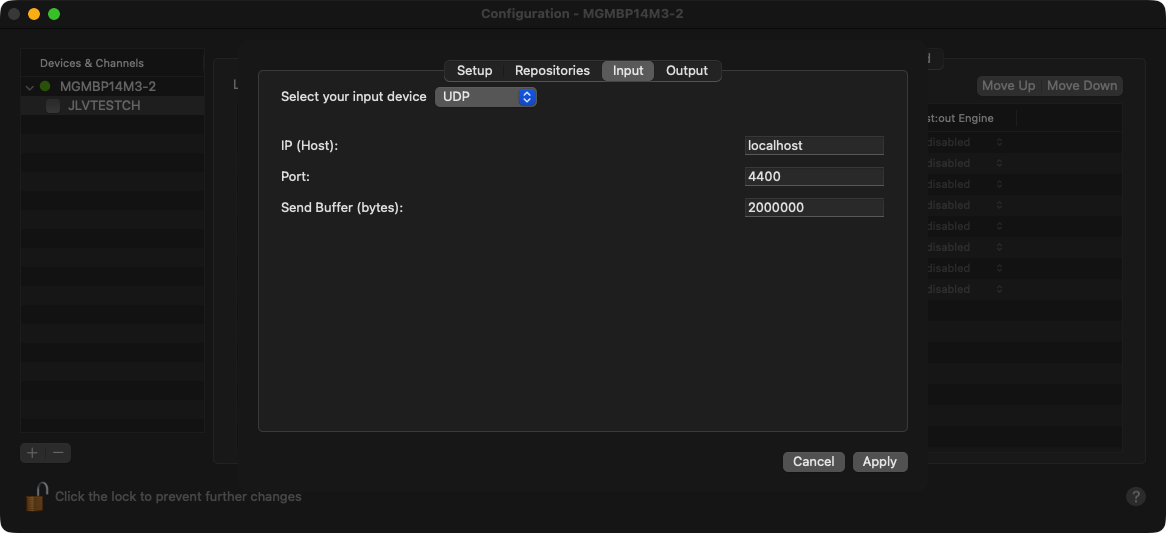
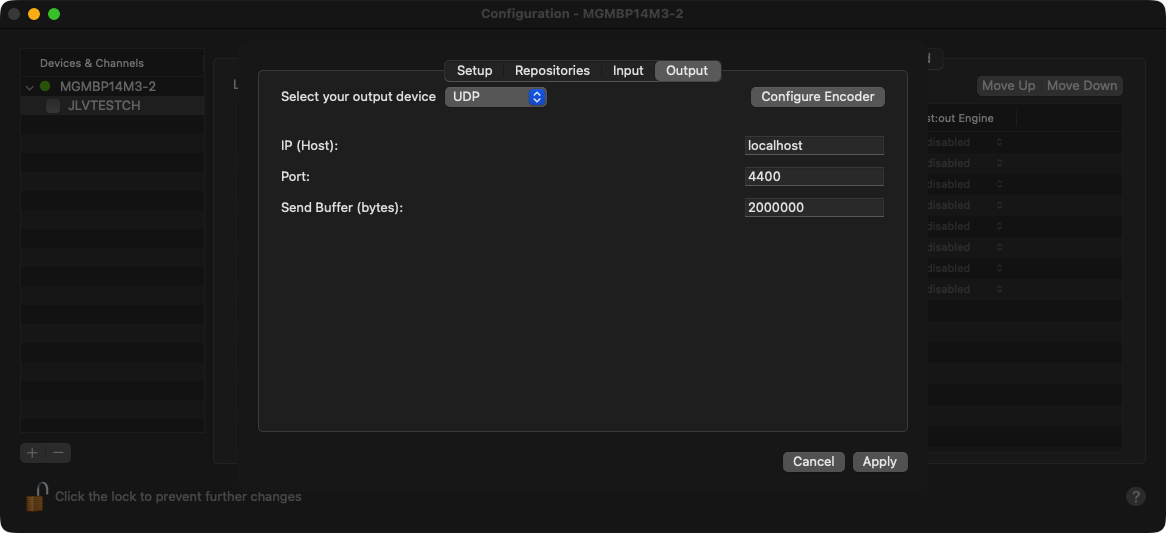
When configuring a UDP input or output, please enter the appropriate “IP [Host]” address and “Port” to be used. For the input settings, that is the IP address of the host and Port you will receive the UDP stream from, whereas for the Output setting, that is the IP address and Port of your system (the Sender) sending out the UDP stream.
By clicking the “Configure Encoder” button, you can adjust the H.264 encoding values to your needs.
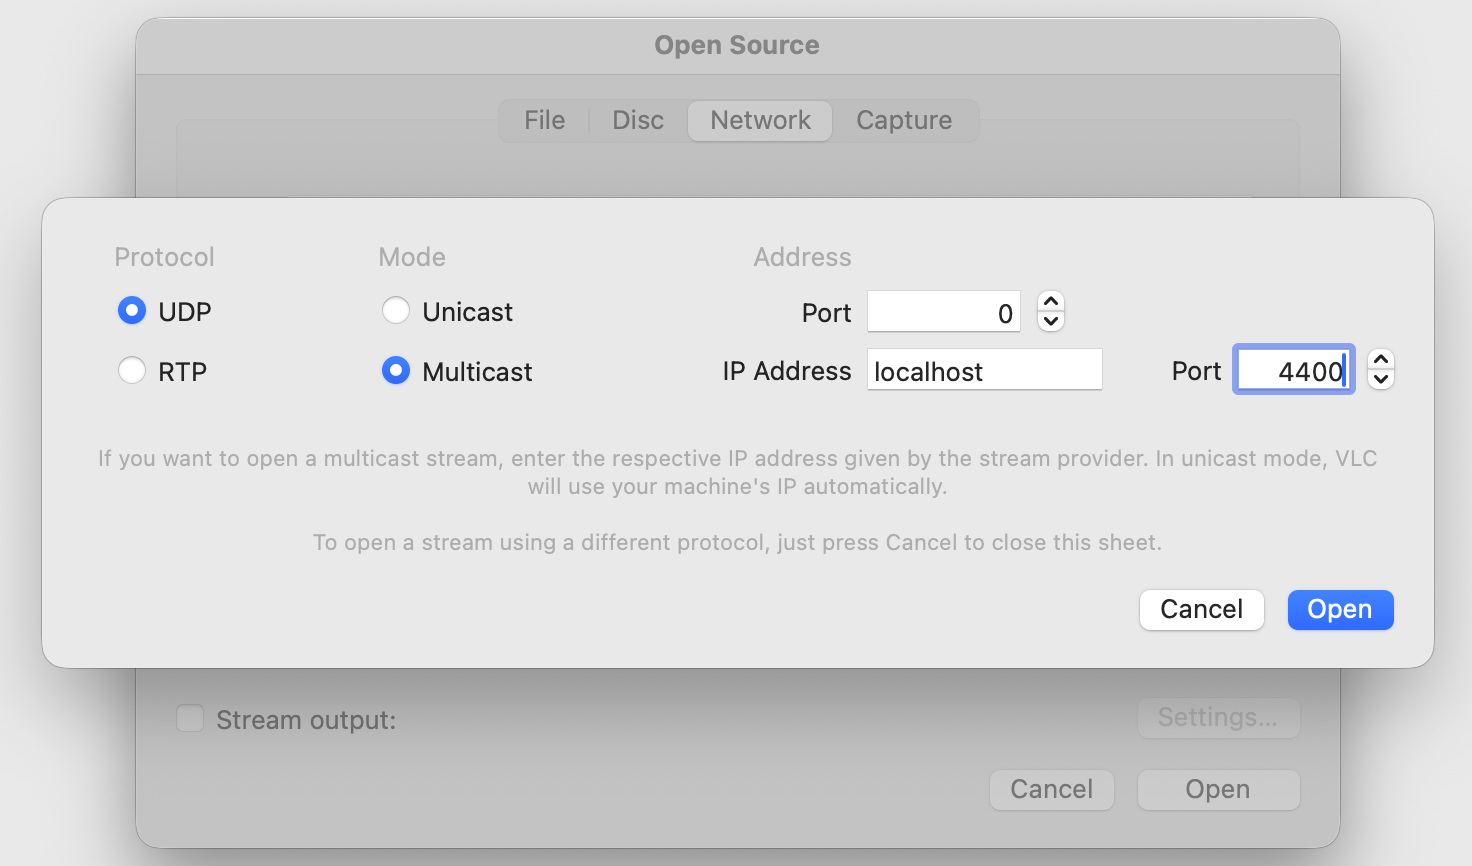
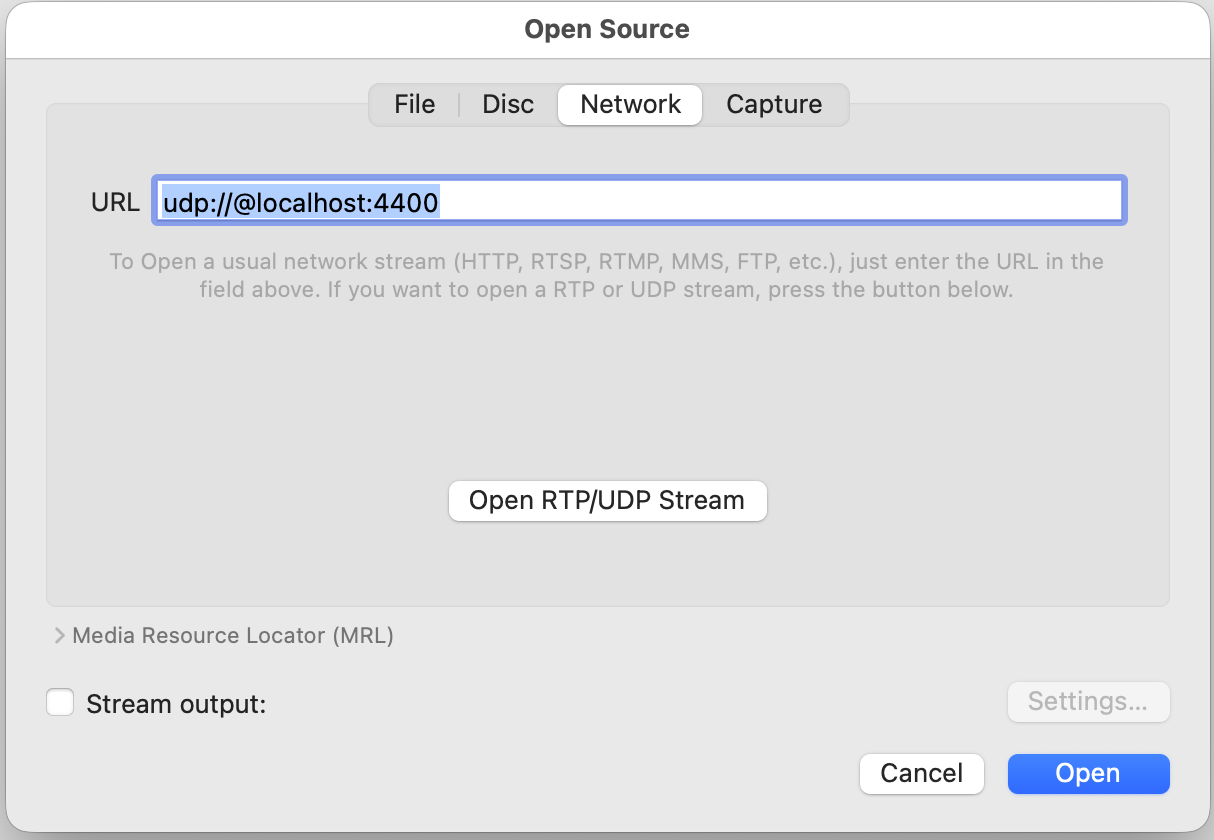
You can test the UDP output with VLC by opening a Network Connection (“Open Network…”), clicking on the “Open UDR/RTP Stream” button, entering the IP Address and the Port of your system and confirming the entry with “Open” (Example: udp://@localhost:4400).
RTMP Output tab:
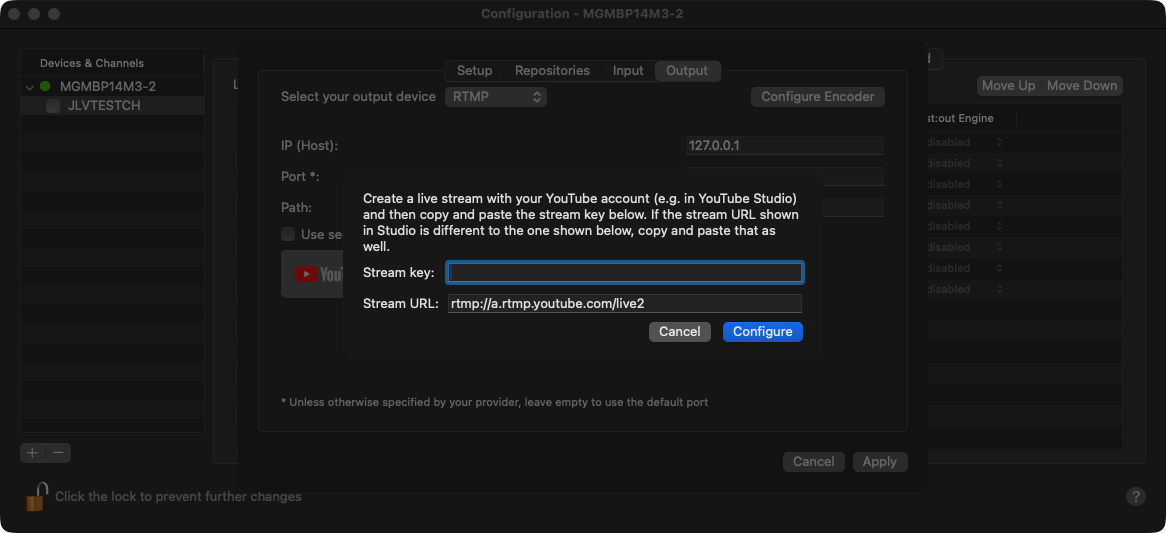
When configuring an “RTMP” output for YouTube, please enter the “Stream Key” and the “Stream URL”. This information is available in the YouTube Studio application of your YouTube channel.
By clicking the “Configure Encoder” button, you can adjust the H.264 encoding values to your needs.
You can test the RTMP output by running a local RTMP server on macOS and connecting to this server via VLC. We have been using the Open Source application “Local RTMP Server.app” (https://github.com/sallar/mac-local-rtmp-server/releases/download/v1.3.0/mac-local-rtmp-server-1.3.0.dmg) for our tests, so you might give it a try.
HLS File Output tab:
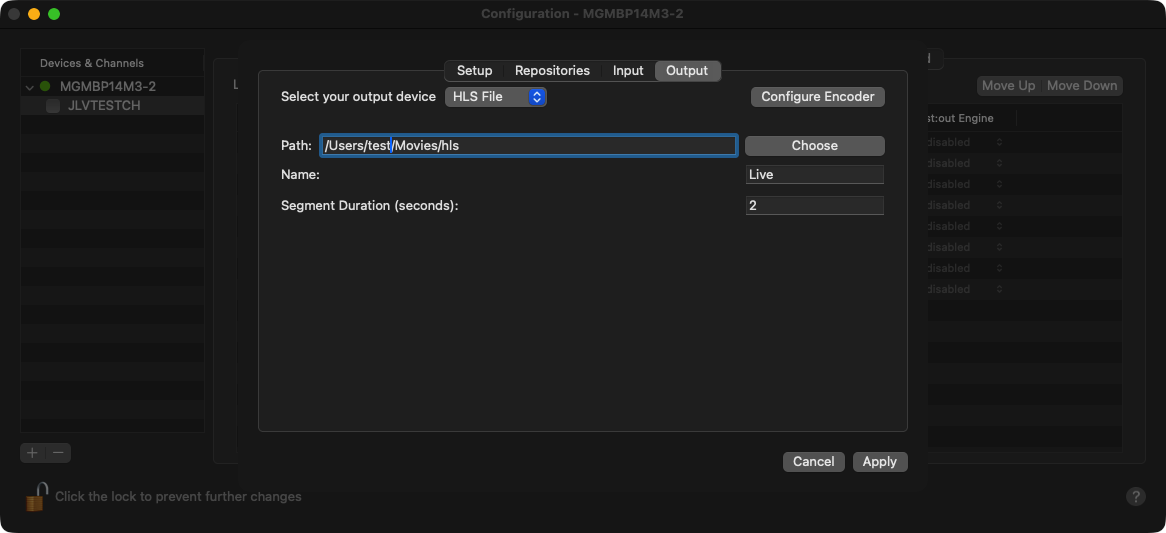
When configuring a “HLS File” output, please define the “Path” where the HLS manifest file (“.m3u8”) and segment files (“.m4s”) should be written to. Additionally, you can set the “Name” of HLS Stream as well as the creation interval of the segments by adjusting the “Segment Duration (seconds)” value. The default is “10s”.
By clicking the “Configure Encoder” button, you can adjust the H.264 encoding values to your needs.
Please be aware that as long as the Just Out engine application is running, the segment files will continue to be created.
HLS Push Output tab:
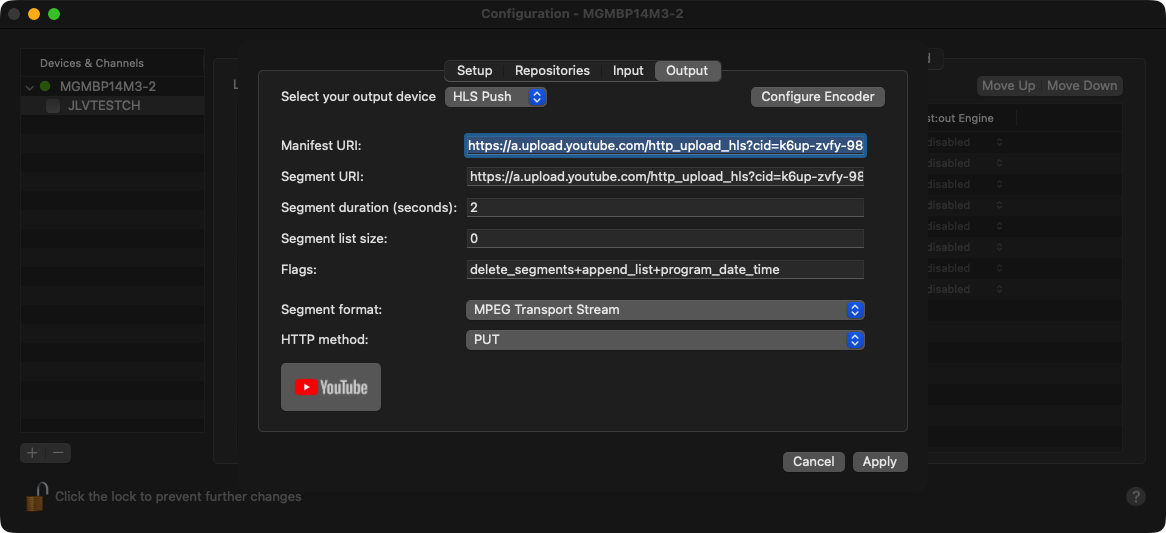
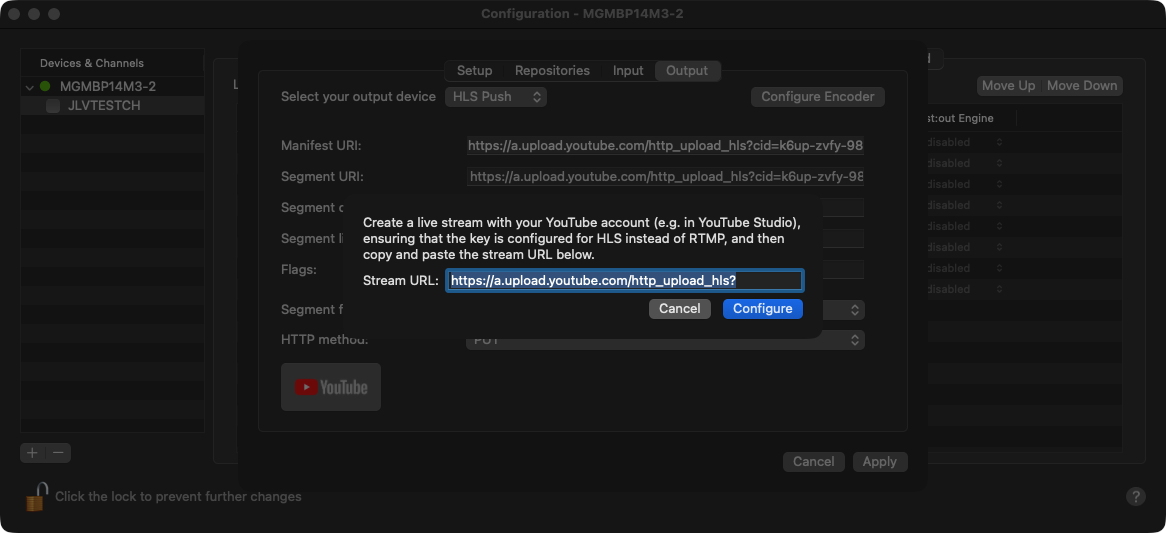
When configuring a “HLS Push” output, there are various manual settings that you can adjust according to your needs. For fast turnaround and better user experience, we recommend using the predefined YouTube settings by clicking the YouTube button and entering the HLS Push concatenated URL that you can get from YouTube Studio.
To get the proper URL stream, create a live stream with your YouTube account (e.g. in YouTube Studio), ensuring that the Stream Key is configured for HLS instead of RTMP, and then copy and paste the stream URL into the “Stream URL” field.
By clicking the “Configure Encoder” button, you can adjust the H.264 encoding values to your needs.
Things to consider
The output stream is always progressive, as field-based movies are not currently deinterlaced. Therefore, for the best possible quality, please use progressive movies.