
Channel Settings
Not shown in the screenshot below:
NDI Source
If you use a NDI based channel with Live Input activated, you can choose here the Live Input which you would like to use for this channel.
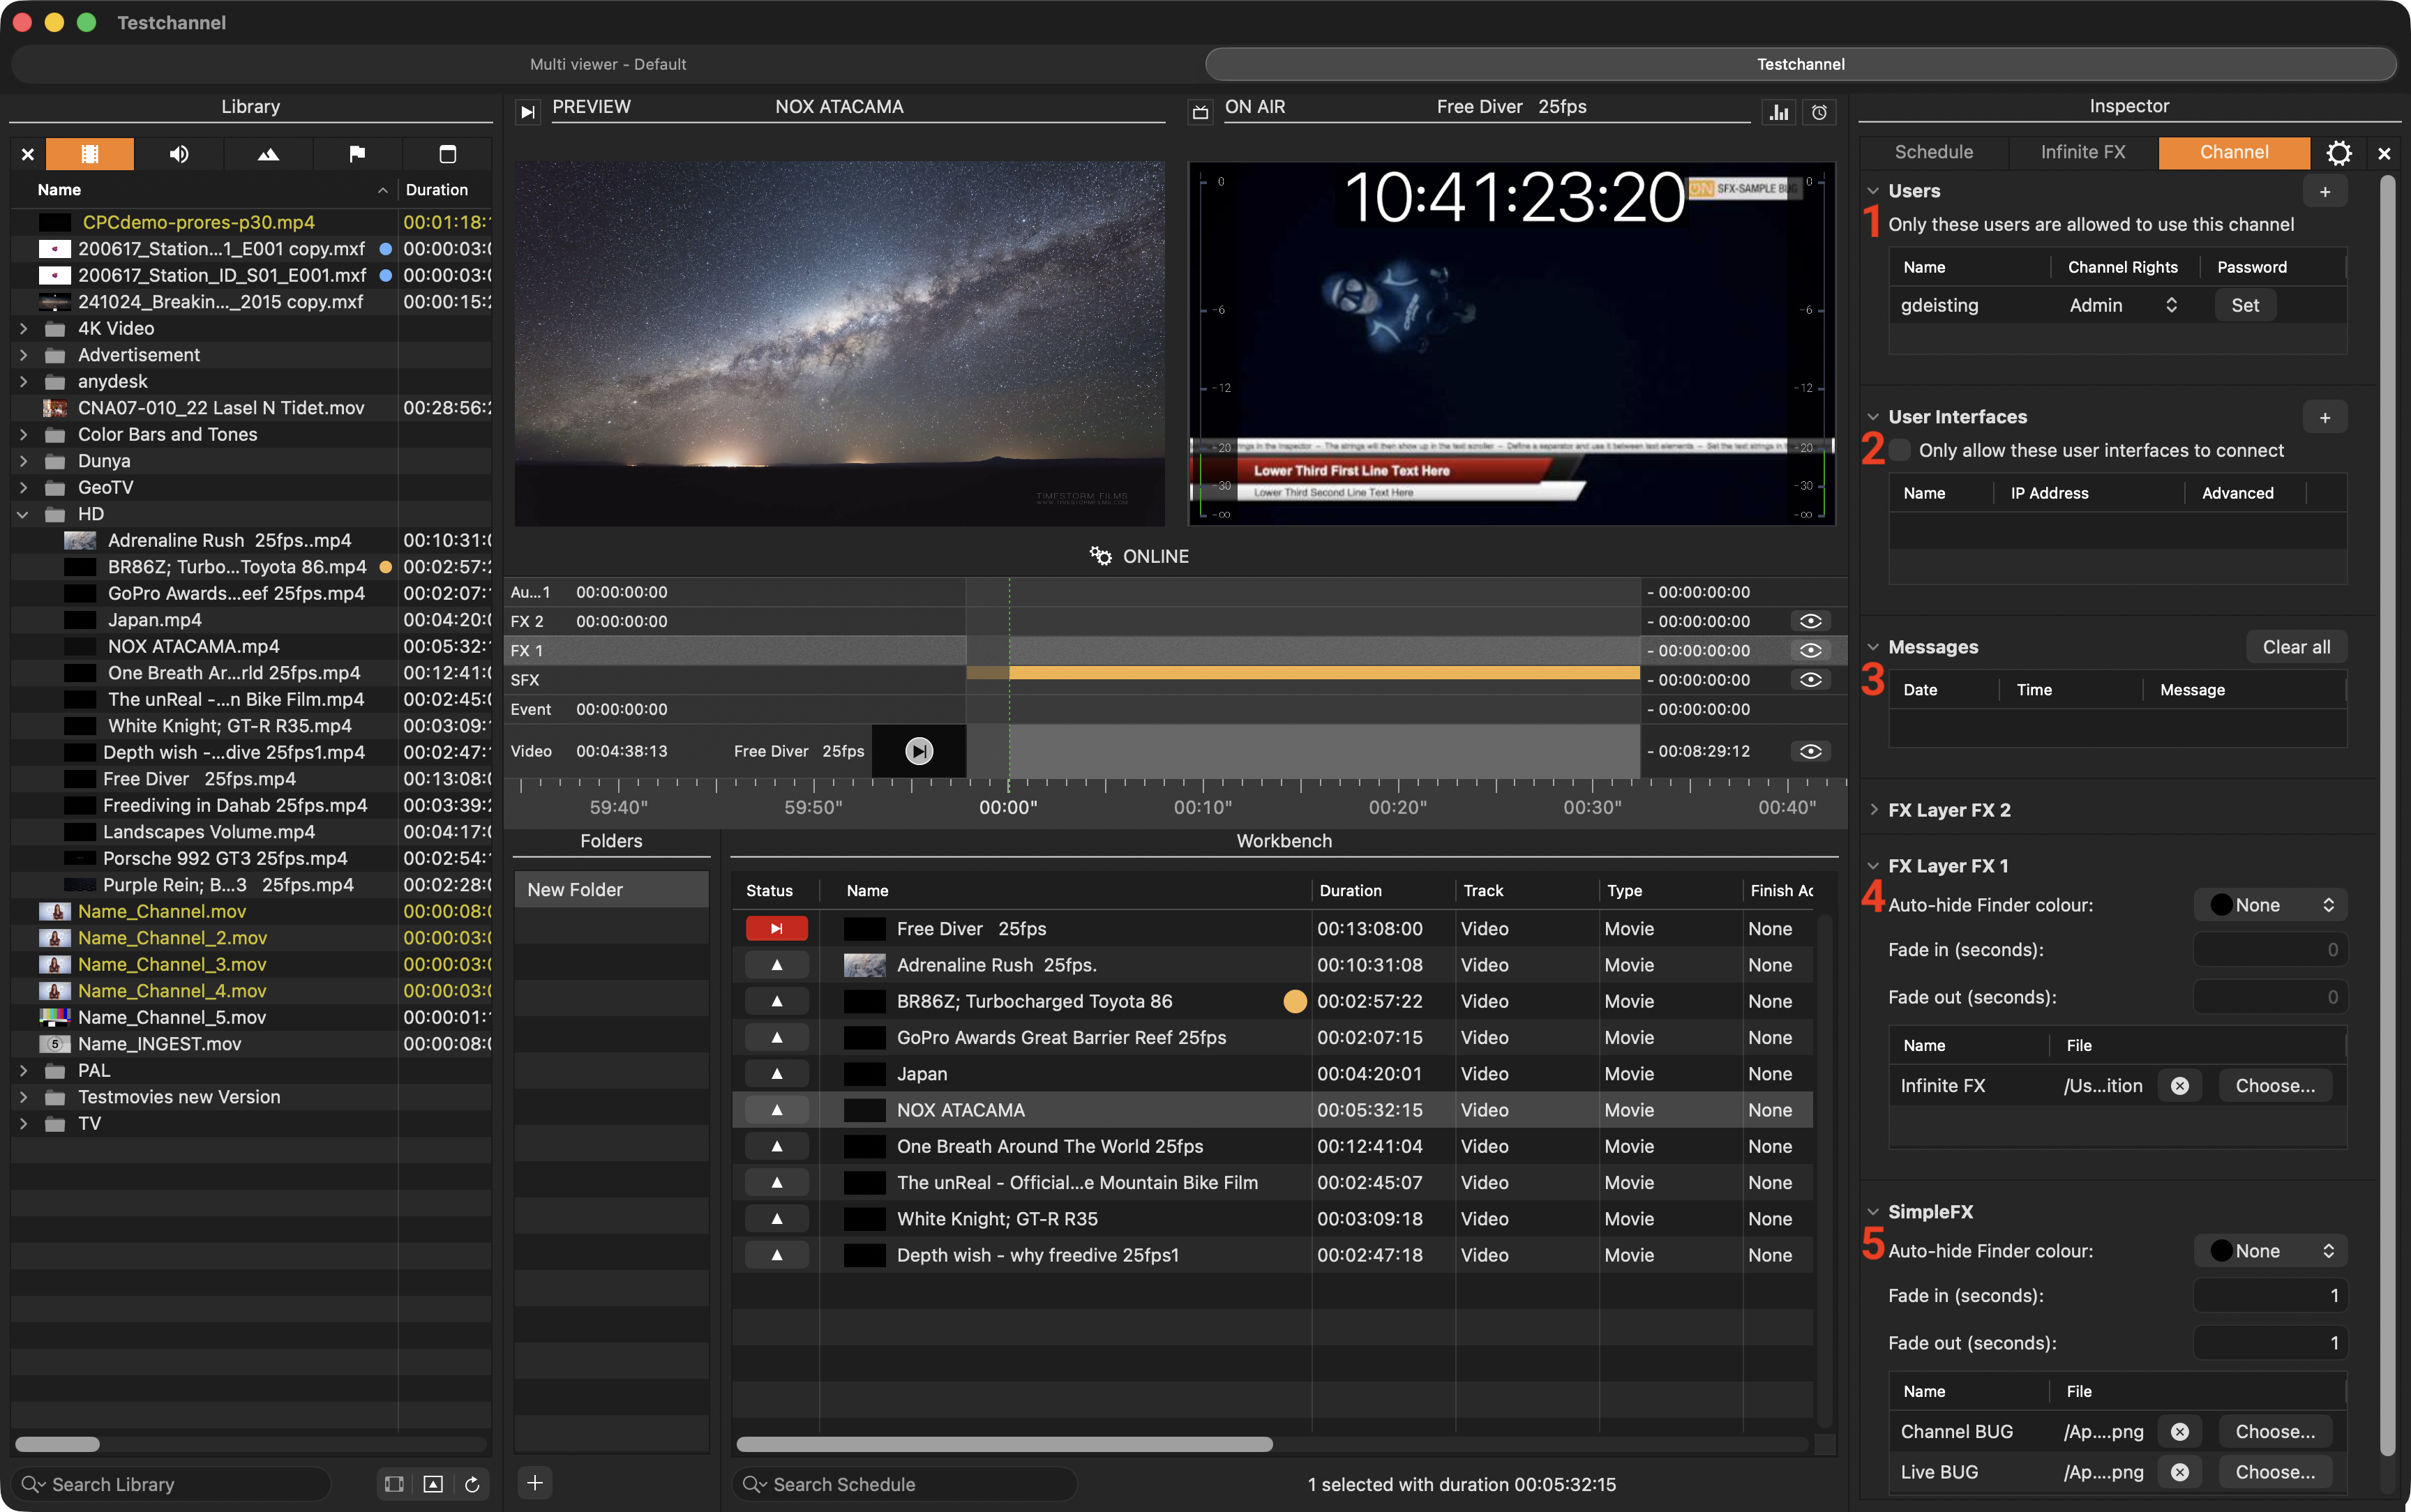
The Channel tab offers all those channels related settings, which can be changed while the channel is on air.
Users
Using the Channel Wizard a User with read/write access is generated automatically. This user can be handled as described in this chapter.
Every time you start Just Control, the Login window is presented asking for a “Username” and a “Password”. This means that to start Just Control (and finally a specific Channel) relies upon the availability of a defined User. In the “Users” section, you can define which users are allowed to log on to this specific channel, define a password, and you can remove users from this list, so they cannot log on to this channel anymore.
Add Button “+”: Click this button to add a new User to the selected Channel.
Name: Lists all Users who can access the selected Channel. Click a User's name to change it.
Channel Rights: Displays the permissions of each User.
Administrator: Has Read and Write rights.
User: Has Read Only rights.
It is possible to change the rights of the user who is currently logged in, but they will be ignored until you restart the Just Control application.
Password: Click “Configure” to set a password for a User.
Make sure the Password of the Admin and the Interface user is the same. Otherwise, you will not be able to access the channel.
Removing a User
Make sure you have selected the proper Channel in the Channel View.
Click on the User you would like to remove.
Press the “Backspace” key.
Confirm the warning dialog to remove the User. This cannot be undone.
User Interfaces:
By default, all interface clients can connect to a Channel based on the configured user rights. It is also possible to restrict the interfaces which can connect to a Channel. This is useful in situations where only certain machines should get access to a Channel. This can be done in the User Interfaces tab.
Only Allow… checkbox: Enable this checkbox to allow only selected user interfaces to connect to your Channel.
Add Interface Button “+”: Adds a new interface to the list.
Name: Lists the names of the interfaces which are allowed to connect to the selected Channel. You can rename an interface by clicking on its name.
IP Address: The IP address of the machine the interface client uses to connect to the machine running Just Connect. You can change the IP address by clicking on it.
Advanced: Click on the “Configure” button for more advanced settings:
Repositories: Allows you to override the Repositories of the selected Channel.
Send Heartbeats: In certain situations (when using 3rd party software applications for example) it may be necessary to disable the heartbeat sent out by the user interfaces. Please → contact us before changing this setting.
Messages
This section displays all error and warning Messages this channel has generated. You see the date and time the error happened as well as the kind of error. Click “Clear All” (or press “ctrl-W” on your keyboard) to clear all warnings.
Infinite FX Layer Control
Infinite Graphics allows for showing a still image or a real-time FX Template, or a html FX stream on the selected FX Layer. Additionally, you can automatically hide an Infinite Graphic (Infinite GFX) based on Finder color tags, or based on your personal preference.
You can define the following functions:
Auto-hide Finder colour: Select the color which will be used to automatically deactivate the playout of the Infinite FX element, if the Movie has the same color defined as a color tag on the Finder level. This function removes the graphics only initially after the Movie has been added to the rundown. Once scheduled, the graphics can be turned on/off independent of the color tag, and changing the colour tag of the movie also does not change the visibility of the graphics.
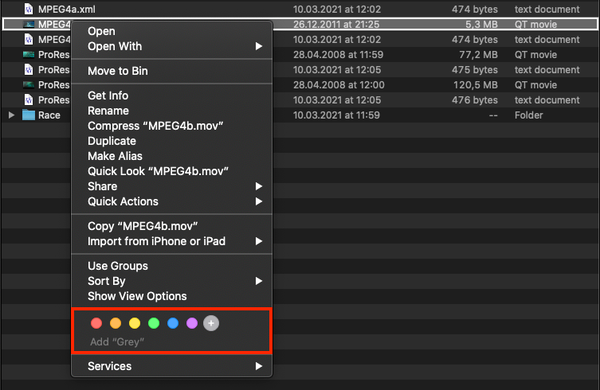
In the user interface, the color tag will be reflected in the Library and the Workbench. The Hide FX Layer checkbox will automatically be enabled for all files with the corresponding color tag.
Fade in/Fade out (seconds): Define the duration, that the Infinite Graphics should be faded In/out each time it goes On/Off air.
Choose:
File based: Click on the “Choose” button and select a still image or a real-time FX Template (QTZ or Composition Builder file) to load it automatically to the selected FX Layer. Click “X” to remove the still image or real-time FX Template from the selected FX Layer.
Stream based: Click on the “Choose” button first and then click on the “Show Options” button. This opens the options area, which allows you to paste the URL which provides the html graphics you would like to show on the selected FX Layer. Click “Confirm” to start receiving the html graphics. Click “X” to remove the still image or real-time FX Template from the selected FX Layer.
Preview: In case you defined a still image as Infinite FX, you can see it in the preview window. Real-time FX Templates or HTML Graphics originating from an external service can not be previewed.
A .qtz or .composition real-time graphics template used as an Infinite Graphics must contain ONE stop frame. Otherwise the Graphics will go off-air once the composition reaches its predefined composition end. Refer to the Composition Builder v.5.0 manual if you want to find out how to add a stop frame to your composition.
Simple FX Layer Control
Each Channel comes with one Simple FX Layer, which can be used to show a still image as a Channel Bug and/or a Live Bug.
Auto-hide Finder colour: Select the color which will be used to automatically deactivate the playout of the Infinite FX element, if the Movie has the same color defined as a color tag on the Finder level. This function removes the graphics only initially after the Movie has been added to the rundown. Once scheduled, the graphics can be turned on/off independent of the color tag, and changing the color tag of the movie also does not change the visibility of the graphics.
Fade in/Fade out (seconds): Define the duration, that the Infinite Graphics should be faded In/out each time it goes On/Off air.
Choose: Click on the “Choose” button and select a still image as the Channel Bug and/or the Live Bug.
Remove: Click on the “X” button to remove the still image from the element.
Preview: You can see the defined Simple FX still image in the preview window.
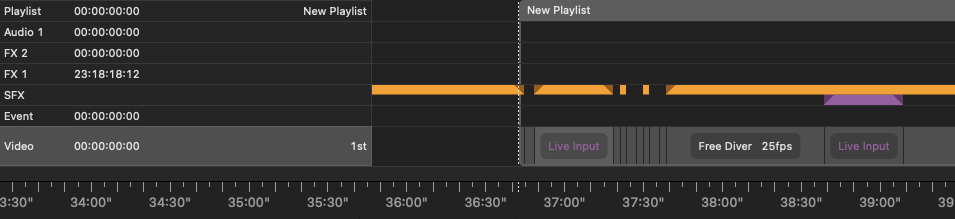
The Channel Bug will be scheduled automatically with every element in the video track, and the Live Bug with every Live element which is added to the rundown. Every Simple FX graphic can then be controlled individually for each element using the Inspector.